
Cold Weather Sticker Installation: How to Apply 3D Domed Stickers in Cold Weather
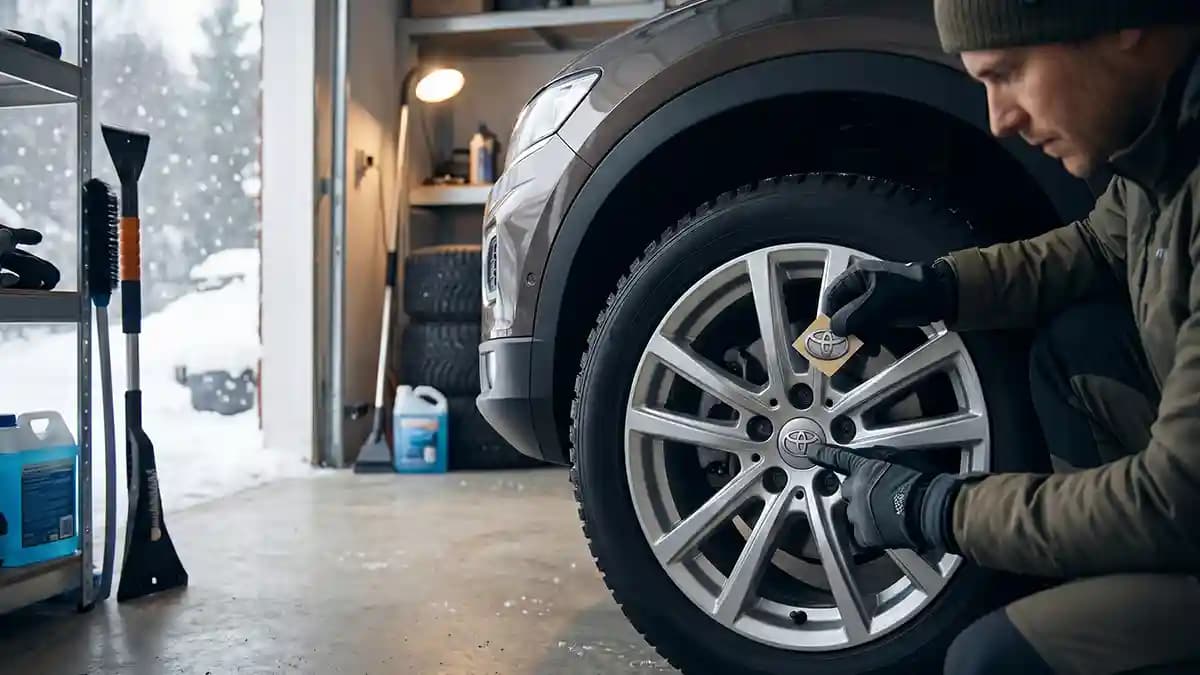
Cold weather sticker installation works when you warm the sticker, warm the cap, clean the surface, press it like you mean it, and let it rest before washing. So yes, you can apply 3D domed stickers in cold weather, but not on a frozen cap in a driveway while your hands feel like crab claws. I learned that lesson in a January garage with one weak space heater, two cold wheel caps, and a badge that acted stuck until the edge curled up like a potato chip. The fix is not magic, it is heat, prep, pressure, and patience.
I used to think the sticker was the problem when a winter install failed. Then I started checking the actual cap temperature, not just the air in the garage, and wow, that made me feel both smart and very late to the party. A metal or plastic cap can stay cold long after the room warms up, like a soup bowl you forgot in the freezer. That cold face steals the grip right out of the adhesive before it gets a fair chance.
Why cold makes a good sticker act dumb
Pressure sensitive adhesive needs contact. It has to flow a little into the tiny low spots on the cap face, even when the cap looks smooth to your eyes. When it is too cold, the adhesive gets firm, stiff, and lazy, like me before coffee. 3M says the ideal range for one common acrylic adhesive is 60 F to 100 F, and it does not recommend application below a 50 F surface temperature because the adhesive becomes too firm to grab well.
That is the whole winter problem in one sentence. The sticker is not failing because it hates your car. It is failing because the glue cannot wet out on a cold surface, and wet out is the boring shop term for making full contact. No full contact means weak edge grip, and weak edge grip is where winter water, road grime, and a wash wand start picking a fight.
My winter garage setup before I peel anything
Last winter I had a black hatchback in the garage with four dull center caps and one owner who wanted them fixed before a weekend meet. The garage felt fine to stand in, but the wheel caps were still cold enough to make my fingers pull back. I put the caps on a clean towel inside the house for a bit, warmed the garage, then used mild heat to bring the cap face into the safe zone. That was the moment the job changed from sketchy to simple.
Here is the basic setup I trust before I touch the backing.
A clean table or bench near the car.
A space heater for the room, not pointed right at the sticker.
A hair dryer or low heat gun for gentle surface warming.
An infrared thermometer if you have one.
Mild soap and water for the first clean.
Isopropyl alcohol for the final wipe.
A lint free cloth that has not been used on tires.
Clean hands or fresh gloves for the peel step.
The thermometer sounds fussy until it saves you from guessing. ORAFOL tells installers to measure vehicle surface temperature with an infrared thermometer and says the best result for vehicle film work is around 21 C to 23 C, which is about 70 F to 73 F. I do not need every wheel cap to be a science lab, but I do like knowing the cap is warm enough. Guessing is how you end up doing the same job twice while your neighbor watches in silence.
The warm up rule I use
The sticker and the cap should live in the same warm room before install. Do not pull a badge from a cold mailbox, walk straight into the garage, peel it, and expect it to behave. Let it sit at room temp for a while so the dome, vinyl base, and adhesive all relax. Cold vinyl can feel stiff, and a stiff dome is much less fun to place on a slightly curved cap.
Use this warm up routine when the garage is cold.
Bring the stickers indoors for at least one hour.
Bring removable caps indoors too, if you can pop them out safely.
Warm the garage before you start cleaning.
Aim for the cap face to feel slightly warm, never hot.
Keep moisture away, because cold parts collect dampness fast.
Stop if you see fog, sweat, or damp spots on the cap.
Wait until the cap is dry and stable before you peel.
There is a sneaky thing that happens in winter garages. You bring a cold cap into warm air and it can sweat, just like a cold drink on a summer table. That thin film of moisture can sit there looking harmless while it quietly ruins the bond. I wipe, warm, then wait a few minutes, because I would rather lose five minutes than lose a badge at the car wash.
Cold weather sticker installation steps I trust
This is the exact order I use when I want the badge to stay put. It works on wheel center caps, small trim badges, and flat hubcap faces. It also works because it is boring, and boring is often the best mechanic in the room. Fancy tricks are nice, but clean, warm, dry, and pressed wins more often.
Wash the cap first with mild soap and water. Brake dust, wax, tire shine, and road salt love hiding near the center cap lip. Alcohol is not a bath, it is a final wipe. Get the grit off before you get clever.
Dry the cap fully. Use a clean towel, then give it time to air dry. Water trapped near an edge will find the adhesive like a tiny villain. If you removed the cap, set it face up on a clean towel.
Warm the cap face gently. Use a hair dryer on low or let the part sit in a warm room. Keep the heat moving and do not blast one spot. You want warm plastic or metal, not a melted science mistake.
Wipe the landing zone with isopropyl alcohol. 3M says clean, dry surfaces matter for bond strength and lists isopropyl alcohol as a typical cleaning solvent for plastic surfaces. Wipe only the area where the sticker will touch, then let it flash dry fully.
Dry fit with the backing still on. This is where you find out if the size is right. If the badge touches a raised rim, curved edge, or rough spot, stop. A sticker cannot win a fight against bad fit.
Peel without touching the glue. Hold the edge like it is evidence in a crime show. Your thumb oil is not part of the install kit. Keep the adhesive clean and get ready to place it once.
Set the center first. Line it up, lower it gently, and let the middle touch before the edge. Do not slap it down like a parking ticket. Calm hands make clean badges.
Roll pressure from the middle out. Use a clean cloth over your thumb and push outward in circles. Go around the full edge twice. This is where the adhesive meets the cap for real.
Add mild warmth after pressing if the garage is still chilly. Keep the heat moving and keep it gentle. Then press the edge again while the adhesive is warm. That last edge pass is cheap insurance.
Leave it alone. Do not poke it, do not twist it, and do not check the edge every ten minutes like it owes you money. Fresh adhesive needs time. Your job now is to stop helping.
When you have the size right and the cap is clean, you can shop for domed wheel stickers with much less guesswork. Impossible Stickers says its domed stickers use high resolution printing, clean cutting, and a clear resin dome for depth, gloss, and long lasting use. That raised dome is the part that makes the wheel center look like a badge, not a flat paper label. But even the nicest dome still needs a warm clean surface, because physics does not care what you paid.
Where most cold installs go wrong
Most winter failures are not dramatic. They start as one tiny lifted edge, then dirt gets under it, then water gets under it, and then you have a sad little flap waving at you. The badge looked fine when you installed it, so you blame the sticker. Real talk, most of the time the job was cold, damp, dirty, or rushed.
Watch for these common mistakes.
Installing straight from a cold mailbox.
Cleaning with tire shine nearby.
Using rubbing alcohol that leaves skin oils behind.
Touching the cap face after the final wipe.
Pressing only the center and ignoring the edge.
Applying over a curved badge face that fights the dome.
Washing the car the same day.
Using a pressure washer right on the fresh edge.
Letting road salt sit on the cap all week.
Trying to fix a cracked cap with a sticker.
That last one matters. A domed sticker can make a good cap look new, but it cannot turn broken plastic into good plastic. If the cap wobbles, if clips are cracked, or if the face is warped, fix that first. If your wheel cap size is odd, send a cap photo before ordering, because one clear photo can save a week of nonsense.
How long to let the sticker rest
The sticker grabs right away, but the full bond builds with time. This is where impatient people lose. ORAFOL says vehicle film should stay at the application temperature for at least 24 hours after install, and it says optimum adhesion is reached after three days, with no car wash before that time. I treat fresh domed wheel badges with the same respect, because wheels live a rough life.
Here is my winter wait plan.
First hour, do not touch the badge.
First day, keep the car dry if you can.
First night, park inside if possible.
First three days, skip automatic washes.
First week, avoid direct pressure washer hits on the edge.
After road salt, rinse gently and dry when you can.
Yes, that sounds like babying a sticker. But it is really just letting the adhesive finish the job you started. You would not paint a wheel then drag it through a gravel lot ten minutes later. Same idea, less drama.
What temperature is safe enough
For a simple garage rule, I like the cap face above 60 F and the room not much colder than that. The absolute floor I treat with caution is 50 F on the surface, because below that the risk climbs fast. If you only have a room thermometer, remember that the cap face can be colder than the room. Touch tells you some truth, a thermometer tells you more.
Use this quick decision guide.
Cap face below 50 F, wait and warm it.
Cap face around 50 F to 60 F, use care and extra warm up time.
Cap face around 60 F to 75 F, good working zone.
Cap face hot to touch, let it cool.
Cap face damp, stop until dry.
Garage dusty from sanding or sweeping, stop until the air clears.
Do not chase a perfect number so hard you forget the basics. Warm helps, but warm dirt is still dirt. A cozy garage with a greasy cap is just a nicer place to fail. Clean first, heat second, press third, rest fourth.
FAQ
Can I apply 3D domed stickers outside in winter?
You can, but I do not like it. Cold air, cold caps, wind, dust, and dampness stack the odds against you. A garage or indoor cap install gives you control.
What is the best temperature for cold weather sticker installation?
I like the cap face above 60 F, with the room close to that or warmer. Below 50 F on the surface, I stop and warm the part first. The cap temperature matters more than the weather app.
Can I use a heat gun on a domed sticker?
Yes, but use low heat and keep it moving. You want gentle warmth, not a tiny plastic barbecue. A hair dryer is safer for most people.
How soon can I wash the car after applying wheel stickers?
Give it at least 24 hours in mild conditions, and three days is better in winter. Skip pressure washing near the edge during that early bond time. The FAQ page is also a good place to check basic care tips.
Why did my sticker stick at first, then lift later?
It usually means the adhesive never made full contact. Cold surface, wax, moisture, weak pressure, or a curved cap face can all cause that. The sticker looked stuck, but the edge was never truly bonded.
Final garage advice
Cold weather sticker installation is not hard, but it does punish rushing. Warm the badge, warm the cap, clean the surface, press the edge, and let it rest like you actually want it to last. That is the whole play. Do that, and your winter garage install can look sharp instead of looking like you fought a sticker and the sticker won.