
Control Panel Overlays: The Tactile Advantage of 3D Buttons
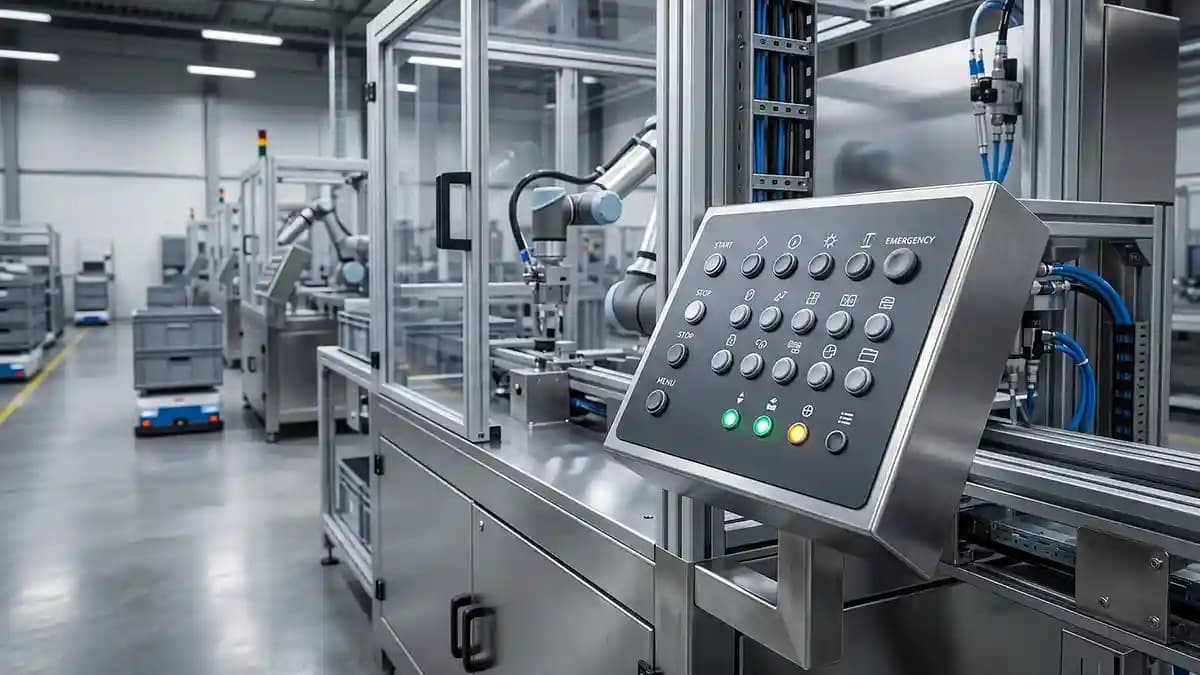
Control panel overlays with raised 3D buttons make machines easier to use because fingers can find the right control before the eyes fully catch up. I learned this beside a noisy packing machine while an operator kept tapping the wrong flat button with his glove on. The print was still clear, but every button felt like the same sad plastic square. That is the real answer to this title, touch matters, and flat panels often make busy people guess.
The machine was not old junk. It was clean, well kept, and expensive enough to make a small accountant sweat. But the overlay felt dead, like pressing a sticker on a fridge and hoping the fridge listens. One raised start mark, one raised reset dot, and one raised stop zone would have saved tiny mistakes each shift.
Why flat panels slow people down
A control panel is not just a label sheet. It is the part of the machine people argue with all day. Modern membrane switch overlays are the top layer the operator touches, and industrial HMI design guidance keeps pointing back to clear visual, audible, or tactile feedback so users know the machine heard them. If that top layer feels vague, the whole machine feels vague.
Flat buttons ask your eyes to do all the work. In a calm office that sounds fine. On a shop floor you get glare, dust, noise, gloves, speed, bad lighting, and one guy walking behind you with a pallet jack like he owns the place. Your hand needs clues too.
That is where tactile stickers and 3D buttons make sense. A raised dome gives your fingertip a landing point. Your finger feels the edge, the curve, and the center before you press. It is the difference between grabbing a door knob and poking a painted circle on a wall.
A good raised overlay helps in plain ways.
It tells the finger where the control starts.
It separates one command from the next.
It gives a small physical cue before the press.
It makes worn printed areas easier to find.
It helps gloved hands work with less guessing.
That last point is bigger than people think. Gloves are great for safety, but they turn fine touch into oven mitt science. If every control feels flat, the operator has to stare harder and move slower. A raised 3D button does not fix bad panel design, but it gives the hand a better map.
The day I stopped trusting print alone
Years ago I thought strong print solved most overlay problems. Make it bright, make it clear, add bold icons, done. Then I watched a worker press feed instead of jog because the two buttons sat close together and both felt like nothing. He did not look careless, he looked tired.
That matters because most bad control decisions happen when people are not at their best. End of shift, loud room, sweaty gloves, boss nearby, line waiting, and suddenly the flat button becomes a tiny trap. The panel did not fail in a dramatic movie way. It failed like a banana peel.
Raised domes add a second sense. The eye reads the label, the finger confirms the spot. That small check builds trust. Tactile feedback is used in industrial keypads because it supports safer use, better accuracy, and operator comfort where clear response matters.
Here is what I check first when I look at an equipment panel.
Which buttons get used every shift?
Which buttons cause the most mistakes?
Which labels are touched with gloves?
Which controls need a stronger feel?
Good panel work starts with real use, not the drawing file. I do not care how nice the design looks on a monitor if the operator cannot find stop fast when the line starts acting stupid. The best overlay works when the room is loud and nobody has patience left.
What raised 3D buttons actually do
A raised 3D button is a shaped, domed surface that sits over a printed area and gives the panel height. In many label uses, polyurethane domed decals create a smooth raised surface that protects the print below while adding a clear glossy lens and a tactile feel. That makes them useful on equipment panels where touch, clarity, and wear all matter.
Think of the dome as a tiny speed bump for your finger. Not the nasty kind that scrapes your bumper. The helpful kind that tells you, yes, right spot. It makes the button easier to find without turning the panel into a toy.
Good 3D buttons can help with start and stop marks, reset buttons, mode icons, warning markers, service labels, direction arrows, and brand plates on machine fronts. The trick is not to dome everything. I have seen panels where every icon was raised and the whole thing felt like a lizard. Fancy, but confusing.
Your finger needs contrast, because if everything is important, nothing feels important. A stop zone should feel different from a setup label. A reset button should not feel the same as a logo badge. This is simple, but simple is where good panels win.
Where control panel overlays earn their keep
Control panel overlays are best when they make a busy task feel simple. Industrial membrane panels are valued because they stay thin, handle custom graphics, and can protect electronics from moisture, dust, and debris when built as sealed assemblies. Add raised domes in the right places and the panel gets easier to use without adding bulky hardware.
Manufacturing equipment is rough on labels. Hands bring oil, gloves drag dust, cleaners hit the surface, and people slap buttons harder when the machine refuses to behave. I have done it too, then looked around to see if anyone noticed. The button survived, my dignity less so.
A strong overlay has to handle repeated finger pressure, light tool contact, cleaning wipes, dust, oil, warm control boxes, and gloved use over long shifts. This is why a thin paper style label does not belong on serious equipment. It looks fine until the first month of real use chews it up. Then you get curled corners, scratched print, and a control panel that looks like it lost a fight in the break room.
The best 3D button layout is boring in a good way
Good panel layout does not scream. It guides. The start button should feel different from reset. The stop control should be obvious without a treasure hunt.
Here is my simple layout rule. Put the raised feel where the hand needs help, not where the designer wants decoration. That means the most used actions, the highest risk actions, and the controls that sit in clusters. If a button only gets pressed once during setup, it does not need to feel like the king of the panel.
A clean tactile layout usually follows a simple pattern.
Strongest tactile cue for stop or emergency related labels.
Medium tactile cue for start, reset, and mode change.
Light tactile cue for navigation arrows.
Flat print for notes, ratings, and low touch data.
Clear space between button groups.
Consistent shapes for repeated actions.
This is where a lot of panels go wrong. They use shape like confetti. Circle here, square there, rounded blob over there, and suddenly the operator needs a decoder ring. Keep the tactile language simple enough that a new worker gets it in ten seconds.
Material choice matters more than shine
Shiny does not always mean strong. I have peeled enough cheap labels to know that lesson by smell alone. Some low grade domes look good in a product photo, then turn yellow, hard, or cloudy after heat and cleaning. That is not a premium feel, that is a little plastic pancake giving up.
Polyurethane domes are useful because they can give a raised lens effect while protecting the printed layer from scuffs and touch wear. Industrial label makers often use doming for durability, gloss, and tactile value, and some processes offer softer or harder resin choices depending on the job. The point is simple, pick the material for the job, not just the photo.
When I check a raised overlay sample, I look for a clear dome, a smooth edge, firm bond, no trapped dust, enough height to feel, and clean color under the clear lens. It should not feel like somebody dripped glue on a sticker and called it engineering. If the edge looks sloppy now, it will look worse after three months of sweaty hands and cleaner wipes.
Flat surface, clean surface, happy overlay
Here is the part that saves money. Raised domes love clean, smooth landing zones. If you stick them on rough powder coat, deep texture, cracked old plastic, or oily metal, you are asking the adhesive to do circus tricks. Adhesive is not a circus animal.
That is why surface prep matters. The Impossible Stickers production flow starts with artwork and size, then moves through print, precision cutting, doming, curing, and final quality check. You can read more about that process on the How It’s Made page. Good production helps, but bad install can still ruin a good part.
For install, I use the boring method because boring works.
Clean the panel with mild cleaner first.
Remove grease with isopropyl alcohol where the label will sit.
Let the surface dry fully.
Test the position before peeling the backing.
Apply from one side or from the center outward.
Press the whole dome, not just the middle.
Press the edges with steady pressure.
Keep harsh cleaning away until the adhesive has settled.
If the panel is cold, warm the room first. Cold surfaces make adhesives act stiff and grumpy. I know because I have tried to cheat this in winter and the label looked at me like, no thanks buddy. Warm, clean, dry, and flat wins almost every time.
How to use tactile stickers without making a mess
The biggest mistake with tactile stickers is using them as decoration first. That works on a laptop. It does not work on a control panel that runs a machine with moving parts. A raised marker must help the operator do the right thing faster.
Use this decision test before adding a raised dome.
Does the operator touch this area often?
Does the control need quick location by feel?
Does the mark need extra protection?
Does the button sit near similar controls?
Does the user wear gloves?
Does glare make the label harder to read?
Does a mistake cost time, scrap, or safety risk?
If the answer is yes to several of those, a raised dome earns its place. If not, keep it flat. Clean design is not empty design. It is design that stops shouting and starts helping.
For custom work, start with the real machine photo, real dimensions, and real use case. Not a guess. Not a dream file. If you want to see the general product range before planning a project, start with custom domed stickers and then send details through contact if the panel needs a special size or shape.
When not to use raised 3D buttons
Real talk, domed overlays are not right for every control. Avoid them on deep curves, rough cast surfaces, heavy scrape zones, tight clearances, flexible rubber areas, dirty surfaces that cannot be cleaned well, and safety controls that require certified hardware changes. A tactile sticker can mark, protect, or guide, but it should not pretend to replace a certified switch, guard, lockout device, or safety rated button. Stickers are good, but stickers are not magic wizards with hard hats.
A simple spec sheet before you order
If you want control panel overlays that work the first time, gather the boring facts first. Send the panel material, surface texture, exact size in millimeters, button locations, cleaner type, glove use, quantity, artwork file, real panel photo, and any clearance limits. This helps the designer pick the right size, shape, height, adhesive, and finish. Almost right is how you get a raised button that sits one millimeter off center and annoys everyone forever.
The real takeaway
Control panel overlays with 3D buttons work because they respect the way people really use machines. People get tired, wear gloves, rush, miss icons, and press buttons while thinking about seven other things. A raised tactile cue gives the hand a little help when it needs it. That is not fancy, it is useful.
I like them most when they are used with restraint. Raise the controls that matter. Protect the marks that get touched. Keep the panel clean enough that new operators understand it fast. For more about how polyurethane can take light scuffs and keep the surface looking clean, the Self Healing Graphics guide is a good next read.
The best machine panels do not make the operator think about the panel. They let the operator run the machine. That is the win. Not louder design, not more shine, not a circus of raised bubbles. Just the right touch in the right place.
Quick Q and A
Q: What are control panel overlays?
Control panel overlays are the top graphic layer on a machine panel, keypad, or HMI face. They show labels, icons, button zones, brand marks, and warnings while protecting the surface below.
Q: Why use raised 3D buttons on manufacturing equipment?
Raised 3D buttons help operators feel key controls faster, especially with gloves or poor lighting. They also protect printed marks from touch wear and cleaning.
Q: Are tactile stickers safe for industrial panels?
Yes, when they are used as labels, markers, or touch guides on the right surface. They should not replace certified switches, guards, or safety hardware.
Q: What surface works best for domed control panel labels?
A clean, smooth, flat surface works best. Rough texture, oil, deep curves, and weak old plastic can cause poor bonding or edge lift.
Q: Should every button be raised?
No. Raise only the controls that need quick touch location, extra wear protection, or clear separation. Too many raised marks make the panel feel busy.