
Gloves or No Gloves? Preventing Fingerprint Contamination During Sticker Install
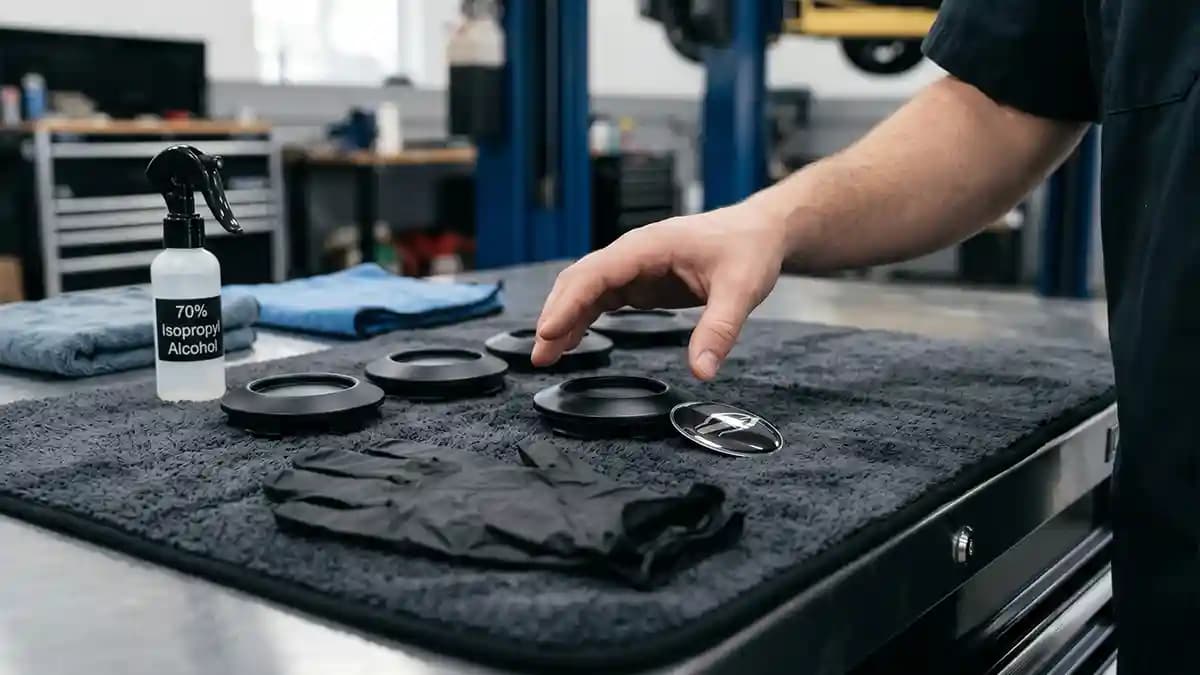
Fingerprint contamination is why I wear clean nitrile gloves once the backing comes off, but I still use bare hands for setup before the adhesive is exposed. That is the real answer to gloves or no gloves. Gloves help during the risky part, but dirty gloves are just fancy fingers with a costume on. I learned that while crouched beside a fresh set of wheel caps, holding a perfect little dome, and trying not to turn it into a crime scene.
The cap looked clean. The sticker looked clean. My hands looked clean enough, which is exactly how this stuff tricks you. Five minutes later I saw one greasy thumbprint near the edge, sitting there like it paid rent. That tiny mark told me the whole job was now about control, not speed.
Why fingerprint contamination matters
A fingerprint is not just a cute little pattern from your hand. It leaves sweat, oil, and tiny skin stuff on the surface, and those invisible bits can sit between the adhesive and the cap. NIST research on fingerprint materials talks about artificial sweat and sebaceous material because real prints carry both water based and oily residue. That is bad news for sticker adhesion, because glue wants the real cap, not a slippery hand ghost.
Here is what a dirty touch does during a delicate install.
It puts skin oil on the adhesive.
It puts skin oil on the cleaned cap.
It makes the clear dome look cloudy when light hits it.
It turns a clean edge into the first place water can sneak in.
It gives dust a greasy spot to cling to.
That last one is the little gremlin. Dust loves oil. Oil loves fingerprints. Once dust gets on the adhesive, you are not installing a sticker anymore, you are installing a tiny sandwich of regret.
Gloves are tools, not magic
Gloves solve one problem and create another when you use them wrong. Clean nitrile gloves keep skin oil off the adhesive and the shiny dome face. But gloves also pick up dust, lint, towel fuzz, brake grime, and that mystery junk from your workbench. If you touch the tire, your phone, the floor, and then the sticker, congratulations, your gloves are now dirty hands.
I use gloves only when they earn the job.
Wear gloves when peeling the backing.
Wear gloves when touching the sticker edge.
Wear gloves when pressing near the dome face.
Change gloves if you touch a tire, rag, tool, or phone.
Skip gloves during measuring, dry fitting, and cleaning unless your hands are greasy.
Bare hands are not evil. Greasy hands are evil. I like bare hands for the setup because I can feel the cap edge, the lip, and the flat landing zone better. Then, right before I peel, I wash my hands or glove up like I am about to handle a tiny royal jewel that costs three bucks but still deserves respect.
My clean install kit
I keep the kit small because big kits make people feel smart, then they skip the one thing that matters. You do not need a lab. You need clean parts, clean hands, clean cloth, and a calm brain. That last one is hard when the badge is small and your thumb acts like a drunk forklift.
This is what I put on the bench before I touch any domed wheel emblems.
Mild soap and water.
Isopropyl alcohol and water mix.
Two clean microfiber cloths.
One lint free wipe for the final pass.
Clean nitrile gloves.
A toothpick or plastic pick for lifting backing.
A small piece of masking tape for alignment.
A clean flat tray for the sticker.
The cleaning part is boring, but boring wins. The Impossible Stickers IPA guide says the wipe removes light oil, wax haze, fingerprints, and residue before the adhesive touches the surface, and that lines up with pro bonding guidance that points to IPA and water as a normal prep step. That is why I do the alcohol wipe after the wash, not instead of the wash. Alcohol on a dirty cap just moves dirt into a nicer shape.
The glove timing rule
This is the rule I wish I learned earlier, gloves go on late, not early. If you put gloves on at the start, you will touch everything with them. You will grab the wheel, open the door, check your phone, scratch your head, and somehow touch the dog. Then you will peel the backing while wearing gloves that have lived a full and dirty life.
I use this timing instead.
Wash and dry the cap with bare hands.
Wipe the landing zone with IPA.
Let the surface dry fully.
Dry fit the sticker with the backing still on.
Mark the top or center if needed.
Put on fresh gloves.
Peel the backing.
Touch only the edge.
Place the sticker once.
Press with a clean cloth.
That is the clean handoff. Before the backing comes off, the sticker is safe. After the backing comes off, it is a tiny sticky trap that wants every speck of garage dirt in a five mile radius. Do not give it a tour of your fingers.
The point is to touch less. Hold the edge, keep the adhesive facing down as little as needed, and stop waving the sticker around like you are showing it to the crowd. Stickers do not enjoy air tours.
Fingerprint contamination on the cap side
Most people worry about touching the adhesive, but they forget the cap side. That is where I see the quiet failures. You clean the cap, then you hold it with your thumb right in the middle while checking fit. The surface looks fine, so you peel and stick, and now your own thumbprint is sealed under the badge like a fossil from Bad Idea Island.
I use a clean cap rule.
After the final wipe, do not touch the landing zone.
Pick the cap up from the outer rim.
If you touch the center, wipe it again.
Keep tire shine rags far away.
Keep wax towels even farther away.
If the surface feels slick, clean again.
This is where the IPA wipe guide saves people money. A cap can look spotless and still carry tire dressing mist, wax, hand oil, or old polish. Your eyes are not good enough for that. The towel tells the truth.
How to touch the dome without ruining the look
The clear dome is the pretty part, so people touch it the most. Of course they do. It is glossy, raised, smooth, and it catches light like candy. But that dome also shows smears, sweat marks, and cloth lint when sunlight hits it.
Here is my dome handling rule.
Do not press the dome with dirty fingers.
Do not wipe the dome with a wax towel.
Do not polish it during install.
Do not use glass cleaner with shine agents.
Press through clean microfiber when you can.
Clean light smears with mild soap and water after the bond has settled.
Avery Dennison warns that cleaners with additives can contaminate application surfaces and reduce adhesion, and that is why I do not bring scented sprays, shine wipes, or mystery kitchen cleaners near the install. If it smells like lemons and promises sparkle, it does not belong on the cap. Use simple cleaning, then stop fussing. The dome is not a kitchen counter.
The pressure part people rush
Clean gloves protect the install, but pressure finishes it. A pressure sensitive adhesive needs firm contact to wet against the surface. 3M guidance says firm pressure increases adhesive flow and contact, and time plus temperature can raise adhesion values after the first touch. That means a light tap is not an install, it is a polite greeting.
I press like this.
Place the emblem from straight above.
Press the center first.
Work outward toward the edge.
Walk around the full rim with steady thumb pressure.
Use microfiber over the dome to avoid smears.
Hold pressure for about thirty seconds.
Do not slide the sticker around.
Do not test the edge with a fingernail.
That last rule is for all of us nervous raccoons. The urge to poke the edge is strong. Fight it. If you cleaned right, placed right, and pressed right, leave the poor thing alone.
Temperature still matters
Gloves do not fix a cold cap. Clean hands do not fix a cold cap. A perfect sticker on a freezing wheel is still asking for drama. The current Impossible Stickers temperature guide gives a practical install range around 10°C to 32°C, or 50°F to 90°F, and I treat that like the garage green light.
Here is my quick temperature habit.
If the cap feels cold, warm it gently.
If the sticker came from a cold mailbox, let it rest inside.
If the cap is hot from sun, move to shade.
If alcohol smells strong, wait longer.
If moisture shows near the edge, dry it again.
I like the application temperature guide because it says the thing nobody wants to hear. The surface decides the bond. Your weather app is not touching the wheel, the adhesive is.
Product handling in real life
Some badges are easy because the size is small and the face is flat. Some are more fussy because the cap is curved, the logo is tiny, or the dome edge sits close to a lip. When I am fitting brand style emblems like BMW domed stickers or Toyota TRD emblems, I do not let the logo distract me from the landing zone. Pretty does not beat prep.
The production side matters too. The Impossible Stickers making page shows the flow from print to cut to dome to curing to final quality check, which is exactly the chain you want before the sticker reaches your bench. But the last step belongs to you. Their clean finish deserves your clean install.
The mistakes I see most
I have watched good stickers fail because people were in a hurry. Not because the job was hard. Because they treated a small part like it did not matter. The funny thing is, the center cap is small, but your eye finds the mistake fast.
Here are the usual suspects.
Peeling the backing too early.
Holding the adhesive with bare fingers.
Wearing gloves that already touched the tire.
Cleaning the cap, then touching the center again.
Using a towel that has wax or tire shine in it.
Pressing the middle and ignoring the edge.
Installing in a cold garage.
Washing the car too soon.
Trying to move the sticker after it lands.
Blaming the sticker before checking the prep.
Number ten is my favorite, because I have done it. I once blamed a badge for lifting, then found my own oily thumbprint exactly where the edge failed. That is a humbling little gift from the garage gods. They do not clap, they just point at your mistake and laugh quietly.
My final gloves or no gloves answer
Use no gloves for the planning work. Measure, dry fit, line up, and clean with bare hands if your hands are clean. Then stop, wash your hands, and put on fresh nitrile gloves right before you peel the backing. That split routine gives you feel when you need feel and clean control when the adhesive is exposed.
The routine is simple.
Bare hands for measuring.
Bare hands for cleaning tools and cap handling.
No touching the cleaned landing zone.
Fresh gloves before peeling.
Edge only contact after peeling.
Microfiber over the dome when pressing.
Hands off after install.
Do that and fingerprint contamination stops being a mystery. You are not hoping the sticker sticks. You are giving it a clean place to land, firm pressure, and time to settle. That is the whole game, and it is not hard unless you rush it like a raccoon stealing fries.
Quick Q and A
Q: Should I wear gloves when applying domed stickers?
Yes, wear clean nitrile gloves once the adhesive backing comes off. Use bare hands for measuring and dry fitting if your hands are clean. The trick is fresh gloves at the sticky stage, not dirty gloves from the whole job.
Q: Can fingerprints make a wheel sticker peel?
Yes, a fingerprint can leave oil on the adhesive or the cleaned cap face. That oil blocks full contact and creates a weak spot. The edge usually tells on you first.
Q: What kind of gloves should I use for sticker install?
Use clean powder free nitrile gloves. They fit well, they do not shed much, and they keep hand oil off the sticker. Change them if they touch anything dirty.
Q: What do I do if I touched the adhesive?
If it was a tiny edge touch and the surface still looks clean, install carefully and press well. If you left a clear oily mark or picked up dust, replace the sticker. Dirty adhesive does not forgive much.
Q: How do I clean fingerprints off the clear dome?
Use mild soap and water with a clean microfiber after the adhesive has had time to settle. Do not scrub it during install. If you smear the dome before pressing, use microfiber pressure rather than rubbing it like a window.
Final garage take
Gloves are not the hero. Clean timing is the hero. Put gloves on too early and they become dirty hands, put them on too late and your bare fingers touch the adhesive. Use the right touch at the right time, and your dome stays clear, your edge stays down, and your wheel caps look like you meant it.