
Heat Gun Sticker Application: How to Activate Adhesive on Stubborn Rims
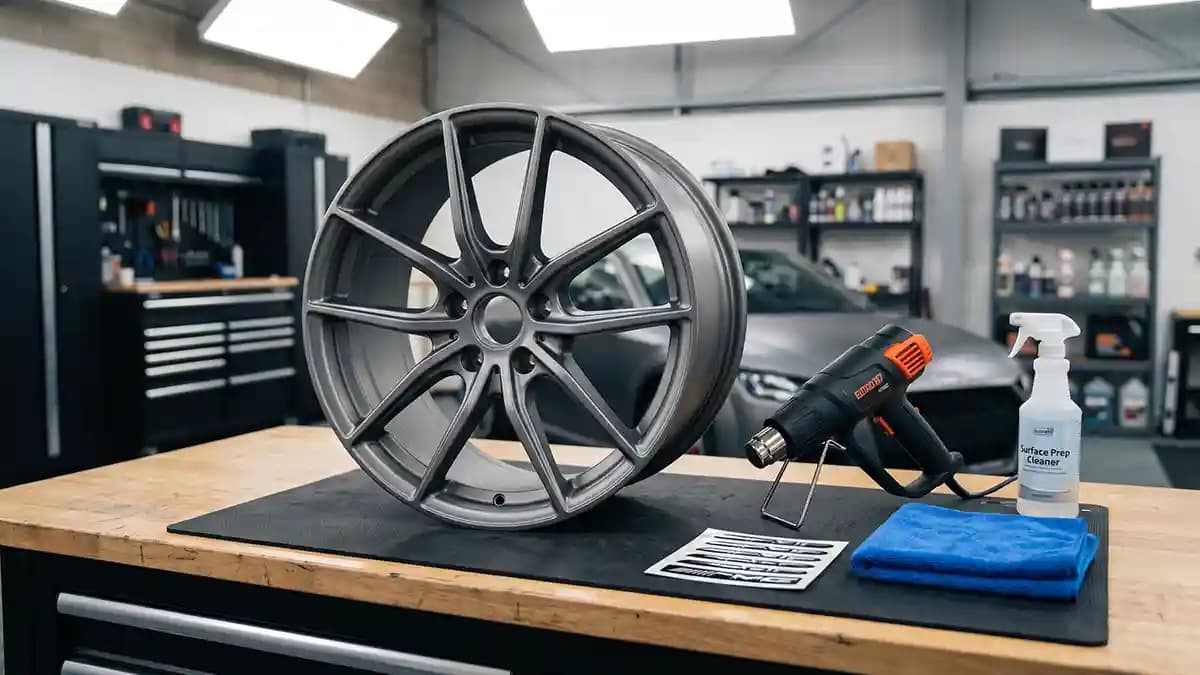
Heat gun sticker application works when you warm a clean rim, place the sticker once, press the dome hard, then use gentle heat to help the adhesive flow into the surface. That is the answer to the title, and it is also the part I learned after making one wheel cap look like it lost a bar fight. Heat is not magic, it is a helper. Use it right and the emblem stays down, use it wrong and you cook the finish like a grilled cheese sandwich.
Last week I had a rim on the bench that looked easy from five feet away. Up close, it had tiny texture, old wax, brake dust in the grain, and one proud little nick right where the sticker edge wanted to sit. I pressed a test dome on it cold and the edge smiled back at me. You know that look, one corner lifted just enough to ruin your day.
The trick is not blasting the sticker until it waves a white flag. The trick is control. You clean, warm, place, press, warm again, then press like you mean it. The 3M prep guidance says a pressure sensitive adhesive bond depends on close contact, firm pressure, and time, with bond strength building toward full strength over about 72 hours.
Why heat helps adhesive stick to textured rims
Adhesive is lazy when it is cold. It sits on top of the rim like a kid refusing to get out of bed. Add mild heat and it gets softer, flows better, and reaches into tiny low spots on the surface. That matters on textured rims, plastic caps, powder coat, and rough old center caps that have seen more car washes than a taxi.
Impossible Stickers explains the same idea in plain garage terms, heat helps the glue flow into the surface, but it does not replace cleaning. I like that line because it saves parts and pride. A dirty warm rim is still dirty. You just made warm dirt, which is not a repair, it is soup.
Here is what heat actually helps with:
It warms the rim so the glue does not hit a cold wall.
It softens the adhesive so it can wet the surface.
It helps the dome settle around tiny texture.
It gives the edge a better chance to stay down.
It speeds up the early grip when the part is already clean.
The surfaces that hate stickers
Some rims are nice and flat. Those are the golden retrievers of wheel work. Clean them, line up the badge, press it, and they act like they were born to help. Then you get low energy plastic, textured caps, powder coat, and cheap aftermarket inserts, and suddenly the job turns into a tiny wrestling match.
3M calls out low energy materials as harder to bond, including plastics such as polypropylene and polyethylene. It also notes that metals tend to be high energy, which makes them easier for adhesive to wet out. That is why a flat alloy center cap can be simple, while a plastic cap with pebble texture can act like it hates you personally.
Watch for these stubborn rim clues:
A dull plastic center cap instead of bare metal.
A sandy or pebbled texture under your finger.
Old wax that makes water bead up.
Powder coat with a dry rough feel.
Curved centers where the edge fights back.
Cold garage air that makes the sticker stiff.
Leftover glue from a badge that died years ago.
What I keep on the bench
I do not grab a heat gun first. That is how people melt trim, burn fingers, and invent new bad words in the driveway. I set the bench up like I am doing surgery, except my patient is a wheel cap and my gloves smell like old tires. A good setup keeps you from rushing once the liner is off.
Here is my basic kit:
A heat gun with low setting.
Isopropyl alcohol and clean towels.
Mild soap and water for the first wash.
A plastic scraper for old glue.
Painter tape for a light alignment mark.
A soft cloth for final pressing.
A timer so you do not guess.
A calm brain, which is harder to find than the heat gun.
Use the heat gun like a hair dryer with manners. Keep it moving, stay back from the rim, and do not aim at one spot like you are trying to roast a marshmallow. If the surface gets too hot to touch, you went too far. Warm is good, angry is bad.
The heat method that actually works
This is the whole move. Clean the rim, dry it fully, warm the surface, place the sticker once, press from the center out, warm the dome lightly, then press the edge again. The 3M VHB guide says final strength builds after 72 hours at 20 C, and that heat can speed the cure process. The same guide also says not to touch the adhesive after the liner comes off, which is good advice because finger oil is tiny sabotage.
Step by step heat gun sticker application
Wash the rim or cap first. Use soap and water to remove grit, brake dust, and road film. Dry it with a clean towel, then let it sit a bit so water is not hiding in the edge groove.
Wipe the target spot with alcohol. 3M names isopropyl alcohol and water as a common cleaning mix for surface prep, and it says the surface should be stable, clean, and dry. Do not use oily detail spray here. Shine spray is great for photos and awful for glue.
Test the fit before peeling the liner. Set the dome on the cap and check the size, curve, and edge gap. If you need a made to size option, check the wheel emblems section before you force a badge that does not fit.
Warm the rim, not just the sticker. Move the heat gun in slow circles for a few seconds at a time. Touch the surface with the back of your finger. It should feel warm and safe, not painful.
Peel the liner without touching the glue. Hold the sticker by the edge. Once your thumb lands on the adhesive, that spot is now wearing thumb sauce. Very fancy, very bad.
Place it once and commit. Line it up, lower it down, and do not slide it around. Sliding can smear the adhesive and trap dirt. Center first, edge second.
Press from the center out. Use your thumb or a soft cloth. Push air out as you go, like you are smoothing a tiny pancake that costs money.
Warm the dome lightly after pressing. Keep the heat moving and stay gentle. The goal is to help the adhesive relax into the surface, not to bend the badge into a potato chip.
Press the edge again. This is where stubborn rims give up. Work around the full circle with firm pressure. Spend extra time where the rim is textured or curved.
Leave it alone. No wash, no pressure washer, no poking the edge every ten minutes. The bond needs time to grow, and yes, that means your fingers have to behave.
How much heat is too much
The easiest way to ruin this job is to think more heat means more stick. Nope. More heat means more risk. You can dull a dome, soften plastic, mark a clear coat, or make the adhesive too loose to hold shape.
I use three simple heat rules:
Keep the heat gun moving.
Keep your hand test in the routine.
Stop before the part feels hot.
If you see the dome sag, stop. If the rim smells warm in a weird plastic way, stop. If your finger says bad idea, trust the finger. Your finger has no SEO plan, but it is honest.
A hair dryer is safer for small jobs. It takes longer, but it is harder to mess up. A heat gun is faster and better for stubborn textured rims, but it has the mood of a tiny dragon. Useful, but it needs rules.
Where most people mess this up
Most failed installs are not because the sticker is bad. The failure starts before the sticker even touches the rim. People rush the clean step, touch the glue, slap the badge down cold, then blame the moon. I have done a few of those myself.
The big mistakes are simple:
Cleaning with quick detailer instead of alcohol.
Heating old wax into the surface.
Touching the adhesive with bare fingers.
Using high heat in one fixed spot.
Pressing only the center and ignoring the edge.
Washing the car too soon.
Applying a flat dome over a deep curve.
Buying the wrong size and forcing it.
If you are unsure what type of sticker belongs on a wheel cap, read the domed stickers versus vinyl decals guide. Here is the plain bit, flat vinyl is thin and cheap, while a 3D dome gives you that raised glossy look. But the better part still needs clean prep and smart pressure. A fancy sticker on a greasy cap is just a sad little hat.
When heat is the wrong move
Heat is helpful, but it is not a cheat code. If the rim is cracked, oily, flaking, or still covered in old glue, heat just locks the problem in place. If the center cap is deeply concave, a normal flat dome can lift no matter how nice you talk to it. If the part is painted poorly, the sticker can bond to weak paint, then the paint lets go.
Skip heat for these jobs until you fix the root issue:
Loose clear coat.
Soft paint.
Wet caps.
Heavy old glue.
Deep cracks.
Sharp raised logos under the sticker.
A dome that is too big for the flat area.
Plastic that warps fast.
This is where a test fit saves money. Put the sticker on with the liner still attached and check the edge. If the edge hangs in the air, heat will not save it. You need a smaller badge, a more flexible part, or a cleaner cap.
The 72 hour rule
The sticker can feel stuck after ten minutes. That does not mean it is done. Adhesive keeps flowing and building grip after the install. 3M states that bond strength can build from about 50 percent after 20 minutes, to 90 percent after 24 hours, then to full strength after 72 hours under normal room conditions.
That is why I baby fresh wheel emblems for three days. No hard wash. No harsh spray. No pressure washer pointed at the edge like you are hunting it. Let the glue do its quiet little job.
For ready made emblems, the Impossible Stickers shop is the easy place to start. For flat caps, a set like MOMO domed wheel emblems uses a vinyl base with a 3D resin coating, comes in many sizes, and the product notes a clean peel and press install on flat surfaces. Good parts make the job easier. Bad prep can still ruin them while you stand there looking proud.
FAQ
Can I use a hair dryer instead of a heat gun?
Yes, and for small domed wheel emblems it is often safer. It warms slower, which keeps you from cooking plastic caps. Use a heat gun when the rim is stubborn, textured, or cold, and keep it on a low setting.
Should I heat the sticker or the rim first?
Warm the rim first. A warm clean surface helps the adhesive make better contact right away. After the sticker is pressed down, warm the dome lightly and press the edge again.
Can heat fix a sticker that is already peeling?
Sometimes, but only if the surface under it is clean and the sticker still has good adhesive. If dirt, wax, or water got under the edge, heat will not clean it. Lift as little as you can, clean with care, warm, then press.
How long before I wash the car?
Give it 72 hours. That is the safe rule I use because adhesive strength keeps building during that window. A soft hand wash after that is fine, but do not blast the edge with a pressure washer.
Final garage rule
Heat gun sticker application is about patience, not firepower. Clean better than you think you need to, warm less than your ego wants to, and press longer than feels normal. That is the boring recipe that keeps emblems on stubborn rims. And boring is great here, because boring means you are not buying the same badge twice.