Heat Removal: Why Heat is Your Friend During Sticker Removal
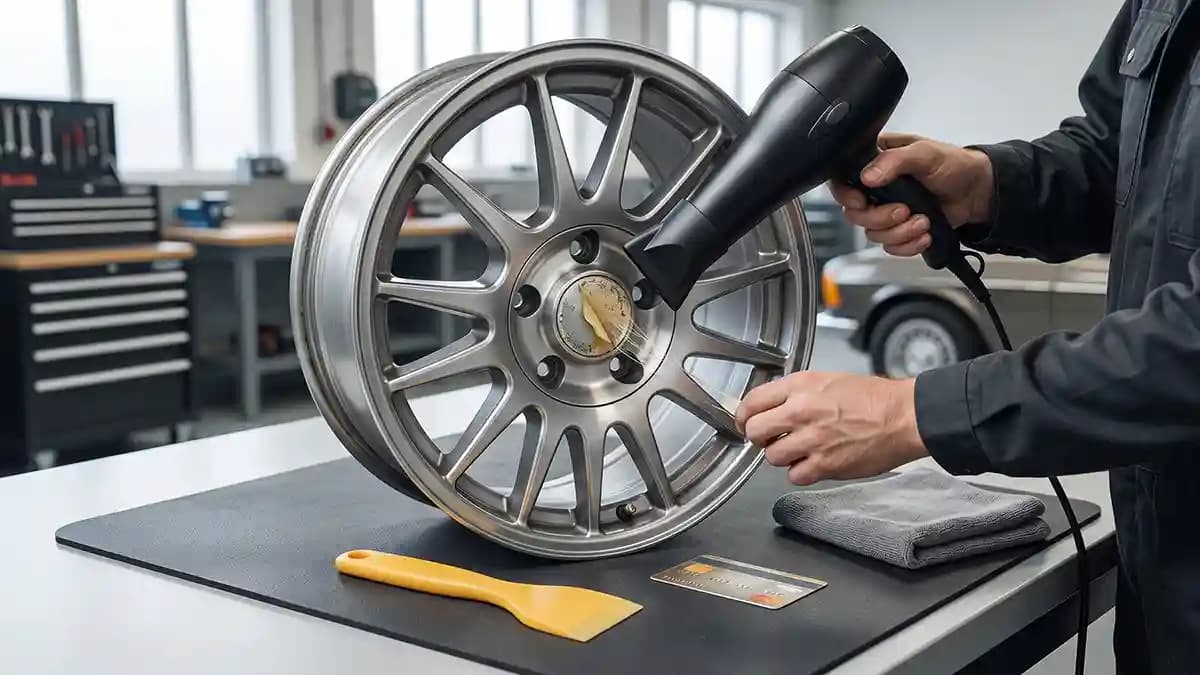
Heat removal is your friend during sticker removal because warmth softens old adhesive, lets the decal lift in bigger pieces, and saves the center cap from knife marks. That is the whole answer to the title before we even get our hands dirty. I learned it while hunched over a wheel cap that looked harmless, then fought me like a raccoon in a trash can. Cold adhesive is stubborn, but warm adhesive starts acting like it has manners.
Last week I had an old domed label on a silver center cap, and I made the classic mistake first. I picked at one edge with my nail, got proud for two seconds, then the top layer cracked into tiny sad chips. The glue stayed behind like it paid rent. I stood there with sticky fingers, one warm garage light, and the face of a man who had just lost a fight to a circle.
The funny part is, heat is not some wild trick. It is just the calm way to wake the glue up before you pull. Avery Dennison says to warm a decal with the heat source held about fifteen to thirty cm away for thirty to sixty seconds, then pull slowly at a low angle. ORAFOL says moderate heat also makes removal easier, while steady motion helps avoid cooking the surface.
Why heat removal works on old wheel stickers
Adhesive changes with age. Sun bakes it, water works around the edges, and brake dust turns every tiny gap into a dirt hotel. When it gets cold or old, it stops stretching and starts snapping. That is why the sticker face breaks while the glue sits there laughing at you.
Heat softens that old adhesive just enough to move. You are not trying to melt it into soup. You are trying to make it bend, stretch, and release from the cap without tearing the finish. Think warm pizza cheese, not boiling lava.
Here is what good heat does.
It softens the glue under the sticker face.
It helps the top layer peel in larger pieces.
It cuts down on the urge to grab a metal tool.
It makes residue easier to roll and wipe.
It gives you control instead of panic.
Here is what heat does not do.
It does not fix a dirty cap.
It does not make a screwdriver safe.
It does not protect weak paint.
It does not mean hotter is better.
It does not remove the need for patience.
That last one matters. Most people do not ruin center caps because they lack tools. They ruin them because they get annoyed and start acting like the sticker insulted their family. I have been that guy, and he is expensive.
The tool choice matters more than your ego
A hair dryer is enough for most wheel cap stickers. It heats slower, which is good when you are working on plastic caps, painted parts, or a badge that is already cracked. A heat gun works faster, but it can also punish you faster. Treat it like a small dragon with a plug.
I keep the tool list simple.
Hair dryer for light sticker removal.
Heat gun on low for stubborn domed labels.
Plastic card or plastic scraper.
Microfiber towels.
Mild car soap and water.
Isopropyl alcohol for the final wipe.
Adhesive remover for old gummy residue.
Painter tape for marking the edge if needed.
A timer because guessing makes people brave.
The plastic scraper is the quiet hero here. Metal tools feel useful because they bite fast, but that is the problem. On a center cap, one slip makes a shiny scar right in the middle of the wheel. Then your eye finds it every time you walk past the car.
This is why I tell people to read a good removal guide before they start yanking. The guide on how to remove old wheel stickers without wrecking the center caps pairs well with this job because it keeps the focus on soft tools and slow peeling. The job is small, but the cap sits dead center on the wheel. Small mistake, big stare.
When to use a hair dryer and when to use a heat gun
Use a hair dryer when the cap is plastic, glossy, fresh painted, or unknown. Unknown means you do not know how tough the coating is, and that is most driveway jobs. It takes longer, but slow heat gives you time to think. Thinking is good, even if your neighbor Gary is watching and giving no help at all.
Use a heat gun when the sticker is thick, old, domed, or baked hard from sun. Keep it moving the whole time. Do not point it at one spot like you are branding cattle. If the part gets too hot to touch, you already passed the useful zone.
A safe heat test is simple.
Warm the sticker for a few seconds.
Touch the cap near the sticker with the back of your finger.
It should feel warm, not painful.
If you pull your hand away fast, stop heating.
Let the cap cool before you try again.
The back of your finger is the best lie test in the garage. Your brain says one more second will help. Your finger says nope. Trust the finger, it has no pride.
My safe heat removal method
Start with a clean cap. Dirt is sandpaper with better marketing. Wash the wheel face with mild car soap, rinse it, and dry it well. If the cap pops out easily, remove it and work on a bench, because your knees deserve peace.
Here is the flow I use.
Wash the cap or wheel face first.
Dry the surface fully.
Warm the sticker in slow circles.
Lift one edge with a fingernail or plastic card.
Pull the sticker back low and slow.
Add more warmth when the pull gets stiff.
Peel in small sections, not one heroic rip.
Set removed pieces on a towel.
Let the cap cool before residue cleanup.
The low pull angle is a big deal. Pulling straight up makes the face tear and leaves glue behind. Pulling back across itself keeps stress low and gives the adhesive a better chance to come with the sticker. It looks boring, which is how you know it is right.
If the sticker breaks, do not panic. Warm the next edge, lift another small flap, and keep going. Old labels do not owe you one clean peel. You win by removing them without leaving scars, not by looking cool while doing it.
The sweet spot is warm, not hot
Heat removal gets dumb when people chase speed. More heat feels like progress until the cap warps, the clear coat dulls, or the glue smears into a bigger mess. I have seen a sticker turn into black gum because somebody tried to speed run the job. It looked like a melted gummy bear got run over.
Use these stop signs.
The cap smells like hot plastic.
The sticker face starts to sag.
The finish gets too warm to touch.
The glue turns runny instead of tacky.
The paint or clear surface changes gloss.
Your scraper starts digging instead of lifting.
You feel annoyed enough to rush.
That last one is real. When I get annoyed, I step away and drink water like a normal adult pretending to be calm. Five minutes later, the job is easy again. Stickers can smell fear, or at least they smell impatience.
What to do with the leftover adhesive
Sometimes the sticker lifts clean and you feel like a hero. Other times, the top comes off and the glue stays behind in a flat ugly ring. That is normal. The cleanup just needs a different pace.
For residue, I use this routine.
Warm the residue lightly.
Push it with a plastic scraper held almost flat.
Roll the glue into small clumps.
Wipe the clumps onto a towel.
Add adhesive remover to the towel, not the wheel.
Let it sit briefly on the glue.
Wipe with light pressure.
Wash the spot with soap and water.
Finish with isopropyl alcohol before any new sticker.
The final wash matters because many glue removers leave an oily film. That film feels clean to your finger, but new adhesive hates it. If you plan to install fresh wheel emblems, the surface should feel plain, dry, and almost boring. Boring wins this job.
The residue guide on cleaning old sticker residue from rims goes deeper into solvents, alcohol, and wash steps. I like using remover on a towel instead of spraying the wheel because control matters. Wheels have brake parts, paint, plastic, rubber, and weird corners where liquid loves to hide.
Before the new emblem goes on
Sticker removal is only half the job. The real win is making the next emblem sit flat and stay down. Once the old sticker and residue are gone, look at the cap face in good light. If it has raised glue, chips, grit, or wax, the new badge will show every flaw like bad lighting in a dressing room.
Use this quick prep check.
The surface is flat.
The surface is dry.
The surface has no wax or oily cleaner left.
The old glue is fully gone.
The edge groove is clean.
The new size matches the flat landing area.
Your hands are clean before touching the new emblem.
Impossible Stickers shows that domed badges start with sharp print, clean cutting, and a clear resin dome that adds depth and protects the print. That means your prep work should match the badge. A nice new emblem on a dirty cap is like wearing fresh shoes in a mud pit. Great plan, terrible timing.
When you are ready to replace the old face, browse the shop all products page or check how domed badges are made so you know what is going on the wheel. Fresh adhesive likes clean, flat, dry surfaces. Give it that and it behaves.
Heat gun tips I wish I knew sooner
A heat gun is not a magic wand. It is a controlled warm air tool, and the control part is where people mess up. Hold it back, keep it moving, and work the sticker in small areas. If you are trying to remove a tiny center cap badge, you do not need to heat half the wheel.
My favorite tips are simple.
Start with the lowest setting.
Heat for seconds, not minutes.
Move in circles around the sticker face.
Keep the nozzle away from tires and valve stems.
Do not heat near solvents or open chemicals.
Stop and reheat when the sticker gets hard to pull.
Use plastic first, always.
3M sells a Stripe Off Wheel for removing vinyl, decals, tape, graphics, and trim striping, and says its tool is made to remove material without changing the surface below when used as directed. That is useful for large stubborn decals, not my first move on a tiny wheel cap. Center caps are small and easy to overwork.
Common mistakes that wreck the job
The first mistake is using sharp metal because it feels fast. It is fast, right up until it carves a mark into the cap. The second mistake is heating one spot too long. The third mistake is pulling like you are starting a lawn mower.
Watch for these.
Using a screwdriver on a painted cap.
Holding a heat gun still.
Pulling straight up.
Spraying remover all over the wheel.
Skipping the soap wash.
Leaving oily residue before the new emblem.
Installing the new sticker before the cap is cool.
I know measuring feels like the dull part. But wheels are cruel about tiny errors. One mm off can make the emblem look wrong, and once you see it, you cannot unsee it. It will haunt you at gas stations.
FAQ
Can I use a hair dryer for sticker removal?
Yes, and I like it for most center caps. It warms slower than a heat gun, which helps protect plastic and painted parts. Use steady warmth, lift with plastic, and peel slow.
How hot should the sticker get?
Warm enough to soften the adhesive, not hot enough to hurt your finger near the sticker. If the part feels painful to touch, stop and let it cool. More heat is not more skill.
Will heat damage my wheel center cap?
It can if you use too much or hold the tool still. Plastic caps, old paint, and chrome style coatings need extra care. Keep the heat moving and start with a hair dryer when you are unsure.
What should I use to clean glue after removal?
Use mild adhesive remover on a towel, then wash with soap and water. Finish with isopropyl alcohol only if a new sticker is going on. Do not leave oily film under new adhesive.
Can I install the new emblem right away?
Yes, after the surface is clean, dry, cool, and free of old glue. Press the new emblem firmly around the whole edge. Then leave it alone so the adhesive can settle.
Final word from the garage
Heat removal works because it turns a fight into a peel. Warm the sticker, lift the edge, pull low, reheat when needed, and clean the glue like you care about the next badge. That is the boring little recipe that saves caps, fingers, and pride. Do it cold and angry, and the center cap wins.
Take your time and the job feels almost too easy. You end with a clean round face, no knife marks, no gummy ring, and no garage shame. Then the new emblem can sit where it should, flat and proud in the middle of the wheel. Funny how much better a car looks when one tiny circle stops looking tired.