
How to Measure Wheel Center Cap O.D. and I.D. With Digital Calipers
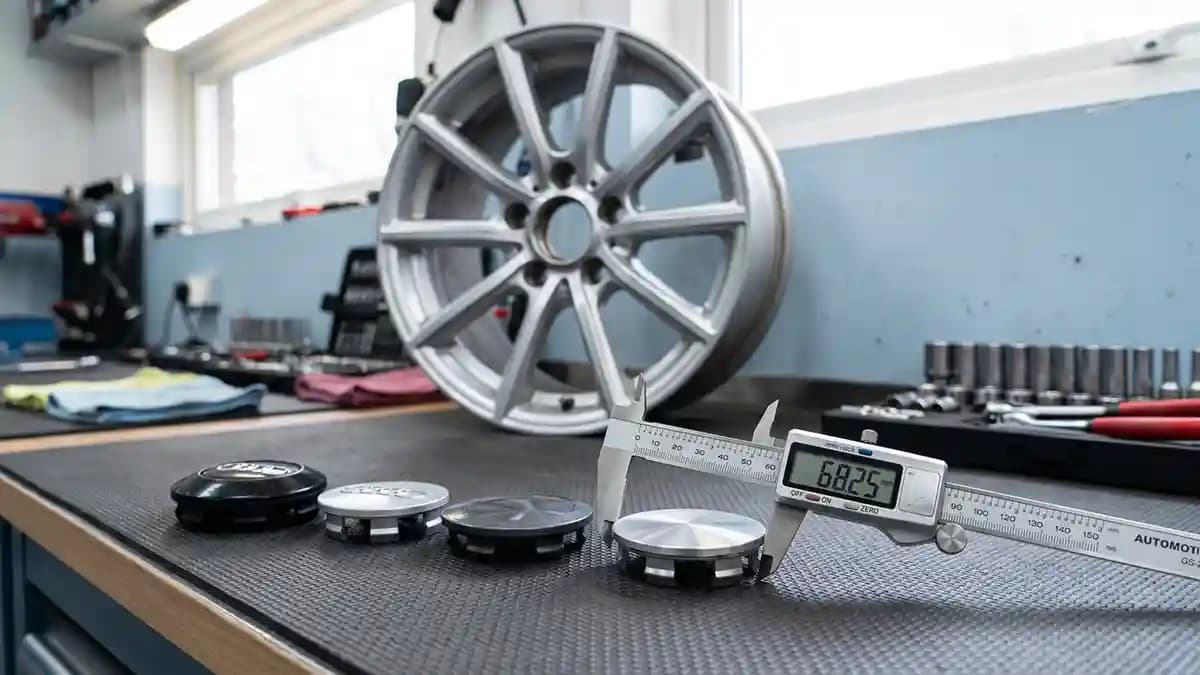
To measure wheel center cap O.D. and I.D. with digital calipers, zero the tool, measure the widest outside face with the lower jaws, then flip the cap and measure the inner clip seat with the upper jaws. That is the whole trick, but the trick matters because one tiny wrong number makes a clean wheel look like it lost a fight with a vending machine. I learned that while crouched beside a set of fresh wheels with one cap that sat proud on the edge and mocked me every time I walked past it. The badge was beautiful, the size was wrong, and my pride took the hit.
I used to think center caps were easy because they are small. That was dumb. Small parts are where tiny errors go to become big ugly problems. A wheel can look perfect from across the driveway, then one cap sits off by 1 mm and suddenly the whole car looks unfinished.
What O.D. and I.D. mean on a wheel cap
O.D. means outside diameter, and I.D. means inside diameter. The outside number tells you the full width across the front or the cap body, while the inside number tells you what fits into the wheel opening or clip seat. For a sticker or domed emblem, you often care more about the flat face than the full cap body. For a full cap swap, you need the cap body, the clip seat, and the depth because the wheel hub size can be rude like that.
O.D. is the full outside width of the center cap or the visible face you want to cover.
I.D. is the inner opening, clip ring, or seat area on the back of the cap.
Flat face size is the circle where the sticker will bond, and this is the number most emblem buyers need.
Depth is how far the cap sits into the wheel or how deep a recessed face drops.
Wheel opening size is the bore area the cap locks into, not the shiny logo on the front.
This is where most people mess up. They measure the pretty part, not the part that does the job. A domed sticker does not care about the outer plastic lip if it is not touching that lip. If you want a clean custom badge from the custom wheel emblems section, measure the landing zone, not the wish in your head.
Set up your digital calipers before you touch the cap
Digital calipers look fancy until you realize they are just a tiny measuring mouth with a screen. The lower jaws measure outside widths, the upper jaws measure inside spaces, and the little rod at the end checks depth. The zero button matters more than people think because a dirty jaw or lazy reset can start the whole job wrong. I have seen people measure three caps with the caliper reading half a millimeter off before they even began, which is like blaming the oven while cooking with the wrong timer.
Wipe the jaws with a clean cloth.
Close the jaws gently.
Press zero.
Open and close the jaws again.
Check that the screen still reads zero.
Set the tool to millimeters.
Do not clamp the jaws like you are trying to crush a crab. Light contact is enough. The caliper should touch the edge, not bite into it. Plastic caps flex, and flexed plastic lies like a kid with cookie crumbs on his shirt.
How to measure wheel center cap O.D.
Start with the front of the cap facing up. If you are replacing the whole cap, measure the full outside edge at the widest point. If you are ordering an overlay sticker, measure only the flat circle where the sticker will sit. Those are not always the same number, and that is why people end up with badges that hang over the rim like a bad haircut.
Place the cap on a clean flat towel.
Open the lower jaws wider than the cap.
Place one jaw on the left outer edge.
Slide the other jaw to the right outer edge.
Keep the caliper straight across the center.
Read the number in millimeters.
Turn the cap and measure again from a second angle.
The biggest mistake here is measuring across a curve. If the face has a raised outer ring, ignore it for sticker sizing unless the sticker will actually sit on it. If the cap has a bevel, stop at the flat part before the bevel starts. I would rather see you order 1 mm smaller and land clean than go too large and watch the edge peel up like burnt pizza cheese.
How to measure I.D. without fooling yourself
Flip the cap over and look at the back. You are hunting for the inner clip area, the retaining ring, or the opening that tells the cap where to sit. This is not always a neat circle, because some caps have tabs, split clips, or small plastic feet that look like they were designed by someone who enjoys chaos. Take your time here, because I.D. is the sneaky number that decides whether the cap snaps in or falls out on the first pothole.
Now use the small upper jaws. Open them inside the clip seat, then spread them until they touch both sides with light pressure. Keep the tool straight and centered, because a tilted caliper gives you a fake big number. If the inside shape has tabs, measure the widest retaining points and write down what you measured so you do not confuse it later.
Flip the cap so the back faces up.
Find the part that locks into the wheel.
Place the upper jaws inside that opening.
Open the jaws until they touch both sides.
Keep the jaws level with the ring.
Read the number in millimeters.
Rotate the cap and measure again.
I like naming the measurement right away because memory gets stupid in the garage. You think you will remember which number was which. Then the dog barks, the phone rings, or Gary from next door asks what you are doing, and now 56.5 mm has become a mystery. Write it down before life gets involved.
The measurement card I use
A scrap of cardboard beats guessing every time. I write the numbers like a small shop ticket, then tape it to the cap or snap a photo of it with my phone. It feels too basic until it saves you from ordering the same wrong size twice. That is when cardboard becomes a hero, which is a sad sentence, but true.
Car and wheel: Audi on aftermarket wheels.
Front flat face: 58.0 mm.
Full cap O.D.: 60.0 mm.
Back clip I.D.: 56.5 mm.
Depth: 8.0 mm.
Surface shape: flat center with rounded outer edge.
Final sticker size: 57.0 mm or 58.0 mm after edge check.
That little note tells the whole story. It separates sticker sizing from full cap sizing, which is the part people blend together. If the sticker only touches the flat face, the flat face wins. If you are replacing the full cap, the back side and depth now get a vote too.
When to order exact size and when to go smaller
Exact size works when the face is truly flat and has a crisp edge. Smaller works when the edge rolls off, the face has a bevel, or the old printed circle reaches too close to a raised lip. This is not about being scared. It is about giving the adhesive a flat place to live instead of making it hang onto a curved edge like a cat on a shower curtain.
Order exact size when the face is flat from edge to edge.
Go 1 mm smaller when the outer edge is rounded.
Go 1 mm smaller when the cap has a raised lip.
Avoid covering grooves, seams, or texture.
Do not use the full cap O.D. for a sticker unless the full front is flat.
Check all four caps before ordering, because one odd cap ruins the set.
If you are shopping after measuring, start with style after the numbers are real. Browse the full shop for ideas, then match your measured size before you buy. That order matters. Style first feels fun, but size first keeps your money in your pocket.
Common measuring mistakes that ruin the fit
Most wrong orders come from the same small group of mistakes. Nobody wants to admit it, but I have made most of them. The good news is that once you know them, they are easy to avoid. The bad news is your wheel will not forgive you just because you were in a hurry.
Measuring in inches, then rounding badly into millimeters.
Measuring the whole cap when you only need the sticker face.
Measuring the old logo instead of the flat surface.
Pressing the caliper too hard into plastic.
Holding the caliper at an angle.
Forgetting to zero the tool.
Trusting one measurement from one cap.
Ignoring bevels, grooves, and raised rings.
Picking the larger size because bigger feels safer.
That last one is dirt cheap comedy. Brake dust can build a tiny dark line around an old badge and make the face look bigger than it is. Clean first, measure second. Your caliper is good, but it is not a wizard.
What wheel hub size has to do with it
Wheel hub size matters when you are replacing the full center cap, not just the face badge. The cap needs to fit the wheel opening, clear the hub, and sit deep enough without rubbing. If the cap clips into the wheel, then I.D. and depth matter just as much as the front look. A beautiful front with the wrong back is just shelf decor with confidence.
Measure the wheel opening if the old cap is gone.
Measure the cap back if the old cap still exists.
Compare the clip area to the wheel opening.
Check the depth with the caliper rod.
Look for axle ends or dust covers that sit proud.
Make sure the cap can seat without force.
This is where full cap shopping gets a bit more serious. A sticker overlay is simple because it bonds to the visible face. A snap in cap has to do a job behind the scenes. If you only need to refresh the look, a measured domed emblem is often the cleaner path.
Before you install the new emblem
Once the size is right, do not ruin the job with bad prep. Clean the face, dry it, and keep your fingers off the adhesive. If the cap is cold, bring it inside and let it warm up before you press anything down. Adhesive likes clean, dry, calm surfaces, not a freezing dirty cap in a driveway that smells like tire shine.
Wash the cap with mild soap.
Rinse away grit.
Dry it fully.
Wipe the flat face with isopropyl alcohol.
Let the surface dry.
Test center the emblem before peeling the backing.
Press from the center out.
Hold firm pressure around the edge.
For more detail on why stickers lift, read the peeling fix guide. If you want to see why clean cuts and true sizes matter, the badge making process shows the print, cut, dome, cure, and quality check path. I like knowing that stuff because it makes sizing feel less random. The more you see the process, the less you want to eyeball anything.
Quick Q and A
Q: What is the best way to measure wheel center cap size?
A: Use digital calipers in millimeters and measure the part that actually matters. For a sticker, measure the flat face. For a full cap, measure O.D., I.D., and depth.
Q: Is O.D. the same as the sticker size?
A: Not always. O.D. can mean the full outside cap body, but a sticker needs the flat landing area. If the outer edge is curved or raised, do not count it.
Q: Should I measure the wheel or the cap?
A: Measure the cap if you still have one that fits well. Measure the wheel opening only when the cap is missing or you are buying a full cap body. For a face refresh, the cap face is your main number.
Q: How exact do I need to be with digital calipers?
A: You do not need to act like you are building a spaceship. You do need to avoid lazy rounding. If the face reads 58.0 mm, do not call it 60 mm because it sounds close.
Q: What if my center cap face is slightly curved?
A: A slight curve can still work with the right material and size, but do not force a sticker across a hard curve. Measure the flattest area and consider going smaller. A clean smaller badge beats a large one lifting at the edge.
Final garage advice
Measure twice, write once, order once. That is the boring sentence that saves the job. A good set of digital calipers turns wheel cap sizing from guesswork into a five minute task. Use them right and your new center caps look centered, clean, and like they belonged there the whole time.
If you want extra help before buying, compare your notes with the Millimeters Matter guide and send a clear photo when the cap shape looks weird. Weird shapes are normal. Guessing is the part that gets expensive. Get the number right, and the wheel stops looking almost done.