
How to Restore Scratched Alloy Wheels Before Applying New Center Caps
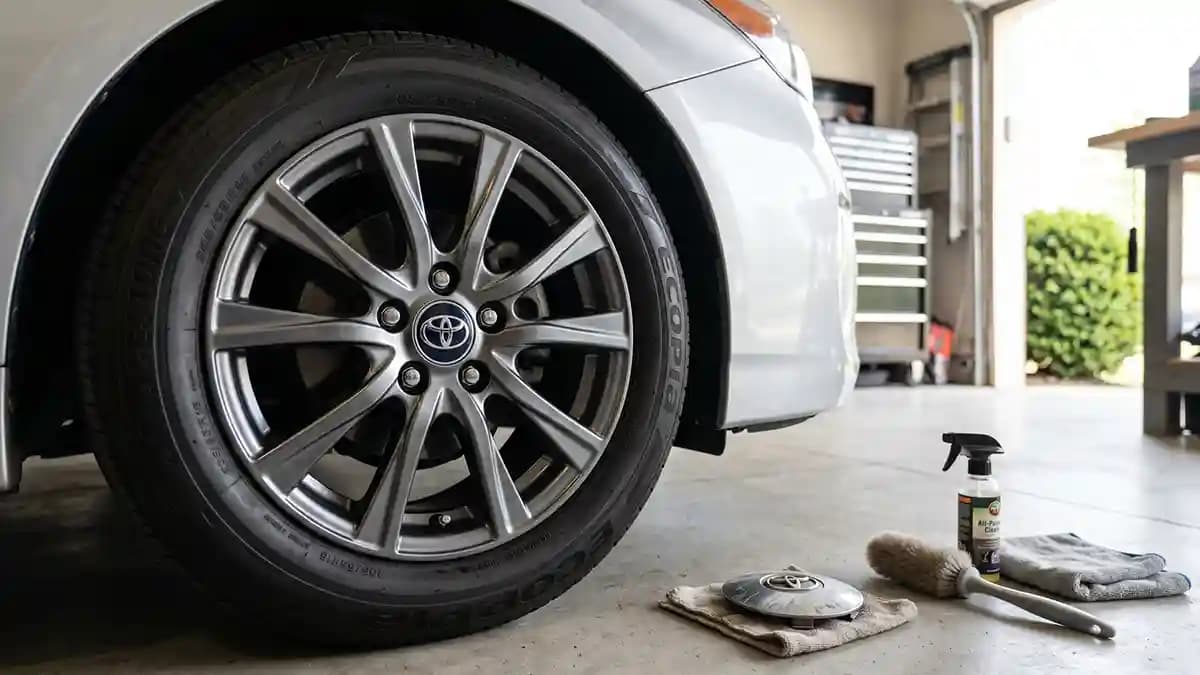
Restore alloy wheels before applying new center caps by cleaning, sanding only the ugly spots, sealing the surface, and making the hub face flat enough for the badge to bond. That is the honest review of this title, because a new center cap does not hide a dirty, gouged landing zone for long. I learned this while crouched next to a silver alloy wheel that looked fine from five feet away and awful up close. The badge was pretty, the hub was crusty, and together they looked like clean shoes in a muddy yard.
The trick is not to rebuild the whole wheel like you own a paint booth. The trick is to fix the part that ruins the look and the bond. Most center cap jobs fail because the person gets excited, peels the backing, and presses the new emblem onto wax, brake dust, old glue, or raised scratches. I have done that once, and my neighbor got a free comedy show while I argued with a tiny circle of adhesive.
Why scratched rims make new caps look cheap
Your wheels live where all the bad stuff hangs out. Brake dust, salt, tar, road grit, and wash chemicals all beat on the finish. Tire Rack notes that many alloy wheels have painted or clearcoat finishes, recommends mild soap and water, and warns against steel wool, abrasive cleaners, steam, and harsh wash methods. That matters because the center cap pocket gets the same abuse.
A scratched hub face causes three problems at once. The new badge sits on peaks instead of a flat face. Old grime blocks the adhesive from touching the surface. Then the fresh resin makes the bad metal around it look even worse, like hanging a new picture on a stained wall.
Check these before you buy anything.
Is the cap body still tight in the wheel
Is the visible center face flat
Is old glue still on the surface
Are the scratches shallow or sharp
Is there bubbling clearcoat or bare metal
If the cap body is cracked, loose, or missing clips, a sticker will not fix the grip. A domed badge refreshes the face, not the mechanical part. If the wheel is cracked, bent, or shaking at speed, stop and call a wheel repair shop. Pretty badges are fun, but not as fun as wheels that stay round.
Restore alloy wheels by judging the damage first
I start every scratch repair rims job by wiping one wheel clean and staring at it like it owes me money. Light scratches around the center cap are usually easy. Deep curb rash near the outer lip is a different job, and structural damage is not a driveway job. The goal here is to repair the hub area so the new badge looks like it belongs.
Use this quick sort.
Fine surface marks need cleaning and light sanding
Raised burrs need careful leveling
Small chips need filler only if they leave a low spot
Peeling clearcoat needs loose edges removed
Cracks, bends, and deep gouges need a pro
Do not be the person using filler to hide a crack in a wheel. That is not repair, that is danger wearing a party hat. If the wheel structure is sound, keep going. Before you sand, remove any old badge or glue, and read the guide on old wheel sticker removal if the old emblem is still fighting you.
Your simple garage kit
You do not need a fancy tool cart. You need clean hands, the right grit, and enough patience to not rush the ugly middle part. That ugly middle part is where the wheel looks worse before it looks better. Totally normal, still mildly rude.
Grab this before you start.
Car soap and a clean bucket
Soft wheel brush
Microfiber towels
Isopropyl alcohol and water mix
Fine sandpaper in several grits
Small sanding block
Painter tape and masking paper
Alloy safe filler for deeper chips
Primer, wheel paint, and clearcoat
Gloves, eye protection, and a proper respirator
Safety gear is not there to make you look like a villain from a cheap movie. Sanding old finish makes dust, and spray paint sends mist where your lungs live. Current wheel paint directions call for outdoor or well ventilated use, the right temperature range, and care around spray mist, flame, and dust. I like my wheels shiny and my breathing boring.
Clean before sanding or you make gray soup
Cleaning is the part everyone wants to skip. Do not skip it. If you sand through brake dust, wax, and road film, you grind trash into the finish and drag it across the surface. That is how a small scratch repair turns into a cloudy mess.
Clean in this order.
Rinse the wheel while it is cool
Wash with mild soap and a soft brush
Rinse again until soap is gone
Dry with a clean towel
Remove old glue with a safe adhesive remover
Finish with alcohol and water on the badge area
That last wipe matters more than people think. 3M says many bonding surfaces are best cleaned with a half isopropyl alcohol and half water mix, and heavy oils need a degreaser followed by that alcohol wipe. (3M) If old glue is still there, remove the residue before you sand. Glue dust is gross, sticky, and somehow always ends up on your elbow.
Sand the hub face without making it worse
Sanding is not revenge. You are not punishing the wheel for kissing a curb. You are leveling sharp edges and giving paint or adhesive a clean surface to grip. Small circles and light pressure beat angry straight scratches every time.
Chemical Guys describes the basic rim repair path as cleaning first, sanding the damaged area with fine grit, applying filler for deeper flaws, then sanding the cured filler with finer paper until it sits flush. (Chemical Guys) That matches the real garage rule. The surface should feel smooth under your fingertip before anything pretty goes on. If your finger catches, the badge edge can catch too.
Use this grit plan for light hub repair.
Start with the least rough paper that still cuts the damage
Use a small block so the surface stays flat
Feather the edge around the scratch
Wipe dust often so you can see changes
Stop once sharp edges are gone
Do not sand the whole wheel face just because you are already there. That is how a one hour job becomes a weekend project with snacks, regret, and one missing socket. Keep the repair area tight. You are prepping the center zone, not repainting a show car.
Fill only the gouges that need it
Filler has one job, fill a low spot. It is not makeup for every little mark. If the scratch is so shallow that primer will hide it, skip filler. If a groove catches your fingernail, a tiny amount of alloy safe filler can save the finish.
Do it like this.
Mix only what you can use right away
Press it into the chip or gouge
Scrape off extra before it cures
Let it harden fully
Sand it flat with fine paper
Wipe clean and check by touch
The mistake is piling filler on like frosting. I have seen people build a little mountain on the hub, then spend forever sanding it back down. Use less than you think. You can add another thin pass if needed.
Prime, paint, and seal the repair
Bare metal and exposed filler need protection. Primer helps the new finish stick and gives the color coat a better base. Current wheel paint directions call for washing, drying, wax and tar removal, removing loose paint or rust, lightly sanding glossy surfaces, and applying in a ventilated area at 50 to 90°F with humidity below 85 percent. That is the difference between smooth paint and a sad orange peel texture.
Keep the paint work small and controlled.
Mask the tire, valve stem, brake parts, and clean wheel areas
Dust on a light primer coat
Let it flash based on the can directions
Spray color in thin passes
Let the color set before clearcoat
Use light clearcoat passes, not one wet flood
Clearcoat protects the color and gives the hub a clean face again. The matching wheel clearcoat page says the product is made for aluminum or steel wheels and plastic hubcaps, and recommends two or more light coats a few minutes apart. Light coats are boring in the best way. Heavy coats run, and runs always choose the most visible spot because paint has a cruel sense of humor.
Prep wheel hub for the center cap bond
After paint and clearcoat, do not rush the badge install. Fresh paint needs time to dry and harden based on the product directions. If the surface smells like paint, feels soft, or marks when pressed near the repair, it is not ready. A new badge on soft paint is like sticking a stamp on pudding.
When the finish is ready, prep the landing zone.
Test fit the badge without peeling the backing
Check that the full edge lands on a flat area
Wipe the face with alcohol and water
Let it dry fully
Place the badge once
Press the center, then press outward
Hold firm pressure around the edge
3M also notes that light abrasion can remove dirt or oxidation and add surface area, while firm pressure helps adhesive contact, and bond strength keeps building after application, reaching far more strength at 24 hours and full strength at 72 hours at room temperature. That is why I tell people to leave new caps alone after install. No wash, no pressure washer, no poking the edge to see if it stuck. You are not helping, you are being a tiny menace.
Test the new center cap before peeling the backing
Dry fitting is free. Wrong placement is not. Hold the cap or badge in place and look at it from straight on, then from a few feet back. The human eye sees a crooked logo faster than it sees a tax bill.
Check these before the backing comes off.
The diameter matches the flat visible face
The edge does not hang over a curve
The logo points the right way
The repaired area is fully dry
The surface feels smooth and clean
All four wheels match enough to look planned
Once the hub face is right, browse wheel emblems by size and style instead of guessing from the car badge alone. If you run aftermarket wheels, BBS center cap emblems show why millimeter sizing matters. For truck style builds, Toyota TRD wheel center caps are a good example of a badge that looks best when the surface under it is clean and flat.
Install the badge like you care
This is the calm part. Clean surface, warm enough garage, steady hands. Peel the backing without touching the adhesive, line up the badge, set one edge or the center, and press it down slowly. Do not hover for ten minutes like you are landing a helicopter on a cupcake.
My install routine is simple.
Wash your hands or use clean gloves
Mark a light guide with tape if the logo needs direction
Peel the backing only when ready
Set the badge gently in place
Press from center to edge
Leave the wheel dry and still for at least a day
If you fight air bubbles on larger domes, read the guide on preventing air bubbles. The short idea is slow pressure from one side to the other or from center to edge. Air needs an exit path. Trap it under the badge and it sits there looking smug.
FAQ
Can I restore alloy wheels without removing them from the car
Yes, for light center hub repair you can work with the wheel on the car if you mask well and keep spray away from brakes and tires. Removing the wheel gives you more room and cleaner paint work. If you do not remove it, take your time with masking.
How smooth does the hub face need to be before installing new center caps
It should feel smooth under a clean fingertip, with no raised burrs, old glue, loose paint, or sanding dust. The badge edge needs full contact all the way around. If the edge floats or bridges a dip, fix the surface first.
Can a domed sticker cover scratches
A domed sticker can cover light visual marks on the cap face, but it should not be used to hide rough raised damage. The adhesive needs a flat clean landing zone. Fix the scratch first, then let the badge finish the look.
Should I use alcohol before applying the badge
Yes, use a clean alcohol and water wipe after the wheel is washed and any oily residue is gone. Let it dry fully before install. Do not apply the badge while the surface is damp or cold.
How long should I wait before washing the car
Give it at least a full day, and 72 hours is better for a stronger bond. Adhesive strength builds over time when the surface is clean, dry, and pressed well. The first pressure wash can wait.
Final take
Restoring scratched alloy wheels before applying new center caps is not hard, but it punishes rushing. Clean the wheel, judge the damage, sand only what needs it, fill only real low spots, seal the repair, and install the badge on a flat dry face. That is how a small center cap job turns from cheap cover up to clean wheel refresh. Do it once the right way and every time you walk past the car, the wheel looks finished instead of almost fixed.