
Lifted Truck Wheels: How to Measure and Install Center Caps on Fuel and XD Rims
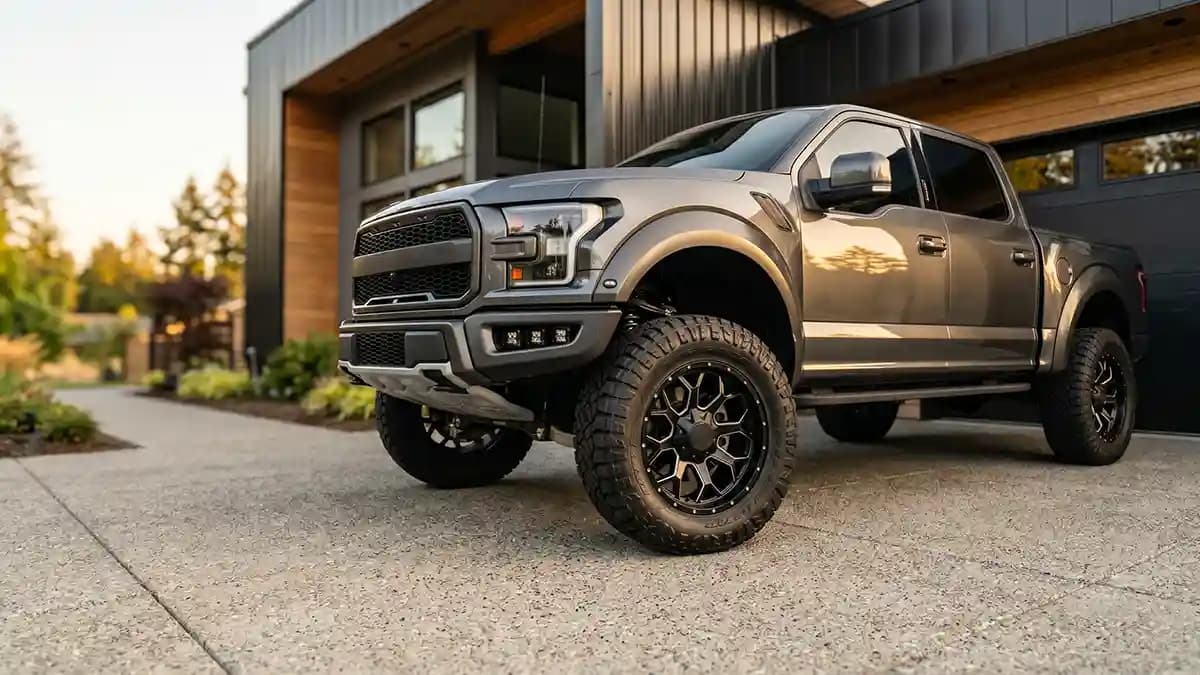
Lifted truck wheels need center caps measured by the flat landing zone first, then checked for inner fit, depth, and cap shape before you stick anything down. That is the clean answer to the title, and it saves you from buying Fuel wheel center caps or XD rim badges that look right online but sit ugly on the truck. I learned this while crouched beside a lifted Silverado with one cap missing, one cap crooked, and one owner staring at me like I owned a magic hubcap wand. I did not. I had a caliper, a rag, and the shame of past mistakes.
The weird thing about lifted trucks is the wheels are huge, but the problem is tiny. One wrong millimeter can make a center cap look like it came from a toy bin. Fuel says its center caps can use a removable top section for access to front locking hubs, which proves these caps are not all simple flat coins. XD says replacement center caps and screws are handled through an accessory site or dealer route, so the right style and part code matter when hardware is involved.
Why Lifted Truck Wheels Make Center Caps Tricky
I love lifted trucks, but they do not make center cap work calm. Big tires, deep lips, wide spokes, tall hubs, and caps that stick out like little soup bowls all get involved. A stock sedan cap is usually boring, which is great for measuring. A truck wheel cap walks in wearing boots and asks for special treatment.
Here is the part most people miss.
The visible logo circle is not always the size you need.
The cap face may curve before the edge.
The axle hub can sit proud behind the cap.
The screws may decide how the cap seats.
The wheel model matters more than your guess.
I checked current brand pages before writing this, and the variety is wild. Fuel lists a large wheel range with new models and dually styles, while XD product tables show details like bore, offset, load, and cap part number. So when someone says, just get the Fuel size, I reach for the caliper before my eye starts twitching.
The Three Measurements That Matter
I split the job into three numbers because it keeps my brain from running into traffic. The first number is the flat face diameter, which is the circle where your sticker or emblem will touch. The second number is the outer cap diameter, which helps when the whole center cap must fit into the wheel. The third number is the inner seat or clip area, which matters when the cap snaps in or rides over a hub.
Use this quick cheat sheet before you order.
Flat face diameter
This is for domed stickers, overlay badges, and logo caps. Measure the smooth flat spot, not the raised lip.Outer diameter
This is the full cap width. Measure edge to edge across the widest hard part.Inner seat size
This is the part behind the face that locks or seats into the wheel. Use the inside jaws on the caliper.Depth
This tells you if a raised dome or cap face has room. Use the depth rod if the cap sits in a pocket.
I send people to the digital caliper guide when they want the full routine, because a ruler lies near a curved truck cap. Rulers are like flip flops in a mud pit, fine until the first real problem shows up.
Fuel Wheel Center Caps Need A Calm Hand
Fuel wheel center caps can be simple on some wheels and sneaky on others. Some styles use tall caps, removable logo faces, or deep lip setups that need clearance for front hub gear. The official Fuel FAQ says replacement parts come through the authorized dealer that sold the wheels, which is a good hint. Take photos, write down the wheel style, and measure the cap before you shop.
This is my Fuel cap routine.
Pull one cap if you can do it safely.
Clean the face with soap and water.
Look for a part number inside the cap.
Measure the flat logo zone in three spots.
Measure the full cap width.
Check the center hub clearance.
Take one side photo and one front photo.
Do not pry with a screwdriver like a raccoon with a tool belt. Use a plastic trim tool, gentle pressure, and patience. If the cap uses screws, put them in a cup right away. Black screws love black driveways.
XD Rims Are Not A One Size Game
XD rims have their own little traps. The XD FAQ says replacement center caps, screws, and related pieces can be searched by accessory part number or wheel style, which helps if you still have the code. Their tables also show cap part numbers on model pages, which saves you from buying random parts based on vibes. Vibes are fun at a cookout. They are bad at fitment. (XD Wheels)
When I measure XD rims, I do this.
Find the wheel style first.
Look for a cap code on the old cap.
Check if the cap is held by screws.
Measure the flat face for an overlay.
Measure the full cap if replacing the cap.
Check bore and hub space if the cap sits deep.
Confirm that all four wheels use the same cap.
That last line sounds silly until you work on a truck with two old caps, one new cap, and one mystery cap from a swap meet. It happens more than people admit. The truck looks tough, then the center caps tell a sad little story.
How To Measure Truck Hubcaps Without Guessing
Set the cap on a clean bench or on a towel over the tailgate. Close the caliper jaws, hit zero, and open them slowly across the flat face. Do not squeeze the cap like it owes you money. Light contact gives the real number, and too much pressure bends plastic enough to fool you.
Here is the exact routine I use.
Clean first
Brake dust adds false edges. Old wax does too.Zero the caliper
Closed jaws should read zero. If not, fix that before you measure.Measure top to bottom
Write down the number in millimeters.Measure left to right
If the number changes, check if you caught a lip.Measure one diagonal
This tells you if the cap is round or if your hand was drunk.Measure the depth
Use the rod when the face sits in a pocket.
Advanced Systems and Designs gives the same kind of common sense advice for calipers, with light pressure, correct jaw placement, and zeroing before use all called out as ways to avoid bad readings. That lines up with what happens in the garage. Most bad numbers are hand problems.The jaws should sit on the flat circle, not the rolled edge. If the emblem lands on a curve, the edge starts lifting, dirt gets in, water follows, and now your nice wheel badge is doing yoga. A badge should sit still. It should not have hobbies.
Pick The Right Sticker Size
Here is the rule that saves the most money. If the flat landing zone is truly flat, order the same size. If the edge rounds down, order one millimeter smaller. If the cap has a deep bowl, read the curved cap guide before you turn a nice dome into a tiny frisbee with glue.
Use this size logic.
Flat face with a sharp edge
Order exact size.Flat face with a soft outer roll
Order one millimeter smaller.Raised center with a ring around it
Measure only the raised flat pad.Deep concave cap
Do not force a normal dome across the whole bowl.Missing cap
Measure one matching cap from the other wheels.
The wheel emblems section is where I check clean size ranges instead of guessing from a blurry phone photo. For Ford truck owners, something like a Ford F 150 domed sticker shows the kind of simple logo overlay that works when the flat face is measured right. A Ford logo sticker is another good example of why the face size matters more than the truck badge in your head.
Prep The Cap Like It Matters
Prep is boring. Prep is also why the sticker stays put. Cool parts stuck to dirt become trash parts. Brake dust, tire shine, wax, mud film, and finger oil all sit there waiting to ruin your day.
Keep your prep kit simple.
Mild car soap
Clean water
Fresh microfiber cloth
Isopropyl alcohol
Masking tape
Digital caliper
Soft press cloth
Hair dryer if the garage is cool
Wash the cap first, then dry it fully. Wipe only the landing zone with isopropyl alcohol and let it flash dry. Do not use greasy detail spray right before install. That is like putting lotion on your hands before climbing a rope, funny for everyone but you.
Install The Center Cap Sticker Clean
I like installing the sticker while the cap is off the truck when possible. It keeps the part flat, close, and easy to see. If the cap has to stay on the wheel, rotate the wheel so the logo angle makes sense before you stick. A straight badge on a crooked cap still looks wrong.
Here is my install method.
Dry fit with the backing still on.
Mark the top with a small tape tab.
Check the gap all the way around.
Peel half the backing.
Set the center first.
Roll pressure outward with your thumb.
Peel the rest of the backing.
Press the edge for ten slow seconds.
Leave it alone while the bond builds.
The rolling motion matters. Do not drop the sticker on like a pancake. Start in the middle and push air toward the edge. If you trap a bubble under a domed badge, you will stare at it every time you walk past the truck, and yes, it will stare back.
What To Check Before Driving
Once the sticker is on, I do not wash the truck right away. I press the edges again after a few minutes, then I let the adhesive settle. Good adhesive grabs fast, but clean contact still needs time. Treat it like fresh paint for a bit.
Check these before driving hard.
The edge is sealed all the way around.
The logo sits level.
No edge sits on a curved shoulder.
No screw head touches the emblem.
The cap clears the front hub.
This is where lifted truck wheels punish sloppy work. Rain, dust, and wheel heat find weak edges fast. If you measured right and cleaned right, the cap looks like it belonged there from day one. If you skipped steps, the truck will snitch on you.
Common Mistakes I See All The Time
The first mistake is measuring the old logo, not the landing zone. The second mistake is ordering by truck model, not wheel model. The third mistake is trying to cover a curved bowl with a flat dome because bigger looked cooler online. Bigger is not cooler when the edge lifts like a sad potato chip.
Avoid these.
Using a tape measure for a millimeter job.
Measuring over old glue.
Ignoring a raised outer lip.
Forgetting the cap depth.
Installing over tire shine mist.
Guessing that Fuel and XD caps share sizes.
Real talk, I have done some of these. I once measured a cap while it was still dirty and got a number that looked perfect. Then I cleaned it, measured again, and the number changed enough to hurt my pride. Dirt is not a measuring surface. It is just dirt wearing confidence.
Quick Q And A
Q: What is the best way to measure Fuel wheel center caps?
A: Pull one cap if you can, clean it, then measure the flat logo landing zone in three directions. If you are replacing the full cap, measure the outer cap and inner seat too.
Q: Are XD rims all the same center cap size?
A: No. XD rim caps vary by wheel style and cap code, so use the wheel model and part number when you can. If you only need an overlay, measure the flat face.
Q: Should I order the exact size or smaller?
A: Order exact size only when the landing zone is truly flat with a clean edge. Go one millimeter smaller if the edge rounds away.
Q: Can I install center cap stickers without removing the cap?
A: Yes, if you can clean, line up, and press the edge well. Removing the cap gives you more control, so I prefer that when the cap comes off easily.
Q: What if my truck is missing one cap?
A: Measure one of the matching caps from the other wheels. Take front and back photos, then match the shape, face size, and hardware style.
The Payoff
The right center cap does not scream. It just makes the wheel look finished. That is the magic, if we want to call it that. Not flashy, not loud, just clean enough that nobody notices the cap first because the whole truck finally looks right.
Measure the flat face, check the cap body, respect the hub, and install slow. That is how lifted truck wheels get center caps that look made for the build instead of borrowed from a drawer. You do not need luck. You need clean hands, real numbers, and the self control to not peel the backing until the fit looks dead right.