
Prepare Rims for Stickers, The Isopropyl Alcohol Guide for Decal Installation
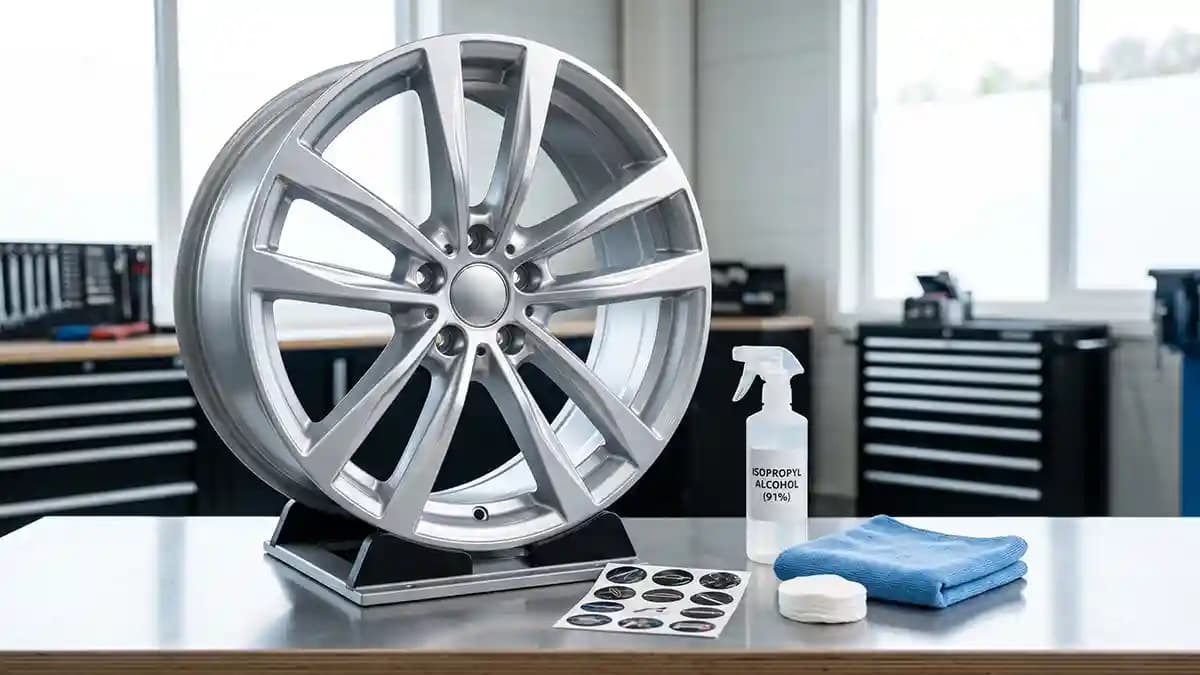
Prepare rims for stickers by washing the wheel face, drying it, then wiping the landing zone with isopropyl alcohol before you even think about peeling the backing. That is the honest answer to the title, because decal installation is won before the sticker touches the rim. I learned this while staring at a clean looking center cap that still had tire shine on it, like invisible butter. The sticker held for two days, then one edge lifted like it was waving goodbye.
Last week I had a guy roll up with fresh wheels, new caps, and that nervous look people get when they are about to stick something small and permanent on something expensive. He had already cleaned the rims, or so he said. I touched one cap and my finger slid across it like a seal on a wet dock. That was not clean, that was shiny dirt in a nice outfit.
Why adhesive prep beats more glue
Here is the thing nobody mentions, adhesive does not fail alone. Most bad bonds are a team sport, with dust, wax, tire dressing, brake grime, and your thumb all doing crimes together. You can buy great domed wheel emblems, but if you stick them to a greasy cap, you are asking glue to hold onto soup. Glue hates soup.
Professional prep advice says the same boring thing over and over because boring works. 3M says many adhesive jobs are best prepped with a mix of isopropyl alcohol and water, about fifty to seventy percent IPA, and the bonding surface needs to be stable, clean, and dry. 3M also says firm pressure helps the adhesive touch the surface better, and that bond strength builds with time after application. That matches what I see in the garage every week, the best installs are not fancy, they are clean and patient.
Avery Dennison says decal surfaces should be clean, smooth, and dry before final prep. It also calls out dirt, grime, grease, oil, wax, and residue as stuff that must be removed before a decal goes down. That matters on rims because wheels collect all the gross stuff your car throws off. Brake dust is basically tiny gray glitter from Satan, and it loves to hide near the center cap.
The two stage wash before isopropyl alcohol cleaning
I do not start with alcohol. Alcohol is the final wipe, not the whole bath. If you spray IPA on a dirty rim, you are just moving dirt around while feeling smart. That is like mopping a garage floor with a slice of bread.
Use this order when the rim or center cap is still on the car:
Rinse the wheel so grit does not scratch the cap.
Wash the area with mild car soap and water.
Use a soft brush around the cap edge if grime is packed in.
Rinse again until soap is gone.
Dry the wheel face and cap with a clean towel.
Wait until water is not hiding in the cap seam.
Do the isopropyl alcohol cleaning only on the sticker landing zone.
Let it flash dry before you touch anything sticky.
I like this because it separates dirt removal from oil removal. Soap handles road film and mud, while alcohol handles the thin film your eyes cannot see. Give each cleaner one job and the decal gets a clean, dry face. That beats a science project with lug nuts.
My rim prep kit
You do not need a lab coat. You need a few clean things and the willpower to not touch the sticky side. I keep my kit small because big kits make people start inventing steps. Then the simple job turns into a tiny garage circus.
Here is what I lay out before decal installation:
Mild car soap.
Clean water.
Two fresh microfiber towels.
One lint free wipe for the final alcohol pass.
Isopropyl alcohol, either seventy percent rubbing alcohol or a clean IPA and water mix.
Cotton swabs for tight cap edges.
Masking tape for alignment marks.
Nitrile gloves for the final handling.
A soft cloth for pressing the finished decal.
Do not use the towel you used for tire shine. Do not use the rag that lives near the polish bottle. Do not use your shirt for one quick wipe. Your shirt has body oil, dust, and probably lunch on it.
That is the whole setup. Nothing wild. The magic is not the bottle, it is the order. A clean wipe at the right time beats fancy junk used wrong.
How I use isopropyl alcohol cleaning without making a mess
The best alcohol wipe is boring and controlled. Wet the cloth, not the whole wheel. Wipe the landing zone in small circles, then make one final pass in one direction. If the cloth turns gray, flip to a clean side and wipe again.
Avery Dennison says IPA can be used by wiping with a cloth soaked in IPA, then drying the surface with a clean, soft, lint free cloth before the solvent is gone. I like that second cloth step because it stops dirty solvent from drying right back on the cap. That is the part people skip because the wheel looks wet and they think wet means clean. Wet is just wet. (Avery Dennison Graphics)
Here is my alcohol wipe rule:
Use enough IPA to wet the wipe, not flood the cap.
Keep the wipe inside the decal landing zone.
Rotate the cloth as soon as it picks up dirt.
Dry with a clean cloth before residue settles.
Wait until the surface feels fully dry.
Do not touch the center again with bare fingers.
If the cap smells like alcohol, give it another minute. If it feels cold and damp, wait. If you see a water ring near the cap edge, dry it. Stickers are not impatient, people are.
Decal installation starts before the backing comes off
You are not ready to peel just because the surface is clean. First you dry fit the decal with the backing still on. Place it on the cap, look from the top, then crouch and look from the side. The side view tells you if the cap is flat enough and if the edge has room to sit down.
I mark the top with a tiny piece of masking tape if the logo has an up direction. For round logos, I mark a center line or use the valve stem as a visual guide. That stops the classic install panic where your hand floats over the cap and your brain turns into oatmeal. I have done that dance, it is not a dance you want neighbors to watch.
This is also when you decide if the cap is a good surface at all. The wheel emblem install FAQ says flat, smooth cap faces give the best hold and cleanest look. It also says to clean with isopropyl alcohol, let the cap dry, align the emblem, then press from the center outward. That is the tiny routine that saves you from the big sad later.
Use this dry fit check:
Does the sticker fit inside the flat area?
Does the edge sit down without hanging over?
Is the cap face smooth, not pebbled or rough?
Is the center free from old glue bumps?
If the answer to any of those is no, stop. A sticker does not fix bad shape. It covers color, logos, and light wear, but it cannot turn a lumpy crater into a flat landing pad. That is when you sand lightly, replace the cap, or ask for custom help before wasting a good decal.
Trouble spots on rims that ruin adhesive prep
The worst rim dirt is never sitting in the wide open part where you can see it. It hides in the cap lip, near the valve stem, around fake bolts, and in the tiny groove where old emblems used to sit. I call these the snack traps. They collect every nasty thing the road offers, then pretend they are part of the design.
Watch these spots before decal installation:
Tire shine overspray on the cap face.
Wax haze left after detailing.
Brake dust packed into the cap groove.
Old glue ridges from a past emblem.
Water trapped behind the cap edge.
Polish residue on glossy painted caps.
Tire shine is the sneaky one. It travels farther than you think, especially when someone sprays it like they are fighting bees. If your cap feels slick after washing, it is not ready. Clean it again, and keep the tire sponge far away from your wheel center.
Old glue is the other villain. If you feel a ridge with your fingertip, the decal will feel it too. Use a plastic pick, a safe adhesive remover if the surface allows it, then finish with IPA. Never scrape painted caps with metal unless you enjoy buying new parts and saying words your kid should not hear.
The press and wait rule
Once the backing comes off, do not touch the adhesive. Hold the decal by the edge. Set one side down lightly, check your mark, then roll the rest into place from the center outward. Press like you mean it, but do not crush the dome like you are mad at it.
3M explains that pressure sensitive adhesive needs good surface contact, and firm pressure helps that contact. It also shows that bond strength rises after the part is pressed down, with more strength after the first day and full strength after three days under room temperature conditions. That is why I treat a fresh install like wet paint with better manners. It looks done, but the bond is still settling in.
My press routine is simple:
Cover the decal with a clean soft cloth.
Press the center for a few seconds.
Press outward toward the edge.
Walk your thumb around the full rim of the decal.
Check the edge from every side.
Leave it alone after that.
The leave it alone part is the hardest. People press it, admire it, press it again, poke the edge, turn the cap, press it more, then wonder why lint appears. Do not pet the decal. It is not a puppy, even if you are proud of it.
When to wash after the install
Do not wash right away. The Impossible Stickers FAQ says to avoid washing for at least twenty four hours, and forty eight hours is even better before an automated wash. It also says not to blast the edges up close with a pressure washer. That is not babying the sticker, that is giving the adhesive time to finish its job.
Here is the aftercare I use:
First day, no wash.
Second day, hand wash only if you must.
First week, avoid direct pressure on the decal edge.
Keep harsh wheel cleaners off the fresh badge.
This does not mean the emblem is weak. It means pressure sensitive adhesive gets stronger after contact and time. Rushing a car wash is like baking bread and opening the oven every two minutes. You can do it, but then you deserve the weird loaf you made.
Quick FAQ
Can I use straight isopropyl alcohol on rims?
I use seventy percent rubbing alcohol or an IPA and water mix for most cap faces. Stronger is not always better because it can flash too fast and leave you chasing streaks. Test a small hidden spot first if the cap is painted, coated, or old.
Should I sand the rim before decal installation?
Only sand if the landing zone has rough old glue, oxidation, or high spots. Use light pressure and keep the surface smooth. If you sand deep scratches into the cap, the adhesive has less clean contact, not more.
Can I install decals right after washing the car?
Yes, but only after the cap is fully dry. Water hides in seams and around center caps like it pays rent there. Blow it out with air or wait longer before the IPA wipe.
What if my wheel cap is curved?
A mild curve can work if the decal is made for it, but a deep curve is asking for edge lift. Dry fit first and check the outer edge. If the edge wants to rise before peeling the backing, it will not get nicer later.
Do I need gloves for adhesive prep?
I use gloves after the final wipe and before peeling the backing. Gloves too early just get dirty like hands do. Clean timing beats fancy gloves.
The last wipe is the whole lesson
The cleanest decal installation feels almost boring. Wash, dry, alcohol wipe, dry again, fit, peel, place, press, wait. No drama. No magic potion. No tiny prayer to the wheel gods, though I have tried that and the gods mostly asked for cleaner towels.
The big lesson is this, prepare rims for stickers like the adhesive can only do its job if you do yours first. The sticker is not there to fight grease, wax, tire shine, or old glue. It is there to bond to a clean face and make the wheel look finished. Get the prep right and your rim emblem sits there like it was born on the cap.
When I see a clean install now, I do not think about the sticker first. I think about the two minutes nobody sees. The soap, the dry towel, the IPA wipe, the final press, and the patience after. That is the part that keeps your wheels looking sharp while the guy next to you wonders why his badge is trying to escape.