
The Eraser Wheel: The Professional’s Tool for Removing Brittle Decals
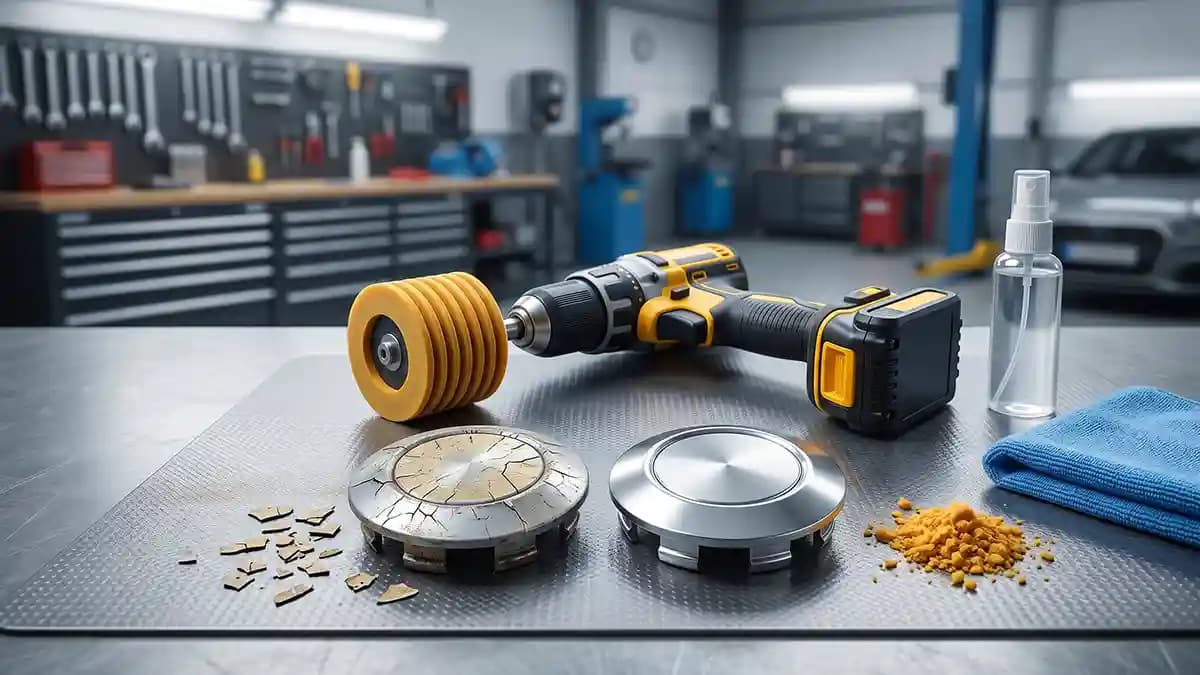
An eraser wheel is the pro tool for brittle decals because it removes old sticker film and baked on glue with friction instead of sharp metal. I reach for it when heat, fingernails, and soft plastic scrapers start acting like they need a nap. Last week I was standing next to a wheel cap that looked like it had been cooked under the sun since the first Fast and Furious movie. The old emblem came off in tiny crumbs, and my thumb was doing the kind of work thumbs were not built for.
That is when the eraser wheel earns its keep. The title sounds like shop talk, but the idea is simple, a rubber wheel spins on a drill and rubs the dead decal away. 3M says its Stripe Off Wheel is made for removing vinyl, decals, tape, graphics, and trim stripe material, and it uses friction rather than an abrasive bite. It also lists a max speed of 4000 rpm, which matters because speed plus pressure can turn a simple job into hot plastic soup.
Why brittle decals fight like tiny criminals
Old decals do not fail in one clean way. Some dry out and crack like a cookie you found under a truck seat. Some lose the printed face but leave glue behind, and that glue grabs dust like it is building a tiny sweater. Some look fine until you touch them, then they break into flakes and make you doubt your life choices.
Here is what usually makes a decal brittle.
Sun cooks the face until the film loses flex.
Brake heat warms the cap again and again.
Road salt and grit chew at the edge.
Harsh cleaners dry out the surface.
Pressure washing lifts one edge, then water works under it.
If the decal still peels in one piece, do not grab the wheel first. Use gentle heat, lift a corner, and pull low and slow. I still like the slow method for fresh stickers and soft vinyl because it gives you more control. For that softer job, I would point a reader to the broader removal tips on the Impossible Stickers blog before making dust with a drill.
But old wheel emblems are rarely polite. They laugh at your hair dryer. They make your plastic scraper feel like a spoon at a steak dinner. When the decal snaps into bits every time you lift it, the eraser wheel stops being extra and starts being the sane tool.
What an eraser wheel actually does
Think of an eraser wheel as a giant pencil eraser with a bad attitude. It spins, touches the decal, and rubs away the film and glue in little rubber crumbs. It is not supposed to grind the cap. It is supposed to skim the junk off the top, like cleaning gum off a shoe without carving the shoe into a boat.
The clean trick is control. You are not trying to win a race against the drill. You are letting the wheel kiss the decal, then move, then kiss again. If you stay in one spot, heat builds fast and the surface under it gets angry.
Use it for these jobs.
Sun baked vinyl that cracks under your fingernail.
Old center cap stickers that leave a thick glue ring.
Painted stripe residue on hard, safe surfaces.
Marine or gel coat graphics, when the surface can take the heat.
Flat wheel cap faces with enough room to work.
Do not use it like a magic wand. It is a tool, not a tiny wizard. 3M says its wheel is suited for small hard to remove areas, works with many drills and rotary tools, and should not be used above 4000 rpm. It also warns that repeated friction creates heat, so heat sensitive surfaces need extra caution.
The first test happens before the drill spins
I do not care how tough you feel, test first. Pick a hidden spot or a small edge where a mistake will not stare at you every time you walk past the car. Touch the wheel for a second, check the surface, then do it again. If the paint gets dull, the plastic softens, or the cap starts to smell hot, stop.
Here is my basic safety check.
Clean the area first so grit does not get dragged around.
Wear eye protection because rubber crumbs fly like tiny bugs.
Use a drill you can control at low speed.
Keep the wheel flat enough to avoid digging with the edge.
Make short passes instead of one long grind.
Let the part cool when it feels warm.
Real talk, most damage comes from impatience. Someone sees the old badge vanish and thinks more pressure means more better. Then the cap gets hot, the paint goes cloudy, and suddenly that five dollar sticker job turns into shopping for new caps. That is not a repair, that is a self made invoice.
My eraser wheel method for brittle sticker removal
I start boring because boring saves parts. Wash the cap, dry it, and remove any loose decal pieces by hand. If the cap is still on the wheel, mask the nearby rim face with painter tape or a clean towel. The goal is not to wrap the whole wheel like a mummy, just protect the places your drill hand can bump.
Then I work in passes.
Set the drill slow enough that you feel in charge.
Touch the wheel to the decal edge, not the clean cap first.
Move side to side with light pressure.
Lift every few seconds and check heat near the work zone.
Brush crumbs away so you can see what is left.
Stop when the sticker film is gone, not when the cap looks polished.
Finish the last glue haze by hand with a safe cleaner.
That last line matters. The eraser wheel is not always the final step. A faint glue haze can stay behind after the big junk is gone. I like to handle that with adhesive remover on a cloth, then soap and water, then an alcohol wipe once the oily cleaner is off. The surface should feel smooth, dry, and boring before any new badge goes on.
If you are replacing the old emblem, this is the moment to measure the clean flat face. Not the shiny outer lip. Not the curve. The flat landing pad. Once that number is real, you can pick fresh wheel center cap stickers that sit flat instead of hanging over the edge like a bad pancake.
Where people mess up with the 3M Stripe Off Wheel
The 3M Stripe Off Wheel is popular because it works fast, but fast tools punish sloppy hands. I have seen people use them like sanding discs. Wrong move. The rubber should roll over the decal, not chew the cap.
The common mistakes are painfully normal.
Running the drill wide open because noise feels useful.
Pressing hard enough to bend the wheel.
Staying in one spot until the surface gets hot.
Using the edge of the wheel like a knife.
Skipping the test spot.
Trying to remove every last stain with the wheel.
The tool does not know you love your wheels. It only knows spin, pressure, and heat. That is why I treat 4000 rpm as the ceiling, not a goal. Most wheel cap jobs feel better slower, because the part is small and your hand needs time to see what is changing.
Also, remember what 3M says about its industrial products. The product page marks the Stripe Off Wheel for industrial or work use and tells users to follow product literature, warnings, and safety rules. That is not there for decoration. It is there because a spinning rubber wheel can still hurt you or wreck a finish when you use it wrong.
When heat beats the eraser wheel
Heat is still my first move when the decal has life left. Warm adhesive lets go cleaner. A soft sticker can peel in one slow pull, and that beats making rubber crumbs all over your bench. If the badge starts to lift as a sheet, stay with heat and patience.
Use heat first when you see this.
The decal bends without cracking.
The edge lifts with a fingernail or plastic pick.
The cap is painted plastic and looks thin.
The surface is curved, soft, or odd shaped.
The glue feels fresh, not crusty.
Use the eraser wheel when heat fails. That means the decal snaps, flakes, or leaves a thick raised glue patch that laughs at a cloth. It is not about being tougher. It is about matching the tool to the mess.
Cleaning the cap after the wheel
After the eraser wheel, the cap will look better but not finished. There will be rubber dust, faint glue, and maybe a dull ring where the old decal sat. Do not stick a new emblem on that. Adhesive does not bond well to dust, oil, or leftover cleaner.
My cleanup routine is simple.
Brush away dry crumbs with a soft brush.
Wipe the surface with a clean microfiber towel.
Use a small amount of adhesive remover for glue haze.
Wash with mild soap and water.
Dry it fully.
Wipe the flat face with isopropyl alcohol.
Touch only the cap edge after final cleaning.
A good cap feels dry and clean, not slick. If it feels oily, wash it again. If your towel grabs little chunks, keep cleaning. If it squeaks under a clean finger, you are close.
Getting ready for the new emblem
A fresh emblem only looks good when the old mess is gone. That sounds obvious, but people rush this part all the time. They clean most of the glue, slap the new badge on top, then wonder why one edge lifts. The wheel did not betray them, the prep did.
Do this before you peel the backing.
Measure the flat face in millimeters.
Check that the cap is flat enough for a dome.
Dry fit the sticker with the backing still on.
Look for raised edges or curved lips.
Line up the logo before pressing.
Press from the center outward.
Leave it alone before washing.
If your size is weird, do not guess. Guessing is how you buy two sets and then start blaming the internet. Send clear photos and measurements through the contact page so the sticker matches the cap you actually have. That saves a second order.
The surface rules nobody wants to hear
Not every surface deserves an eraser wheel. Hard painted metal usually gives you the best shot, while thin plastic caps are the drama queens of the group. Gel coat can work too, which is why these wheels show up around boats and old graphics. The eraser wheel does not care what is under the decal, that is your job.
Here is the quick surface call.
Painted metal, test first with light pressure.
Gel coat, test first and watch heat.
Clear coated alloy, be careful near sharp details.
Hard plastic caps, use short passes.
Soft plastic trim, skip it unless you know it can take friction.
FAQ
Can an eraser wheel damage paint?
Yes, if you run it too fast, press too hard, or hold it in one spot. Used with light pressure and a test spot, it can remove old decals cleanly on the right surface. Heat sensitive plastic and weak paint need extra care.
Is the 3M Stripe Off Wheel better than cheap rubber wheels?
The 3M version has clear published details, including max 4000 rpm, small area use, and friction based decal removal. Cheap wheels can work, but quality is less clear. I like tools with real limits printed somewhere because guessing with a drill is dumb.
Should I use an eraser wheel on wheel center caps?
Use it when the old cap sticker is brittle, sun baked, and breaking into pieces. If the center cap is thin plastic or the finish looks weak, start with heat and a plastic scraper. Always test first.
What do I clean with after using an eraser wheel?
Brush off crumbs, wipe the cap, use a safe adhesive remover for haze, then wash and dry. Finish with isopropyl alcohol before a new sticker. Do not leave oily cleaner under fresh adhesive.
Can I install a new domed sticker right away?
Yes, once the cap is clean, dry, smooth, and fully free of oily residue. Dry fit the new emblem first so you know the size is right. Press from the center out and give the adhesive time before washing.
The garage truth
The eraser wheel is not fancy. It is rubber, a drill, and a little common sense. But when a brittle decal turns into a flaky mess, it can save your fingers, your time, and maybe the cap itself. That is why pros keep one nearby.
My rule is simple. Peel what will peel, heat what needs heat, and use the eraser wheel only when the sticker has turned into crusty nonsense. Clean the cap like the new badge depends on it, because it does. Then fit the fresh emblem and enjoy that tiny center cap glow that nobody else notices until the whole wheel suddenly looks right.