
Electronics Branding: Achieving the High End Look for Your Product
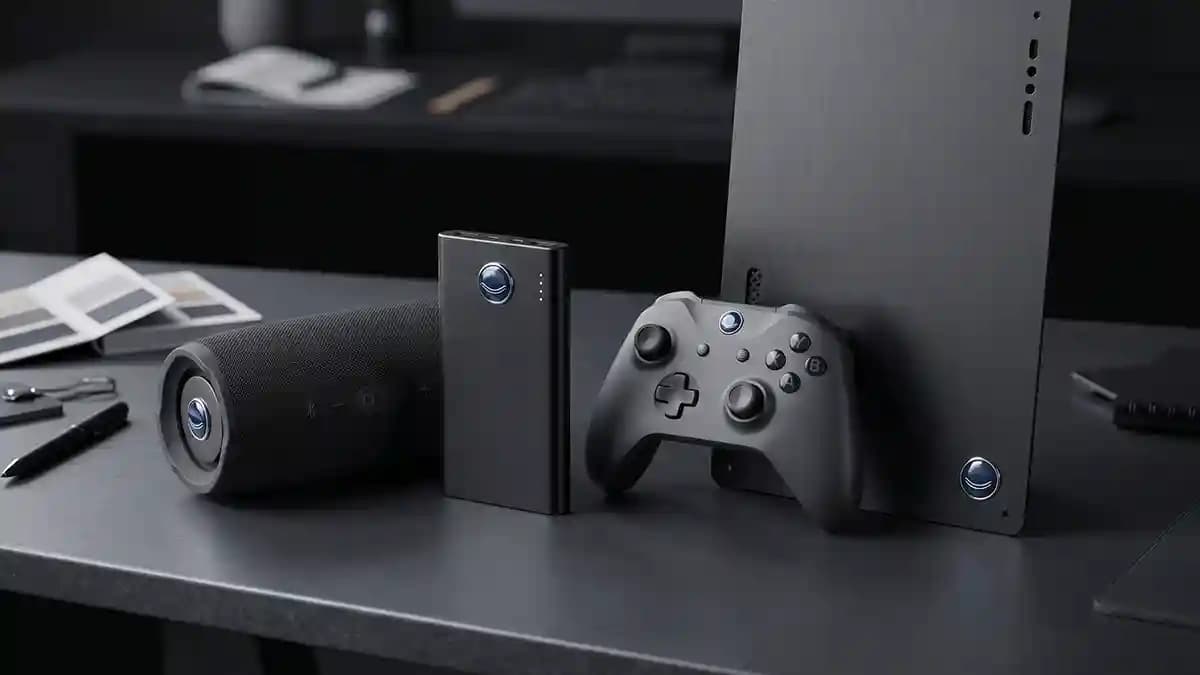
Electronics branding gets the high end look when your label feels like part of the device, not a sad sticker slapped on at the end. That is my review of this title right away, because the answer is simple and a little rude. A product can have clean plastic, nice screws, smooth buttons, and then lose the whole first impression because the logo label looks thin. I have seen it happen on PC cases, power banks, audio gear, small appliances, and one poor little router that looked like it came free with a cereal box.
Last month I had a small black gadget on my bench, the type of thing that should feel expensive just because it was heavy. The body was matte, the button had a good click, and the cable fit tight. Then I saw the brand mark. Flat paper label, soft corners, dull print, and one edge already lifting like it was trying to escape the job.
That is the dumb part about electronics branding. People talk about chips, screens, sensors, battery life, and packaging, but the little badge on the front still does a huge amount of work. The buyer touches it, sees it on the desk, photographs it, and judges it before reading one feature line. Current 2026 branding trend writing keeps pointing at touch, texture, human feel, more personal design, smart packaging, and 3D logo depth, so the small physical detail is not dead at all, it is getting more important.
Why Cheap Labels Make Good Electronics Look Cheap
A cheap label does not whisper. It yells. It tells the buyer that someone cared about the main product, then ran out of patience right before the finish line. You know the look, thin gloss sticker, weak black ink, bad cut, cloudy film, and a logo that sits crooked by half a millimeter.
That half millimeter matters. On a wheel cap it drives me nuts, and on electronics it does the same thing. The human eye loves straight edges and clean centers, especially on devices with simple shapes. A crooked logo on a square charger is like spinach in your teeth during a sales meeting.
A premium domed label fixes that because it adds shape and touch. The clear raised layer catches light, protects the print, and makes the mark feel molded. It is still a label, yes. But when it is sized right, cut clean, and placed in the right spot, it stops acting like a sticker and starts acting like a badge.
Here is what a good electronics label should do.
Make the product feel finished
Protect the printed logo from hands and cleaning
Add a small tactile cue when someone touches the device
Keep the brand mark clean in photos and videos
Match the finish of the product, not fight it
High End Product Labels Are About Feel First
People say they buy with logic. Cute story. Most of us pick up a device and judge it in three seconds like tiny judges wearing invisible robes. Weight, texture, button feel, logo quality, those things all hit before the feature list gets a vote.
This is why high end product labels matter more than many brand owners think. A raised dome gives the finger something to notice. The edge feels smooth, the top feels glossy or soft depending on the finish, and the logo has more depth than flat print. It gives the brain a tiny message that says, this was not the cheapest part they could find.
That message is useful on PC case badges, gaming controllers, audio logos, power banks, smart home hubs, and appliance front panels. I like domed labels most when the product has a clean flat zone. A small recessed rectangle, a flat circle, or a smooth front plate is perfect. If the surface is rough, rubbery, oily, or deeply curved, stop and test first.
The PC Modding Lesson
PC modding teaches this better than any product design lecture. A builder can spend a full weekend routing cables, choosing fans, lining up lights, and cleaning glass panels with the focus of a surgeon. Then the case badge looks like an afterthought. That one weak logo turns a clean build into a near miss.
I once watched a guy finish a black and silver gaming rig that looked mean in the best way. The GPU sat straight, the tubes were clean, the fans matched, and the cable combs were doing their little plastic job. Then he stuck a flat logo label on the front panel and pressed it with his thumb. It wrinkled, and his face did the same thing.
For PC modding, premium decals work because the whole build is about details. The badge can match the fan rings, the coolant color, the motherboard heat sinks, or the case finish. Small does not mean weak. Small means every error is easier to see.
A clean PC badge usually follows these rules.
Keep the logo simple enough to read from arm length
Use strong contrast against the case color
Match metal tones like silver, black, gunmetal, or gold
Keep the badge away from vents and hot exhaust paths
Test the size with paper before you order the final dome
Finish Choices That Make Electronics Branding Look Premium
The finish is where people either get smart or go feral. Shiny chrome on every product is not a brand plan. It is a raccoon decision. Bright thing, grab it. The right finish should match the device, the price point, and the mood you want.
Recent design trend coverage talks a lot about texture, sensory details, warmer minimal looks, metallic touches, and materials that feel honest rather than fake perfect. That fits electronics well because many devices are plain shapes. A tiny label can add the contrast without making the whole product look busy.
My safe choices are gloss black, matte black under a clear dome, silver, brushed metal style, white on black, and small color accents for gaming gear. The big trap is adding too much. I have seen product labels with gradients, icons, tiny slogans, QR codes, product codes, and a logo all fighting inside one little shape. That is not branding. That is a traffic jam wearing makeup.
Design Rules Before You Order Premium Decals
Before you order premium decals for electronics, make the artwork behave. The dome adds depth and gloss, but it will not rescue bad design. If the logo is cluttered, the dome just makes the clutter shinier. That is like putting a tuxedo on a trash can.
Start with the actual product in your hand. Not a perfect mockup on a white screen. Hold the case, panel, lid, or shell and look for the spot the eye finds first. That spot is where the badge should go if the shape supports it.
Use this quick artwork check.
Is the logo readable at normal viewing distance
Does the design have enough empty space around it
Are the colors strong after the clear dome adds shine
Is the size matched to the flat surface
Does the shape suit the device body
Will the label still look good in product photos
If you want to see how print, cutting, doming, curing, and checks work together, the How It’s Made page is a good place to start. It shows why the process matters more than people think. A label this small has no room to hide sloppy edges. The tiny stuff is the loud stuff.
Where Domed Labels Work Best On Electronics
Not every surface deserves a dome. I know, tragic. Use domed labels where they add touch, depth, or brand value. A dome needs a calm flat home, not a weird plastic cliff.
Good places include PC case fronts, speaker boxes, chargers, hubs, audio panels, laptop lids, camera cases, and appliance control panels away from buttons. Bad places are heavy rubber texture, deep curves, soft silicone skins, hot vents, flex zones, and areas cleaned with harsh solvents. Put it in the wrong place and it will complain with lifted edges.
For rough service labels, I would also read the asset tag guide, because electronics often need branding and tracking at the same time. Laptops, chargers, test tools, and camera gear vanish faster than snacks in a workshop. A good tag helps people stop arguing and start scanning.
Smart Labels And The Scan Problem
Smart packaging and linked labels are getting more attention, especially with QR codes, NFC ideas, and personal print runs. That can be useful, but do not let the tech tail wag the product dog. Label trend coverage points toward QR, NFC, and more personal print work, but the label still has to be easy to read and use.
Here is my honest rule. If the code must scan every time, test it before you commit to a dome. Gloss can create glare, curves can bend the code, and tiny sizes can turn smart labels into tiny puzzles for angry phones. Use QR labels only when the code is large, flat, high contrast, scan tested, and linked to a page worth opening.
Bulk Electronics Branding Without Looking Generic
Bulk labels scare people because they think bulk means bland. It does not. Bulk should mean controlled, repeatable, and clean. If you are making fifty smart sensor housings, two hundred PC case badges, or a run of appliance logos, the goal is for the first and last label to feel like siblings, not distant cousins.
This is where planning saves money. Use one master logo file, one main badge size, one backup size for smaller devices, two finish options at most, and one placement rule for each product type. That sounds strict, but strict is good here. Random variety looks messy fast.
For larger runs, Wholesale and Bulk Orders makes more sense than guessing your way through one small order at a time. It keeps the batch thinking clean. Nobody wants to find out on unit number one hundred that the label should have been two millimeters smaller.
How To Install Without Making A Mess
Installation is where confidence turns into comedy. I have seen people clean a device with a sleeve, blow dust on it with their mouth, then wonder why the edge lifted. Your breath is not a cleaning tool. It is warm soup air.
Good install work is boring in the best way. Clean surface, dry hands, careful alignment, firm pressure, done. Do not touch the adhesive. Do not slide the label around like a tiny hockey puck.
Use this install flow.
Wash the surface if it has grease or dust
Dry it fully
Wipe the spot with a safe alcohol wipe if the material allows it
Mark light alignment points with low tack tape
Roll the dome down slowly
Press across the full label with even finger pressure
Leave it alone while the bond settles
The Quality Promise matters here because the label is only part of the result. Materials, print, resin, adhesive, and install all share the blame or the win. A good sticker on a dirty device is still a bad job. Mean, but true.
When Custom 3D Domed Stickers Beat Molded Badges
Molded badges are great when you have huge volume, fixed tooling, and a product that will not change for a long time. Most smaller brands do not live there. They test designs, change colors, create limited runs, and tweak packaging after feedback. A custom dome gives you room to move without paying for hard tooling every time.
That is why custom 3D domed stickers are so useful for small electronics brands, PC modders, repair shops, makers, and appliance upgrades. You can test a look, run a batch, and improve the next one. You can make the product feel more finished without rebuilding the shell. That is a nice little shortcut, and I love a shortcut that does not look cheap.
Use domed labels when you need a premium look without mold tooling, short runs for demos, matching badges across gear and packaging, cleaner branding for small flat zones, better touch than flat vinyl, and a logo that looks good in close photos. This same logic shows up in tiny automotive pieces too. The key fob stickers post is a good reminder that small objects get handled the most. Electronics are the same.
The Simple Buying Checklist
Here is the part I wish every buyer did before sending artwork. It takes ten minutes and saves a surprising amount of pain. Measure the flat zone, not the whole device. Then check the finish in daylight and under shop lights.
Use this checklist.
Measure the exact flat area in millimeters
Choose a shape that fits the product body
Keep the artwork simple
Match the finish to the device
Avoid hot vents and flex zones
Test QR codes if used
Take product photos before the full run
Quick Q and A
Q: What is the best label type for electronics branding?
A domed label is best when you want the logo to feel raised, protected, and premium. Flat vinyl works for simple marking, but it does not give the same touch or depth.
Q: Can I use domed labels on a laptop or PC case?
Yes, if the spot is clean, smooth, flat, and away from heat vents. PC cases are great for this because many panels have clear flat zones.
Q: Are premium decals good for small product runs?
Yes, that is one of their best uses. You can test a logo badge without paying for molded tooling or changing the device shell.
Q: Can a QR code go under a dome?
Yes, but test it first. The code needs enough size, contrast, and low glare so phones can scan it without drama.
Q: What makes high end product labels look expensive?
Clean artwork, exact sizing, strong contrast, a smooth raised finish, and careful placement do most of the work. The label should feel like it belongs on the product.
Electronics branding is not just a logo file. It is the moment someone picks up your device and decides whether it feels serious. A good domed label makes that moment better because it adds touch, depth, and a cleaner finish without making the product loud. Measure the space, keep the design simple, pick the right finish, and install it like you care.