
How to Apply Flexible 3D Domes to Concave Wheel Caps
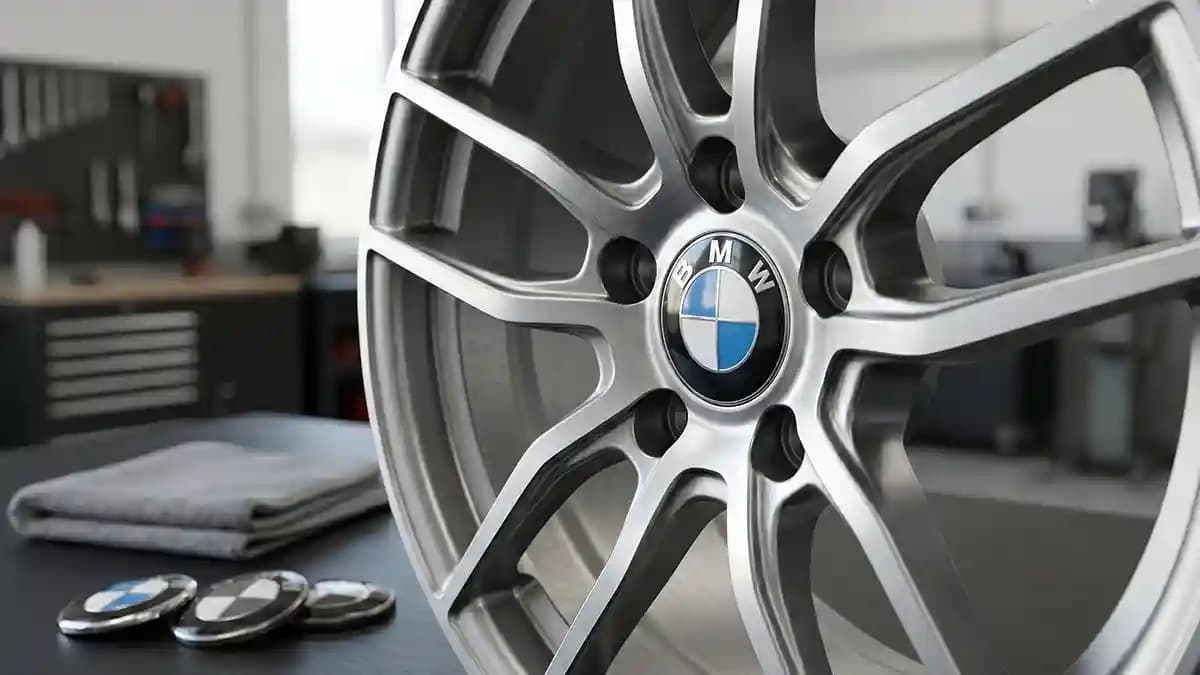
Concave wheel caps need a soft extra flexible 3D dome, gentle heat, a spotless landing spot, and slow pressure from the center to the edge. That is the real answer to the title, because a deep bowl cap makes a raised sticker fight the shape the whole time. I learned this while pressing a fresh dome into a cap that looked like a tiny cereal bowl, and the edge popped back up like it had unpaid bills. The fix is not magic glue, it is tension control.
I was standing at my bench with four wheel caps, one hair dryer, and the kind of false hope you get right before a simple job turns dumb. The first cap was flat, and the dome landed like it wanted to live there. The second cap dipped inward, and the same dome started curling at the rim like a potato chip. That was the small moment that taught me this job is not about sticking harder.
Why concave wheel caps fight domes
A flat cap lets the dome sit with almost no stress. A concave cap pulls the outside edge down while the middle stays proud, so the sticker has to bend and stay bent. Thick domed labels are heavier than flat decals, and the clear polyurethane top adds both depth and load. That is why flexible material and a stronger bond matter on curved surface stickers.
Here is the garage version. Lay a playing card across the face of your center cap. If light shows under the card near the middle, you have a bowl shape. If the card touches most of the face, you have an easy cap and your blood pressure can stay in the normal zone.
Check these before you peel the backing:
The cap face has a clear round landing spot.
The landing spot is smooth, not gritty or cracked.
The dome is the right size for the bottom of the bowl.
The edge of the dome does not hang over a lip.
The cap is warm enough that the material feels relaxed.
That fourth point is where people lose money. They measure the outer cap face, then order a sticker that fits the top rim, not the recessed center. On a concave cap, the real size is the flat or gently curved bottom area, not the whole dish. The Impossible Stickers fit advice says to measure the visible flat circle and choose equal size or about 1 mm smaller, especially when the cap has a recessed face.
Pick the right extra flexible domes
Extra flexible domes are not just regular domes with a better attitude. For deep bowls, I want the soft 45 to 55 Shore DO feel, because the dome has to bend and stay calm instead of fighting back. They are made to bend farther without the edge trying to spring back all day. A normal dome can look fine for ten minutes, then the outer rim starts to lift once the material cools and remembers it hates you.
For concave wheel caps, I look for three things:
A soft dome made for curved faces.
A strong adhesive layer, not bargain bin glue.
A size that leaves breathing room around the edge.
A clean cut with a smooth round outline.
A design that still looks good if it sits 1 mm smaller.
If you are still choosing the part, start with custom wheel emblems and match the design to the cap shape, not just the badge you like. The shiny one in your head means nothing if it sits on the cap like a fried egg on a spoon. I also like the concave and flat wheel caps guide because it makes the soft versus firm choice easy. This is one of those tiny calls that saves you from doing the same job twice.
The prep that saves the edge
Prep is boring until it saves the sticker. I have watched people clean a cap with a shirt sleeve, breathe on it like glasses, then act shocked when the edge lifts. Wheel caps collect brake dust, wax, tire shine, road film, old glue, and whatever mystery slime lives near the curb. Adhesive does not bond to slime, it bonds to clean surface.
My prep routine is simple:
Wash the cap with mild soap and water.
Dry it until no water hides near the rim.
Remove old glue with a safe adhesive cleaner.
Wipe the landing spot with isopropyl alcohol.
Let the surface flash dry before touching it.
Keep your fingers off the adhesive side.
3M surface prep guidance for pressure sensitive adhesives backs up the boring stuff, because clean dry surfaces, firm pressure, and time all help the bond build. Their guidance also notes that heavy oil or grease needs a degreaser first, then the alcohol and water wipe. Bond strength builds with time too, with 72 hours as the full strength mark at room temp.
How to apply 3D resin on a curved cap
This is the part where people rush, and then the cap looks like it lost a fight with a bubble. You do not slap the dome down like a parking sticker. You roll it in, give the material a path, and make the curve work with you. Slow hands win here, even if your brain is yelling to just finish it.
Use this order:
Warm the cap first, not hot, just warm to the touch.
Warm the dome for a few seconds so it bends easier.
Line up the design while the backing is still on.
Peel only part of the backing if the dome is large.
Touch the center down first.
Press outward in small circles.
Work the edge last, all the way around.
Hold pressure at the rim for several slow passes.
The middle first method matters because trapped tension has to go somewhere. If you stick one edge first, then drag the rest into the bowl, the far edge gets loaded like a rubber band. That edge is the first one to lift later. If you land the center first, the dome spreads into the curve with less drama.
Heat rules for curved surface stickers
Heat helps, but heat also ruins things when you get brave for no reason. I use a hair dryer more than a heat gun for this job because it is gentle and harder to overdo. If you use a heat gun, keep it moving and keep it far enough away that the dome never feels soft like melted candy. The goal is flex, not soup.
Here is my safe heat test:
Warm your fingers first so you know what normal feels like.
Warm the cap for a short pass.
Warm the dome for a short pass.
Touch the dome edge with a clean knuckle.
Stop when it feels warm and pliable.
Never aim heat at one spot and stare at it like a villain.
Most sticker problems show up when the garage is too cold, the part is cold, or the adhesive never gets firm contact. Impossible Stickers gives a practical application range of 10 to 32 degrees Celsius, or 50 to 90 degrees Fahrenheit, for sticker installs. Their troubleshooting advice also points at dirt, cold parts, weak pressure, and curved surfaces as common causes of edge lift.
The pressure routine I trust
Pressure is not one big thumb smash. It is a slow set of passes that tells the adhesive, hey buddy, this is your home now. I wrap a microfiber cloth over my thumb so I can press hard without scratching the dome. Then I work in circles from the middle to the outside edge.
Do this after the dome is placed:
Press the center for ten seconds.
Move outward in small circles.
Follow the curve, do not push across it.
Press the outer rim in short sections.
Go around the edge three full times.
Warm the edge again if it feels stiff.
Press the edge one last time with steady force.
Real talk for a second. If the cap is very deep, the right answer is a smaller dome, not stronger fingers. I have tried to force a too large dome into a deep cup, and it made me look like I was trying to teach a cat to sit. The cat did not sit. The sticker did not sit either.
How to know the size is wrong
A wrong size dome tells on itself fast. The edge will sit near the steep wall of the cap instead of on the flatter center. You will press it down, it will look fine, then one little crescent will rise when you turn your head. That crescent is not a small flaw, it is the start of the peel.
Watch for these red flags:
The dome edge crosses from flat area into steep wall.
The logo looks stretched after pressing.
The edge lifts while the cap is still warm.
You feel a hard ridge under one side.
The sticker slides during pressure.
The cap surface has old glue or wax left behind.
If two or more of those show up, stop. Do not keep pressing and praying, because prayer is not a surface prep method. Measure again, clean again, and order the size that fits the actual landing spot. The full shop is the better place to browse once you know the size and shape you really need.
What to do if the edge starts lifting
If an edge lifts right after install, you still have a shot. Warm the cap gently, press the lifted area back down with a clean cloth, and hold steady pressure longer than feels normal. Do not pick at the edge with a knife, because that just adds dirt and turns a small issue into garage comedy. If the adhesive has touched dust already, the fix gets much harder.
Try this rescue pass:
Warm the lifted edge gently.
Press from the center toward that edge.
Hold the lifted section down for twenty seconds.
Let it cool while still pressed.
Keep water away for at least a day.
Avoid pressure washing while the bond sets.
If the same spot lifts again, the surface or size is wrong. A sticker lifting guide is not a shame scroll, it is a map back to sanity, so use the sticker lifting guide before you waste the next one. I know, nobody wants to read directions after losing a sticker. But nobody wants a half peeled badge flapping around like a tiny sad flag either.
Aftercare that keeps the dome down
The first three days matter more than people think. The dome can look done right away, but the adhesive is still building strength under the surface. 3M says pressure sensitive adhesive bond strength builds over time, with full strength at about 72 hours at room temp. That is why I baby fresh wheel caps before blasting them with water.
My aftercare rule is boring and it works:
Let the caps sit dry for 24 hours.
Avoid automated washes for 48 hours.
Avoid pressure washers near the edge for 72 hours.
Use mild soap when cleaning.
Do not scrub the rim of the dome with a stiff brush.
Check the edge after the first drive.
Impossible Stickers also tells customers to wait before hard washing, with 24 hours before a normal wash and 48 hours before an automated wash. That lines up with what I see in the garage. The ones that fail early are usually the ones that got installed cold, touched with oily fingers, then blasted at the car wash like they owed somebody money.
Fast FAQ
Can I put flexible 3D domes on any concave wheel caps?
No, not every cap plays nice. A shallow concave cap with a smooth center is a good match, but a deep bowl or rough texture is trouble. If the edge lands on a steep wall, go smaller or use a different cap.
Do I need a heat gun?
No, a hair dryer is safer for most people. A heat gun works only if you keep it moving and stay careful. Warm and bendable is the goal, not hot and floppy.
How small should the dome be?
For recessed caps, choose the size that fits the bottom landing spot, not the outer cap face. Equal size or about 1 mm smaller is the safer call. That small gap looks better than a lifted edge.
Why does my dome lift only on one side?
One side is usually dirt, weak pressure, cold material, or the curve getting too steep. It can also happen when the cap face is not even. Clean, warm, press again, and if it lifts again, the size is wrong.
Can I install the caps on the car?
You can, but I do not love it. Removing the caps gives you better light, better pressure, and fewer weird wrist angles. On the car, you end up crouched like a confused frog, and the sticker knows.
The garage answer
Flexible 3D domes work on concave wheel caps when you treat the curve with respect. Measure the bottom landing spot, choose extra flexible domes, clean like you mean it, warm the parts gently, and press from the center outward. Do that and the sticker sits down clean, the edge stays quiet, and the wheel center looks finished instead of almost finished. That tiny detail is the whole point, because wheels do not need much to look sharp, but they do need the right 1 mm.