
Polishing Polyurethane: Can You Polish a Polyurethane Dome and Restore Old Emblems?
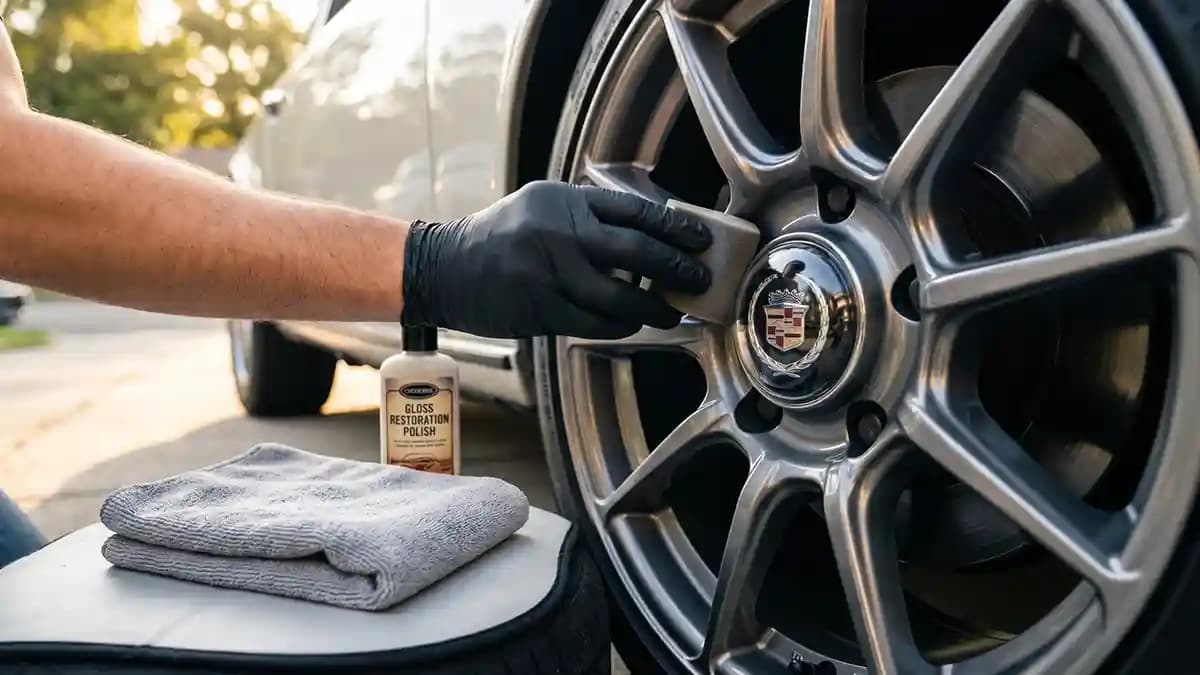
Polishing polyurethane is safe if you treat the dome like clear plastic, not like a chunk of metal, and yes, it can bring gloss back to old emblems with light haze or tiny scuffs. That is the whole answer before we get fancy. I learned that while kneeling beside a set of tired wheel caps that looked fine from ten feet away and sad from two feet away. I wiped one clean, gave it a careful hand polish, and the shine came back like the badge had just remembered its job.
That little win matters because old emblems can make a clean car look lazy. The problem is not always the sticker underneath. Most of the time, the clear raised layer has surface grime, tiny wash marks, or a dull skin that needs gentle care, not violence with a rotary buffer. Tiny part, big mood.
Why old domed emblems lose shine
A polyurethane dome is basically a clear raised lens over the printed design. It gives the emblem depth, gloss, and that finished badge look that flat vinyl does not have. But the dome lives on the wheel, which is a nasty place full of brake dust, road grit, water spots, sun, salt, and tire shine that somehow gets everywhere. The poor little badge lives in a dirt cannon.
Here is what usually kills the shine first.
Brake dust sits on the dome and acts like gray sand.
Harsh wheel cleaner dries on the clear surface.
Dirty wash mitts drag grit across the badge.
Pressure water hits the edge and drives grime under weak spots.
Sun bakes leftover soap into a dull film.
Road salt dries and leaves crusty marks.
Cheap polish or heavy compound chews the surface instead of clearing it.
They see a dull dome and think it needs aggressive cutting, like paint correction on a scratched hood. No. The dome is small, curved, and soft enough that heat and pressure can make it worse fast. Treat it like a tiny clear lens, because that is how it behaves.
First decide if polishing is worth it
Before I polish anything, I do the ugly inspection. I clean the emblem with mild soap and water, dry it, then look at it under bright light. If the marks vanish when the surface is wet, polishing has a real shot. If the dome has cracks, deep cuts, yellow resin, or loose edges, polish will only make you feel busy.
Use this quick test before you touch a polish bottle.
Wet the dome with clean water.
Look at the shine from the side.
Check if the haze fades while wet.
Feel the edge with a clean fingertip.
Press gently near the center and watch for movement.
Check for cracks that catch a fingernail.
Look for yellow color inside the dome, not on top.
A good polish candidate looks dull but still solid. The edge is stuck down, the dome is clear under the haze, and the print underneath still has color. A bad candidate has cracks, peeling, deep gouges, or cloudy resin that stays cloudy when wet. That is a replacement job wearing a fake mustache.
My safe polishing kit
I keep the kit boring on purpose. Boring is good here. Small tools win this job. I want gloss, not a badge that looks like I attacked it with a kitchen sponge.
Here is what I use.
Mild car soap.
Clean water.
Soft microfiber towels.
Cotton swabs for the edge.
A gentle clear plastic polish.
Foam applicator pad.
Painter tape if the badge sits near fresh wheel paint.
Soft detailing brush for dried dirt around the edge.
Patience, which is free but weirdly rare.
I do not start with paint compound because most compounds are built for bigger, harder surfaces and more correction. A dome is tiny, curved, and easy to overwork. If your elbow starts acting like you are sanding a boat, stop, because you are doing too much. This job rewards soft hands, not heroic nonsense.
How to polish a polyurethane dome by hand
It gives you control, keeps heat low, and lets you feel the surface while you work. I like that because the dome tells you what is happening before it gets ugly. Machines do not listen, they just spin and judge you. That is why I start by hand, even when a machine is sitting two feet away.
Follow this order.
Wash the emblem with mild soap and clean water.
Rinse away every bit of grit.
Dry the dome with a soft microfiber towel.
Clean the edge with a damp cotton swab.
Put a pea size dot of clear plastic polish on a foam pad.
Rub the dome in small circles with light finger pressure.
Work for ten to fifteen seconds, then stop.
Wipe with a clean microfiber towel.
Check the gloss under a light.
Stop after two or three light rounds.
That last step is not a joke. The goal is to remove a thin dull surface film, not grind the dome into a new shape. If the first round does nothing, pushing harder is usually not the answer. I have seen people polish one tiny emblem like they were trying to win a strongman contest, and the badge still looked bad, just warmer.
When a machine polisher is a bad idea
I do own machines, and I love them for paint. But on a small polyurethane dome, they are usually too much tool for too little job. The pad grabs the curved surface, heat builds fast, and suddenly your badge has a weird flat spot or cloudy patch. Then the garage gets loud in a bad way.
Skip the machine if any of this is true.
The emblem is smaller than a drink coaster.
The dome sits on a wheel center cap.
The edge is close to lifting.
The badge is old and slightly soft.
The surface is curved or raised.
The print below is rare or hard to replace.
You are tempted to use high speed to hurry.
If you must use a machine on a larger dome, use the softest foam pad, the lowest safe speed, almost no pressure, and very short passes. Keep the pad moving and stop before the surface gets warm. But real talk, for wheel center emblems, I still do it by hand. Your fingers are smarter than a spinning pad on a part that small.
What not to use on a dull dome
This is the part where I save you from the cabinet of bad ideas. It has old wax, tire gel, glass cleaner, metal polish, and one bottle with no label that smells like regret. None of that belongs on a polyurethane dome. If the bottle makes you squint, do not put it on your badge.
Keep these away from old emblems.
Metal polish.
Heavy rubbing compound.
Sandpaper.
Magic cleaning pads.
Ammonia glass cleaner.
Strong wheel acid.
Brake cleaner.
Acetone.
Tire shine.
Stiff brushes.
The tire shine one gets people. You spray the tire, it mists onto the wheel cap, and the dome gets a greasy film that attracts dirt like a magnet in a screw drawer. Then the emblem looks dull, so you wash harder, which makes more marks. The fix is boring again, clean gently, polish lightly, and keep slick products away from the badge face.
Restoring gloss versus hiding damage
Restoring gloss means you are improving the clear surface that is already there. Hiding damage means you are trying to cover a problem that has gone too far. Those are not the same job. Know when to save a part and when to stop feeding it time.
Here is my simple call.
Light haze means polish it.
Fine wash marks mean polish it.
Water spots mean clean first, then polish.
Surface scuffs mean try one light polish round.
Deep scratches mean replace it.
Yellow resin means replace it.
Cracked dome means replace it.
Loose edge means fix the bond or replace it.
Faded print under a clear dome means replace it.
Chipped cap under the sticker means repair the cap first.
If you need new badges, start with the wheel emblems section and match the size before you fall in love with the design. If the emblem is a Toyota badge and the cap face is still flat, a Toyota TRD domed badge is the kind of clean replacement that makes sense. And if you want to know why the material matters, read the guide on epoxy versus polyurethane before buying the cheapest shiny thing online. Cheap shiny things have hurt enough people.
Old emblem care after polish
Once the gloss is back, do not celebrate by blasting the badge with a pressure washer. That is like cleaning your glasses with gravel because you are excited they look clear. You want to keep the surface clean without loading it up with new marks. The badge will keep looking good if you stop giving it extra chores.
My care routine is simple.
Rinse loose dirt first.
Wash with mild car soap.
Use a clean microfiber towel.
Wipe the dome in one gentle direction.
Clean around the edge with a soft brush.
Dry the badge after washing.
Keep tire shine off the dome.
Keep pressure washer tips away from the edge.
Recheck gloss every few months.
Do not baby the car like it lives in a museum. Just stop treating the emblem like a floor tile. Clear parts show abuse first. That is true for headlights, piano black trim, and these little raised badges.
Scuffed sticker repair without making it worse
Scuffed sticker repair starts with knowing what kind of scuff you have. A white transfer mark from a brush is usually easy. A scratch you can feel with a nail is not. A cloudy patch from chemical damage looks fixable, then sits there laughing at you.
Use this repair map.
For dirt film, wash and dry only.
For greasy haze, use mild soap twice.
For light scuffs, hand polish with clear plastic polish.
For water marks, clean first and polish second.
For edge dirt, use a damp cotton swab.
For loose edges, stop polishing and replace the badge.
For deep cuts, replace the badge.
For dull yellow resin, replace the badge.
For faded artwork, replace the badge.
If a dome still has good bones, polishing polyurethane can bring it back and make the wheel look sharp again. If the clear layer is cracked or the print is cooked, replacement saves time and looks better. The trick is being honest before you waste a Saturday making circles with a towel. No shame in quitting on a dead sticker.
How I finish the job
After the last wipe, I step back and look at all four wheels from the same angle. One shiny badge and three dull ones makes the car look like it got dressed in the dark. If one emblem needed polish, the others probably need at least a gentle clean. This is not being picky, this is just having eyes.
I also compare the gloss in daylight, not just garage light. Garage light lies. It hides water spots, glare, and weird marks that jump out near a store window. Daylight tells the truth, sometimes rudely, but that is why we use it.
If you are restoring a faded cap face instead of polishing a good dome, the Toyota TRD restoration guide shows the same idea from the replacement side. Measure the flat face, clean the surface, and do not stick new gloss over loose junk. The eye lands in the center of the wheel, so that little circle has to look intentional. Do that right and the whole wheel looks cleaner.
FAQ
Q: Can you polish a polyurethane dome with car polish?
A: Yes, but use a gentle clear plastic polish first. Regular car polish can work only if it is very mild, but heavy compound is too risky for a small raised dome.
Q: How many times can I polish an old domed emblem?
A: A few light hand polish sessions over its life are fine. If you need to polish it every month, the surface is getting abused or the dome is near the end.
Q: Will polishing remove deep scratches?
A: No. Polish helps with surface haze, light scuffs, and tiny wash marks. A deep scratch that catches your nail needs replacement, not more pressure.
Q: Can I wax a polyurethane dome after polishing?
A: A mild wax can add some slickness, but keep it thin and avoid buildup at the edge. Do not use wax to hide dirt, because trapped grime turns into more haze.
Q: Why did my dome get cloudy after cleaning?
A: The cleaner was too harsh, the towel was dirty, or the dome had old chemical damage waiting to show itself. Wash with mild soap first, then try a light hand polish only if the surface is still solid.
Polishing polyurethane is not magic, but it is one of those small jobs that pays off fast when the dome is still healthy. Clean first, inspect honestly, polish gently, and stop before your ego takes over. If the gloss comes back, you saved the emblem and the wheel looks cared for again. If it does not, replace the badge and move on with your life, because your Saturday deserves better than fighting a dead sticker.