
The Chemistry of Adhesion: Why Domed Labels Need High Tack Glue
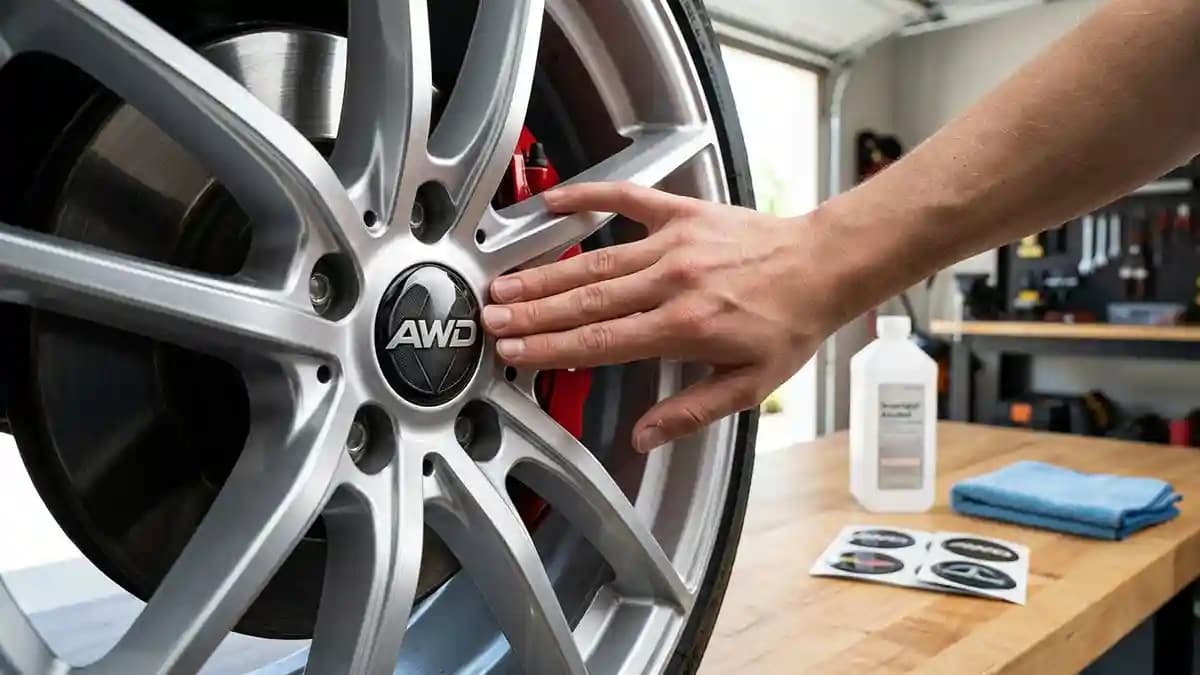
High tack glue is the reason a thick domed label stays on the part instead of lifting at the edge like a cheap price tag on a hot window. That is the answer to the title right away, and I learned it while staring at a wheel cap that looked perfect on the bench, then looked drunk two days later on the car. The print was sharp, the dome was glossy, and the size was right, but one edge had started to curl up like it had somewhere else to be. I touched it, made a face, and realized the glue was not keeping up with the dome.
A flat sticker is light, thin, and easy to keep down when the surface is clean. A domed label is different because it has weight, thickness, edge tension, and a clear raised top that needs full support under the whole base. That clear dome gives the badge its rich look, but it also makes weak adhesive show its flaws faster. The adhesive under a 3D emblem is not a boring detail on the back, it is the part doing the ugly work while the shiny top gets all the praise.
Why high tack glue matters under a domed label
I like to explain high tack glue with a dumb garage test. Press your palm on a clean glass table, then press it on a dusty rubber floor mat. Same hand, same pressure, very different grip, and one of them makes you look like you slapped a dirty pancake. Sticker glue works the same way, because it needs contact, clean surface, and enough grab at the start to stay put while the bond builds.
Here is what the glue has to fight on a domed label:
The dome is thicker than flat vinyl
The raised edge catches fingers, towels, and wash water
The part heats up in sun or near brakes
The surface can be plastic, painted metal, coated alloy, or old trim
The sticker has to stay flat while the adhesive settles
That first grab is what people call tack. It is the instant bite you feel when the sticker touches the part. Low tack glue feels polite, like it is asking permission. High tack glue grabs like a toddler holding a candy bar, and that is what you want when the label is thick or living outside.
Adhesion chemistry in plain garage English
Adhesion chemistry sounds like a school topic that makes your forehead hurt. It is not that bad. For stickers, the simple version is this, the glue has to flow into tiny surface gaps, touch as much surface as it can, then hold on while heat, water, dirt, and time try to pull it back off. If the glue cannot spread across the surface, it never gets a real handshake.
Pressure sensitive adhesives need good wet out before they can interact well with the surface, and surface energy has a huge say in whether that wet out happens. Avery Dennison explains that low surface energy surfaces make wetting out hard, similar to rain beading on waxed paint. It also says tackified or modified acrylic adhesives improve grip on difficult plastics. The garage answer is shorter, if the glue cannot lay flat and bite, the edge loses. Surface prep matters just as much as the glue itself. 3M says most VHB tape surfaces are best cleaned with a 50 to 50 mix of isopropyl alcohol and water, and that the bonding surface should be clean and dry for best adhesion. I know, cleaning sounds boring. But boring is cheaper than watching a fresh badge fly away like a tiny UFO at the car wash.
Why thick domed labels are harder to hold
A thin flat decal bends and follows the surface with less drama. A domed label has a clear resin top that adds body, gloss, and protection, which is why it looks like a small factory badge instead of a paper sticker. Impossible Stickers shows the basic build in its production flow, print, cut, doming, curing, and final quality checks, and that raised dome is what gives the badge depth and a tougher wipe clean surface. That same raised body also means the adhesive needs to do more than just sit there and look busy.
The hard part is the edge. The center of a domed sticker usually behaves because it has the most contact and the least abuse. The outer rim is where wash towels catch, water pushes, dust sits, and curves try to bend the sticker upward. If the adhesive is weak at the edge, the rest of the label can be perfect and still fail in the most annoying way possible.
I check for these edge risks before I trust any domed label:
The label lands fully on a flat surface
No part of the edge sits on a bevel
The cap face is smooth, not chalky or rough
The sticker is not too large by even 1 mm
The adhesive backing is not touched by fingers
The label gets firm pressure after placement
When one of those is wrong, the edge starts plotting against you. It may not lift today. It may wait until you wash the car, because apparently stickers enjoy timing their failures for maximum insult. And yes, I have had one peel after I showed the wheel to a friend like I was showing off a trophy. Tiny lesson, big shame.
The clean surface rule nobody gets to skip
I have seen people install a beautiful domed emblem on top of brake dust, wax, old glue, tire shine mist, and something I can only call driveway sadness. Then they blame the sticker. Real talk, glue is strong, but it is not magic. It cannot bite through oil, soap film, road grime, polish, or fingerprint grease.
Do this before applying heavy duty stickers:
Wash the part with mild soap and water
Dry it fully, including the edge and recess
Remove old glue if anything feels raised
Wipe the landing area with isopropyl alcohol
Let the surface flash dry before placing the label
Do not touch the adhesive with bare fingers
Press the label from the center outward
The alcohol wipe is not a fancy ritual. It removes the junk that blocks wet out. If the surface still feels slick after cleaning, clean it again. If it feels chalky, cracked, greasy, or soft, the sticker is already starting with a handicap, like trying to run a race in wet socks.
Surface energy, or why some plastics act like jerks
Some surfaces love adhesive. Glass, clean metal, and some painted parts give the glue a good place to spread. Other surfaces are low energy, which means the adhesive wants to bead up instead of flow across them. Avery Dennison names plastics like PE and PP as surfaces where pure acrylic adhesives do not give enough peel strength without help from added tackifiers or modified formulas. That is why domed label adhesive has to match the job. A label for a clean indoor panel does not need the same bite as a badge on a wheel cap or outdoor machine. A soft rubber like trim piece, oily plastic, or rough molded texture is not the same as a smooth painted cap. Treating all surfaces the same is how people end up with one good install and three sad corners.
This is also why Impossible Stickers keeps the flat surface rule clear. The How We Work page says wheel emblems, domed stickers, and resin emblems are intended for flat, smooth surfaces, because deep bowls, strong curves, and heavy texture are where edges lift over time. That is not a sales line. That is physics with dirty hands.
Pressure, temperature, and the 72 hour rule
Here is a mistake I made years ago. I placed a badge, tapped it twice with two fingers, then acted like I had installed a windshield. Wrong. Pressure sensitive adhesive needs pressure because pressure helps the glue wet out and make more contact. A gentle tap is not pressure, it is a tiny round of applause.
Use this pressure routine:
Place the sticker once and do not slide it around
Press the center firmly with your thumb
Work outward in small circles
Hold pressure around the full edge
Use a soft cloth so you do not scratch the dome
Press again after a few minutes
Leave it alone after that
Glue hates drama, and temperature brings drama. A cold sticker feels stiff, a cold cap does not help wet out, and cold adhesive acts like it woke up angry. On the other side, a hot part can soften things too much and make placement harder. The sweet spot is a clean, dry, mild garage where your hands are not freezing and the part is not hot enough to cook an egg. The label can feel stuck right away and still not be at full strength. Avery Dennison notes that some pressure sensitive systems take time to reach final peel adhesion, with certain acrylic hybrid adhesives building final adhesion over a longer period. That is why I tell people to wait 72 hours before pressure washing. The first grab holds the part in place, but the bond keeps building while the adhesive settles into the surface.
For the first 72 hours, keep it simple:
No pressure washing
No harsh wheel cleaner
No scraping the edge with a towel
No picking at the corner to test it
No heat gun experiments after placement
No mud bath if you can avoid it
No brag rubs with your thumb
That last one sounds silly, but people do it. They install a badge, then rub the edge ten times to admire their work. Leave it alone. Let the glue win quietly.
When high tack glue still cannot save the job
High tack glue is strong, but it does not fix a bad landing area. If the surface is deeply curved, the thick dome wants to stay flat while the cap curves away. That creates tension at the edge. The adhesive then has to fight shape, dirt, heat, and water at the same time, which is a rude amount of work for a tiny circle.
Skip the install when you see this:
The cap face is a deep bowl
The sticker edge lands on a slope
The surface is rubber like and soft
Old glue is still raised
The cap is cracked or flaking
The sticker is bigger than the flat pad
The part stays oily after cleaning
This is where a smaller size often wins. People want the badge to fill the whole space, but full size is not always right size. A badge that is 1 mm smaller and sits flat beats a bigger badge that climbs onto the curved edge. Your eye forgives a neat hairline gap faster than it forgives a lifted corner.
Best places for heavy duty stickers
Heavy duty stickers make sense when the part gets touched, washed, moved, or seen a lot. Wheel center caps are the obvious example, but the same rule applies to tool tags, machines, outdoor equipment, key fobs, control panels, and product badges. If a flat sticker will get rubbed, wet, or picked at, a domed label with the right glue is the smarter build. It looks better, but more important, it stays put when the job is real.
For car parts, I always start with the surface before I start with the design. Browse the shop all products, look at the style you want, then measure the real flat landing zone on your part. If you are new to the clear raised finish, the guide on what domed resin stickers are gives you the simple layer view. And if you care how the badge gets made, the How It’s Made page shows the print, cut, dome, cure, and check process.
Quick Q and A
Q: Why do domed labels need high tack glue?
A: Domed labels are thicker and heavier than flat stickers. High tack glue gives stronger first grab and better edge hold, which keeps the badge flat while the bond builds.
Q: What is wet out in sticker adhesion?
A: Wet out means the adhesive spreads across the surface and makes close contact. If it cannot spread, it cannot grip well, even if it feels sticky at first.
Q: Can high tack glue stick to any surface?
A: No. It still needs a clean, dry, flat surface. Deep curves, rough texture, soft rubber, and oily plastic can beat even strong glue.
Q: Should I use alcohol before applying a domed sticker?
A: Yes, on most hard surfaces. Clean first, then wipe with isopropyl alcohol and let it dry before applying the sticker.
Q: How long before I can wash the car?
A: Wait 72 hours before pressure washing or using harsh wheel cleaner. The badge can feel stuck right away, but the bond needs time to build.
Final garage note
High tack glue is not the fun part of a domed label, but it is the reason the fun part stays where you put it. The shine gets the compliments. The clear dome gets the touch test. The adhesive sits underneath doing the thankless work, fighting heat, wash water, dust, and the bad choices we make in cold garages.
So before you order or apply a domed label, think like the glue. Is the surface clean. Is it flat. Is it dry. Is the size right. Will the edge sit down with full contact. If the answer is yes, you are set up for a strong install. If the answer is no, fix the surface, pick a smaller badge, or choose a better base.
That is the whole trick. Good design gets attention, good resin adds depth, and good adhesive keeps the whole thing from turning into driveway confetti. Match the label to the surface, prep it like you mean it, press it like you are not scared of it, then leave it alone.