
The IPA Wipe: The Single Most Important Step in Application
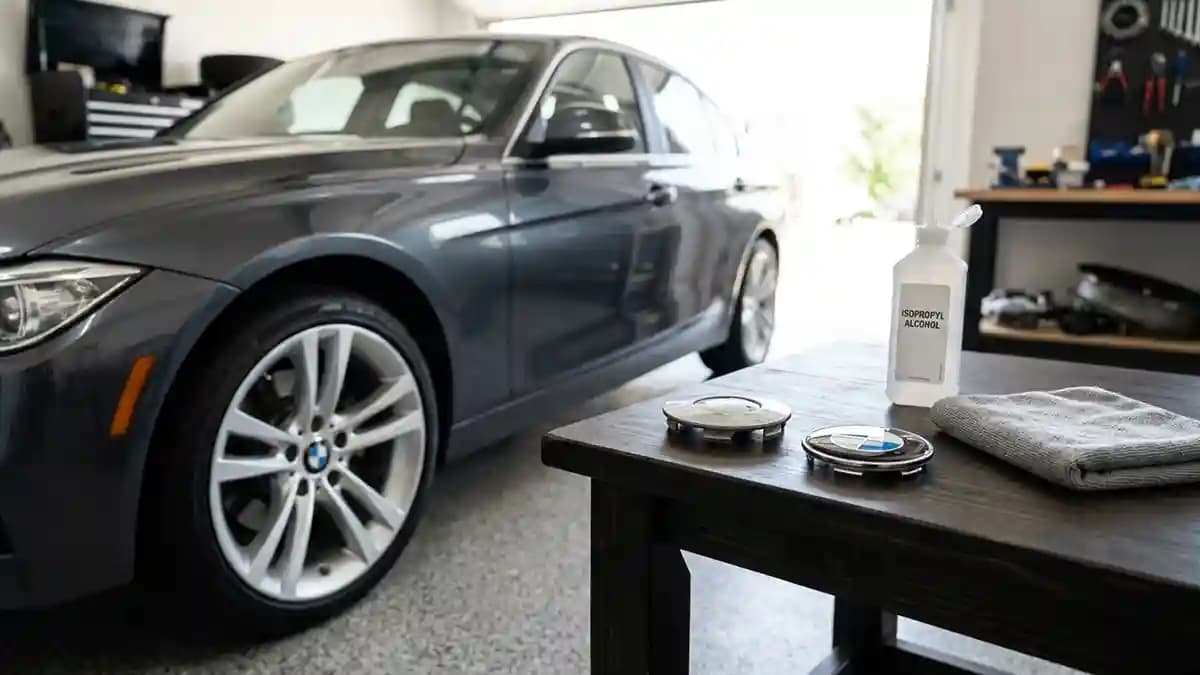
IPA wipe is the single most important step in sticker application because it removes the invisible junk that makes good adhesive act like wet noodles. I learned this while standing beside a clean looking wheel that was, in fact, lying straight to my face. The cap looked dry, the badge looked perfect, and my confidence was doing pushups. Two days later, one edge lifted like it wanted to leave town.
That tiny lift was not magic. It was skin oil, wax, brake dust film, and old dressing sitting on the cap like a greasy little welcome mat. The sticker never really touched the surface. It touched the dirt on top of the surface, which is like shaking hands while wearing three pairs of oven gloves. You can press harder, curse louder, and stare at it with mechanic eyes, but bad prep still wins.
What the IPA wipe actually does
Isopropyl alcohol cleaning sounds boring until it saves you from buying the same badge twice. IPA cuts through light grease, finger oil, wax haze, polish film, and that weird road film wheels collect after weeks of normal driving. It also dries fast, which matters because adhesive hates moisture trapped under it. Clean and dry is not a cute suggestion, it is the whole deal.
Here is the plain version.
Soap removes dirt you can see
Water rinses loose grit away
Drying removes trapped moisture
IPA removes oils and films you cannot see
A final dry wipe takes away the last bit of loosened junk
That order matters. Do not use IPA like it is a magic bath for a filthy wheel cap. Alcohol is good, but it is not a pressure washer in a tiny bottle. If the cap has mud, salt, brake dust, or old glue chunks on it, wash first. The IPA wipe is the final clean, not the whole cleaning crew.
I see people skip straight to the alcohol all the time. They put a few drops on a dirty rag, smear the wheel face, and call it ready. That is not cleaning, that is moving grime into a nicer pattern.
Why wheel caps are harder than normal stickers
A laptop sticker has a soft life. A wheel center cap lives in heat, water, grit, brake dust, and the occasional car wash lance held way too close by someone named Gary. Gary means well, but Gary destroys weak installs.
Domed wheel emblems need a clean bond because they are thicker than flat decals. A raised dome has weight, edge height, and more surface for water to push against. If the edge is sitting on wax or oily film, the adhesive loses the fight early. That is why a proper prep routine matters even more for Wheel Emblems than it does for a tiny flat label.
Think of the adhesive like a suction cup for glue. It needs to sit against the real surface, not dust, wax, silicone shine, or old polish. If there is a thin layer in between, the sticker is not stuck to the cap. It is stuck to the problem.
The worst part is the surface can look clean. That is why people get fooled. A glossy center cap under garage lights can look ready, while still carrying tire shine mist, wax, hand oil, and brake grime. Your eyes are not enough here. Your towel is the truth teller.
My five minute prep routine
I do not make sticker application fancy because fancy is where people start adding bad ideas. The goal is simple, clean the cap, dry the cap, wipe the cap, place the badge, press it, leave it alone. No dance moves. No mystical installer chant.
Use this routine when the old cap body is still solid and the front face is flat enough for a domed sticker.
Wash the wheel cap face with mild car soap
Rinse until no soap or grit is left
Dry the face and the outer edge with a clean towel
Put IPA on a clean lint free cloth, not straight on the cap
Wipe the bonding area in one direction
Flip to a dry part of the cloth and wipe again
Wait until the surface is fully dry
Test fit the sticker before peeling the backing
That last step saves pride. A sticker with the backing still on can be moved around all day. A sticker with the backing peeled is a tiny trap with a logo on it. Once adhesive touches the surface, you do not want to drag it around like a shopping cart with one bad wheel.
The right cloth matters more than you think
A dirty towel can ruin the whole job. I know that sounds dramatic, but I have watched it happen. Someone grabs the same rag they used for tire shine, wipes the cap, and then wonders why the edge lifts. That rag did not clean anything, it brought a tiny oil parade.
Use clean cloths and keep them separate.
One towel for the soap wash
One towel for drying
One lint free cloth for the IPA wipe
One dry lint free cloth for the final wipe
No old tire shine towels near the cap
Microfiber works well if it is clean and not full of wax or dressing. Paper towels can shed fibers, so use them only if they are strong and clean. Cotton shop rags can work, but not if they smell like oil, fuel, polish, and every bad decision from last month. Clean cloth means clean cloth, not almost clean cloth with a backstory.
Do not touch the cleaned surface with bare fingers after the wipe. Your skin leaves oil faster than you think. One thumbprint can sit right under the edge and become the weak spot. It is rude, honestly. Your own hand betrays you.
What IPA strength should you use
For most sticker application work, 70 percent IPA is a smart choice because it cleans well and gives you a little working time before it flashes dry. Very strong IPA can dry so fast that it gives you less time to wipe the lifted grime away. A mix with some water also helps with certain dirt and residue. That is why many pro prep guides talk about IPA and water, not just pure alcohol.
Here is my simple shop rule.
Use 70 percent IPA for normal wheel cap prep
Use a clean cloth, not a soaked mess
Wipe while the surface is wet enough to lift residue
Dry wipe before it fully disappears
Let the cap sit until it is dry to the touch
Do not flood the cap. If alcohol runs into grooves, clips, cracks, or the back side of the cap, you made extra work for no reason. A damp cloth is enough. You are cleaning the badge landing zone, not baptizing the wheel.
Also, do not use random cleaners with shine agents. Anything that leaves gloss, scent, wax, silicone, or slickness is the enemy. Some household sprays make a surface look clean but leave a film behind. That film is where adhesives go to cry.
The surfaces that need extra care
Not every cap face acts the same. Painted alloy, plastic center caps, clear coated caps, older emblems, and blank universal caps can all clean a bit different. IPA is useful, but you still need common sense. Test a hidden spot first if the surface is old, painted, or unknown.
Be extra careful with these.
Fresh paint that has not fully cured
Old clear coat that is already flaking
Soft plastic with a cheap coating
Caps with ceramic coating or wax on top
Old emblems with raised or cracked artwork
Curved caps where the dome edge has poor support
If the surface is cracked, loose, or peeling, cleaning will not fix it. You cannot stick a nice badge on a weak layer and expect it to hold forever. The new adhesive bonds to whatever is on top. If the top layer falls off, the sticker goes with it like a tiny passenger on a sinking boat.
For badly worn caps, remove loose material first. If old adhesive is still there, clean it off before the final IPA wipe. If the cap is too curved or stepped, read Domed Stickers vs Vinyl Decals for Wheel Caps before you force the wrong product into the wrong shape. A clean fail is still a fail.
The mistake that kills the edge
The edge is where sticker application gets judged. The center can look perfect while the edge is secretly planning a mutiny. Water hits the edge first. Dust collects there first. Pressure from washing finds that tiny gap first and starts pulling.
Most edge lifts come from one of these problems.
The cap was not cleaned with IPA
The cap was wet near the outer edge
The sticker was too large for the flat face
The surface had wax or tire shine on it
The installer touched the adhesive with fingers
The badge was pressed lightly and then ignored
The car was washed too soon after install
I press domed emblems from the center outward because it pushes air and stress toward the edge. Then I hold firm pressure for about thirty seconds. Not a tiny polite tap. Real pressure. You want the adhesive to wet out against the clean surface.
Then comes the hard part. Leave it alone. Do not poke the edge every ten minutes like you are checking if bread has risen. Do not wash the car right away. Do not aim a pressure washer at the badge and call it a test.
Why IPA wipe helps the expensive badges too
Some people think premium stickers do not need prep. Wrong. Better materials give you a better chance, not a free pass from physics. A premium polyurethane dome, clean print, and strong adhesive still need a clean place to land. Even the best badge looks silly when installed on grime.
This is where Epoxy vs. Polyurethane: The Science of Why Cheap Stickers Fail matters. A good dome protects the print and keeps the badge looking clear. But the adhesive side still depends on surface prep. Top quality on top cannot rescue filth underneath.
I like ordering from the Shop when the cap size and shape are already clear, but I still do the prep like the badge cost ten times more. That mindset saves money. Measure right, clean right, press right. The fancy part is boring, and that is why it works.
The same logic applies to custom sizes and brand style upgrades. If the face is 60 mm, clean the 60 mm landing area. If the visible flat circle is smaller than the cap lip, clean the flat circle only. Stickers do not care what the internet said your car uses. They care what they touch.
My quick test before applying
I like the fingernail feel test because it is simple. After the IPA wipe and dry wipe, touch the clean area lightly with the back of your fingernail. A greasy surface feels slick. A clean surface has a bit more grab.
Use this check before you peel the backing.
Look for dust under bright light
Feel for slick wax or polish
Check the outer edge for moisture
Make sure no cloth fibers are stuck
Confirm the cap face is flat enough
Dry fit the badge one more time
That last dry fit is not optional in my garage. I want to see the circle, the gap, and the logo position before the adhesive joins the chat. If the badge is a hair too big, stop. Do not force it. A perfect IPA wipe cannot make a wrong size become right.
If you are ordering custom domed badges, the production side matters too. The print, cut, dome, cure, and final check all have to be right before the sticker ever reaches your hand. The How It’s Made page shows that process in a way that makes the prep step make more sense. Good making plus bad cleaning is still bad installation.
Quick Q and A
Q: What is an IPA wipe for sticker application?
It is a final cleaning wipe using isopropyl alcohol on a clean cloth. It removes light oil, wax haze, fingerprints, and residue before the adhesive touches the surface.
Q: Can I use 99 percent IPA for wheel emblems?
You can, but 70 percent IPA is often easier for normal prep because it gives more wipe time. If you use stronger alcohol, work small and dry wipe fast.
Q: Do I need to wash the cap before the IPA wipe?
Yes. Soap and water remove loose dirt and brake dust first. IPA is the final clean, not the first step.
Q: How long should I wait after wiping with IPA?
Wait until the surface is fully dry and no solvent smell or wet look remains. Then apply the sticker and press it firmly.
Q: Can IPA damage wheel caps?
It is safe for many surfaces, but test first on old paint, weak coatings, and unknown plastics. If the surface is already flaking, fix that before applying anything.
The boring step that saves the whole job
The IPA wipe is boring, cheap, and easy to skip, which is exactly why it decides the result. Anyone can peel a backing and slap a sticker on a cap. The good installs happen before the backing comes off. That is where the bond is won.
I want you to think of the IPA wipe like washing your hands before eating ribs. Nobody claps when you do it, but things get ugly when you do not. Clean the cap, dry it, wipe it, dry wipe it, test fit, then press once with intent. Your wheel centers will look cleaner, the edges will stay down, and you will not be the person blaming a sticker for a dirty cap.