
Heat Activated Adhesive for Harsh Environments: How to Use Heat Without Ruining the Job
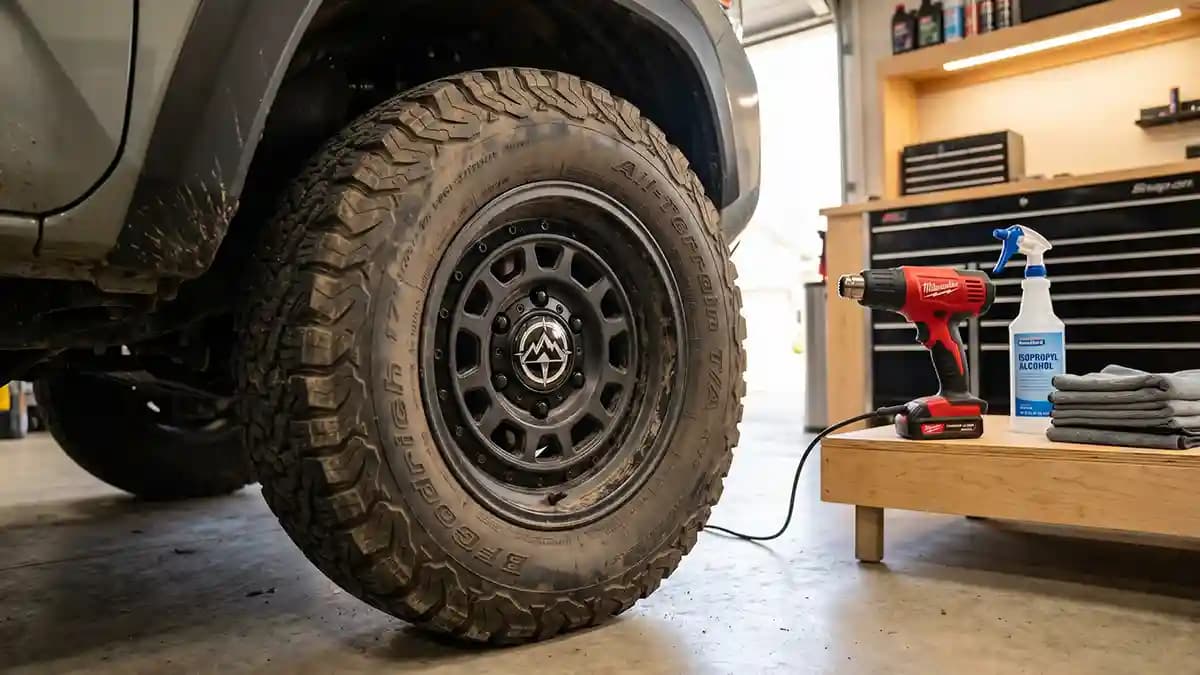
Heat activated adhesive works best when you use mild heat to warm the surface and help the glue flow, not when you blast the sticker like you are cooking a pizza. I learned this beside a cold set of wheels in a garage that felt like a meat locker. The sticker looked perfect in my hand, but the cap felt cold enough to make the adhesive act lazy. That is the whole point of this guide, heat can save a tough install, but only if you treat it like a tool, not a weapon.
I have seen people use a heat gun like they are trying to scare the wheel into obeying. They wave it close, cook one spot, press the sticker, then wonder why the dome edge looks sad later. The adhesive did not fail because heat is bad. It failed because the heat was uneven, the surface was not clean, and the installer got brave in the dumbest possible way.
Here is the thing nobody wants to hear. A heat gun application does not replace cleaning. It does not fix grease, wax, tire shine, road film, old glue, or a cap face shaped like a soup spoon. Heat helps good prep work bond better. It does not turn a dirty surface into magic.
Use heat when these things are true:
The surface is cold but clean
The cap face is smooth and dry
The sticker is sized correctly
The edge has full support
The surface sees water, salt, heat, vibration, or outdoor abuse
You can warm the part gently and evenly
Do not use heat when these things are true:
The sticker is already badly placed
The cap is oily or waxy
The surface is soft rubber
The old emblem under it is lifting
The dome is hanging over a curved edge
You are angry and holding a heat gun
That last one matters. I have been there. You mess up one badge, your blood pressure goes up, and suddenly you are waving hot air around like a tiny dragon with bills to pay. Stop. Walk away for two minutes. Your wheels do not need your rage.
Why heat helps adhesive in harsh environments
Pressure sensitive adhesive needs real contact with the surface. That sounds basic, but the tiny truth is where the money goes. A wheel cap, machine panel, trailer badge, tool case, or outdoor label can look smooth and still have tiny texture, dust, oil, and low spots. The adhesive has to flow into that surface enough to grab.
Warmth makes that flow easier. Not melting. Not cooking. Just warming. Think of cold honey compared with warm honey, one moves like it hates you, the other spreads nicely. Adhesive is not honey, but the idea is close enough for garage talk.
Harsh environments make weak bonds show up fast. Cold makes glue stiff. Heat cycles make parts expand and shrink. Water looks for the edge like a nosy neighbor. Salt and grime sit there and cause trouble. Vibration keeps picking at any weak spot until the sticker starts waving goodbye.
That is why I use heat as part of the install on tough jobs. Not always. But when the surface is cold, when the part will live outside, or when the sticker has a thicker dome, a little heat helps the adhesive settle. It is like giving the bond a firm handshake instead of a limp finger tap.
A proper 3D dome from Wheel Emblems already gives you a strong raised finish, but the install still matters. The sticker can be well made and still lose if you put it on a cold dirty cap. That is not a product problem. That is a five minute prep problem wearing a fake mustache.
The surfaces where heat matters most
Some surfaces are easy. Clean painted metal in a warm room is friendly. Smooth plastic on a dry day is usually fine. But harsh surfaces have attitude. They do not care that your sticker looked nice on the table.
Watch for these problem spots:
Cold wheel center caps
Painted metal panels on trailers or shop equipment
Outdoor toolboxes
ATV and off road parts
Truck badges that see mud and wash pressure
Industrial labels on hard plastic housings
Low energy plastics that feel slick
Slightly textured surfaces that still pass the flatness test
I treat each one the same way at first. I clean it, dry it, test the fit, warm the surface, apply with pressure, then warm again lightly. That order is boring. Boring is good. Boring means you are not redoing the job next weekend while your neighbor watches from behind his coffee mug.
The surface has to be flat enough too. This is where people lie to themselves. They say, it is basically flat, while the cap edge is clearly rolling away like a potato chip. A thick dome does not like unsupported edges. If the edge has nowhere to sit, heat will not save it.
This is why I like reading guides like Domed Stickers vs Vinyl Decals for Wheel Caps before choosing the material. A dome looks more like a badge on a flat face. A thinner vinyl decal can be smarter on a curved face. Heat does not change that rule.
My heat gun application kit
You do not need a fancy installer cart with six drawers and a logo on it. I have done clean installs with simple tools on a workbench that had too many coffee cups on it. But you do need the right basics. Cheap prep beats expensive panic.
Here is my simple kit:
Hairdryer or heat gun with low setting
Clean microfiber cloths
Mild soap and water
Isopropyl alcohol for final cleaning
Nitrile gloves if you touch the adhesive side easily
Soft squeegee or clean thumb pressure
Infrared thermometer if the job matters a lot
Masking tape for test placement
Good light so you can see the edge
A hairdryer is safer for beginners. It warms slowly and makes it harder to destroy things. A heat gun is faster, but it can also make you stupid faster. I say that with love, because I have been the stupid guy.
If you use a heat gun, keep it moving. Do not park it in one spot. Do not point it at the dome from one inch away. Do not heat until the sticker feels floppy or smells strange. If the part gets too hot to touch, you already went past smart.
The safe step by step method
This is the method I use when I want a permanent bond on a tough surface. It is not dramatic. It does not require installer wizard hands. It just removes the dumb mistakes one by one. That is why it works.
Wash the surface first
Use mild soap and water. Remove dirt, brake dust, mud, and loose grime. Do not use tire shine near the install area. Tire shine is basically sticker sabotage in a shiny bottle.
Dry it fully
Water hides around edges. It sits in little seams and waits to ruin your day. Use a clean cloth and give the part a few extra minutes. If you rush this, the adhesive bonds to moisture instead of the cap.
Wipe with alcohol
Use isopropyl alcohol on the exact landing area. Wipe once with a clean cloth, then let it flash dry. Do not soak the part like you are cleaning a crime scene. You want clean and dry, not wet and dramatic.
Dry fit the sticker
Place the sticker with the backing still on. Check size, edge support, and logo direction. This is where you catch the mistake before glue gets involved. Glue involved means the job has feelings now.
Warm the surface
Use a hairdryer or low heat gun setting. Warm the cap evenly, not just the center. The surface should feel warm to the touch, not hot. Warm plastic and painted metal accept pressure better than cold parts.
Peel the backing cleanly
Do not touch the adhesive. If you do, you add finger oil right where the bond needs to start. Hold the sticker by the edge. Take your time, because tiny stickers love making grown adults nervous.
Place from the center
Set the middle first. Then roll pressure outward. For round domed stickers, I like center first because it pushes air and stress toward the edge instead of trapping it under the dome. Slow hands win here.
Press the edge firmly
The edge is where harsh environments attack first. Press all the way around with your thumb or a soft cloth. Do not slide the dome around. Press down, lift your finger, move, press again.
Warm lightly after install
Give the sticker a second gentle warm pass. Then press again around the edge. This helps the adhesive settle and improves contact. Again, warm means warm, not surface of the sun.
Let it rest
The bond needs time. Keep it dry for at least the first day. Avoid car washes for 24 to 48 hours when possible. Do not aim pressure water at the edge during the first few days.
How hot is too hot
People ask for an exact magic number because numbers feel safe. The real answer is simpler. For most sticker and film work, room like warmth is your friend, and extreme heat is not. A warm surface helps. A cooked sticker fails.
Use this garage rule:
Cold to the hand means warm it first
Warm to the hand is usually good
Hot to the hand is too much
Soft, warped, or glossy weirdness means stop
Steam, smell, or color change means you already messed up
A hairdryer gives you more room for error. A heat gun can pass from helpful to harmful in seconds. If you are new to this, start with a hairdryer and patience. Patience is cheaper than replacing four badges because you tried to become a heat wizard.
The safest move is to heat the surface before the sticker, then only warm the sticker lightly after placement. This matters with domed stickers because the clear top is part of the finished look. You do not want to overheat the dome and make the edge unhappy. Gloss is nice. Melted gloss is a tiny tragedy.
When I work on customer style parts from Shop All Products, I treat heat like seasoning. A little helps. Too much ruins dinner. Nobody wants steak that tastes like a campfire and nobody wants a badge that looks like it fought a toaster.
The pressure part people forget
Heat helps the adhesive flow, but pressure makes contact. Skip pressure and you lose half the point. I see this mistake all the time. Someone warms the part, sets the sticker down, taps it twice, then proudly walks away like they just solved physics.
Press the whole face. Then press the edge. Then press the edge again. The edge is the battlefield, because water, dust, and wash pressure all start there. If the center looks great but the rim is lazy, the sticker is not done.
My pressure routine is simple:
Press the center for a few seconds
Roll outward in small circles
Press the top edge
Press the bottom edge
Press the left and right sides
Go around the whole circle twice
Warm lightly
Press the full edge one last time
That final pass feels silly. Do it anyway. The first pass seats the sticker. The second pass tells the edge you mean it. I know that sounds like I am talking to glue, but after enough installs you start treating adhesive like a stubborn pet.
When heat will not fix the problem
Heat is useful, but it is not a miracle. A bad surface stays bad. A wrong size stays wrong. A thick dome on a curved cap still fights the shape. If you use heat to force a sticker into a bad job, the edge will remember and punish you later.
Do not expect heat to fix these problems:
Grease under the sticker
Old adhesive lumps
Loose paint
Flaking chrome
Deep texture
Cracked plastic
Curved edges under a thick dome
Sticker too large for the flat face
Washing too soon after install
Repositioning the sticker three times
This is Why Your Wheel Stickers Keep Peeling Off is worth reading before blaming the sticker. Most peeling starts before the badge ever hits the cap. The failure is baked into the prep, like a bad cake with brake dust in it. Delicious? No. Accurate? Sadly yes.
If a surface is rough, I clean and test first. If it still feels wrong under my fingertip, I do not force it. Your finger can tell you a lot. If the edge clicks, rocks, dips, or hangs over air, the adhesive is already in a bad mood.
Heat for automotive, industrial, and outdoor labels
The same logic works outside wheel caps too. Domed labels on outdoor equipment, machines, tool cases, control panels, trailers, and garage gear all need a clean bond. Harsh environments do not care that a label is pretty. They care about water, dirt, touch, and temperature swings.
For automotive use, focus on cleaning and edge pressure. Wheels see brake dust, wash soap, and road grime. For industrial use, focus on surface type and oils. Shop equipment loves hiding grease in places that look clean until a sticker proves otherwise.
For outdoor labels, give the bond time before stress. Do not apply a sticker to a cold mailbox, then let rain hit it ten minutes later. That is not a durability test. That is sticker bullying. Let the adhesive settle before you ask it to survive weather.
The best installs all share the same rhythm:
Clean
Dry
Warm
Place
Press
Warm lightly
Press again
Rest
That rhythm is boring enough to trust. And when you follow it, heat activated adhesive stops feeling like some mystery trick. It becomes a simple way to help a sticker grab harder when the job has to live a harder life.
The final garage rule
Use heat to help the adhesive, not to bully the sticker. Warm the surface, keep the tool moving, press the edge like you mean it, and let the bond rest before washing or stressing it. That is how you get a permanent bond in harsh environments without turning your install into a tiny garage disaster.
I still mess with a hairdryer more often than a heat gun because slow heat is easier to control. It feels less cool, sure. Nobody looks heroic holding a hairdryer next to a wheel cap. But the badge stays down, the edge stays clean, and I do not have to explain why a sticker looks like grilled cheese.
Quick Q and A
Q: What is heat activated adhesive?
Heat activated adhesive is adhesive that bonds better when warmth helps it flow into the surface. On many sticker installs, heat is used to warm the surface and improve contact, not to melt the glue. Think warm and firm, not hot and scary.
Q: Can I use a hairdryer instead of a heat gun?
Yes, and I prefer it for many small domed sticker jobs. A hairdryer gives gentle heat and lowers the risk of damage. A heat gun is faster, but it needs more control.
Q: Should I heat the sticker or the surface first?
Heat the surface first. A warm clean surface gives the adhesive a better landing. After the sticker is placed, use a light warm pass and press the edge again.
Q: How long should I wait before washing after using heat?
Wait at least 24 hours, and 48 hours is better when the surface will see pressure water or harsh use. Keep the edge away from direct pressure during the first few days. The sticker can feel stuck right away and still need time to build strength.
Q: Will heat fix a sticker that is already peeling?
Sometimes it helps a very small fresh edge lift if the surface is clean and dry. But if dirt, wax, water, or old glue is under the edge, heat only hides the problem for a while. Clean repair beats hot panic.
Q: Can heat damage a domed sticker?
Yes, too much heat can harm the dome, soften parts unevenly, or stress the edge. Keep the heat source moving and use gentle warmth. If the part feels hot to touch, stop.
Q: Is heat needed for every sticker install?
No. Warm, clean, smooth surfaces often bond well with firm pressure alone. Heat becomes useful when the surface is cold, the part sees harsh use, or you need extra help with edge contact.