
How to Install 3D Gel Emblems on Nissan Skyline and Z Car Rims
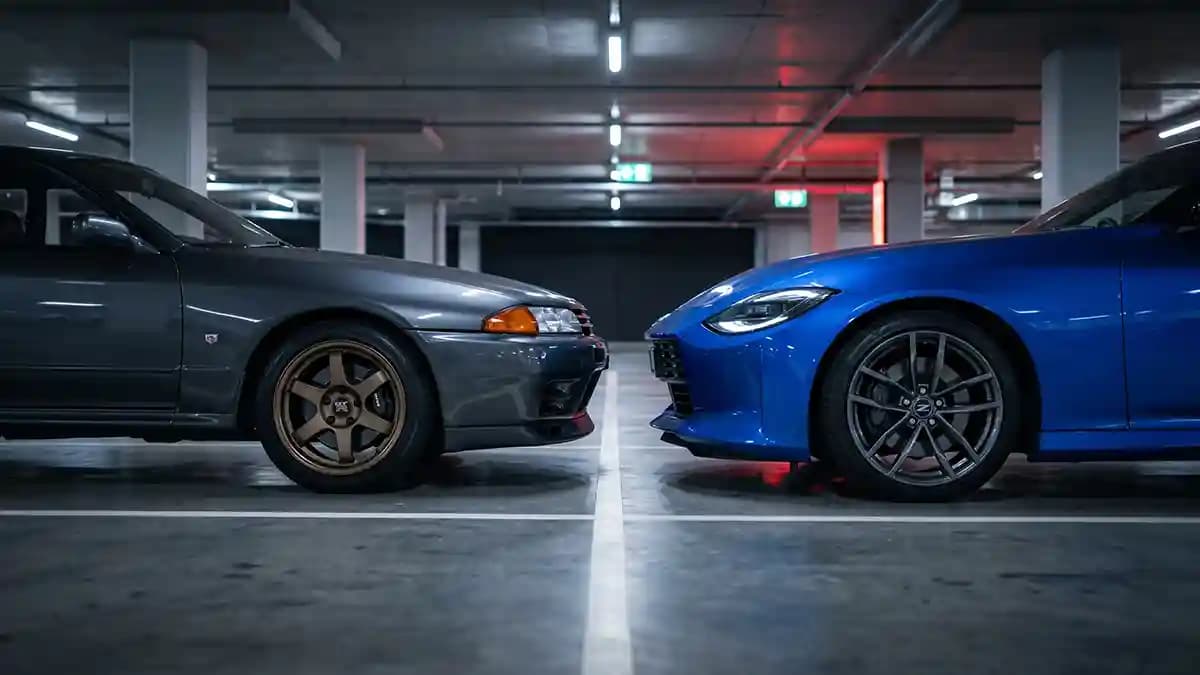
3D gel emblems on Nissan Skyline and Z Car rims install best when the cap is flat, clean, measured in millimeters, and pressed from the center out. That is the answer before we even open the toolbox. I learned this beside a black Z with fresh tires, dusty center caps, and one old badge sitting crooked like it had quit the job. The owner had bought nice parts, but the prep work was lazy, and lazy prep makes even good badges look cheap.
Nissan style has fresh heat right now, so small wheel details matter more than ever. The 2026 Z Heritage Edition brings Midnight Purple paint, bronze 19 inch RAYS forged alloy wheels, Twin Turbo graphics, and a carbon fiber rear spoiler. Nissan also ended R35 GT R production in August 2025 after about 48,000 cars across an 18 year run. Old or new, the center cap is still the tiny circle that can make the whole rim look finished.
Why Nissan center caps show every mistake
Nissan wheels punish lazy installs because the cap sits right in the visual target. A Z wheel with sharp spokes sends your eye straight to the middle. A Skyline GT R wheel does the same thing, only with more pressure, because people expect that car to look loved. If the emblem is one millimeter off, your brain spots it before your mouth can be polite.
This is where most people mess up. They treat a 3D gel emblem like a normal sticker. Peel it, slap it, press it once, then act shocked when the edge lifts after a wash. The emblem did not fail, the install did.
Before the emblem touches the cap, check these:
The visible flat area is measured, not guessed
The surface is free from grease, wax, dust, and old glue
The emblem sits on a flat or almost flat area
The cap is not hot from sun or braking
The emblem is pressed with firm steady force
I like using Nissan 3D domed wheel cap emblems when the old center mark is faded, missing, or just dull. The raised dome gives depth and gloss, so the cap feels closer to a factory badge than a flat sticker. But even a good dome cannot bond to dirt. Glue does not stick to hope.
Measure the cap before you buy
I once watched a guy measure a center cap with his thumb. Not a ruler. Not calipers. His thumb, like he was reading ancient wheel magic, and yes, the badge he ordered was too large.
Do not be that guy. Measure the visible flat circle where the emblem will sit. If the cap has a raised lip, measure inside the lip. If the cap has a recessed badge spot, measure the flat bottom of that recess.
Use this quick method:
Remove one cap only if it pops out safely
Wipe dust so the real edge is clear
Measure the flat badge area in millimeters
Measure twice from different angles
Pick the exact size or one millimeter smaller if the edge curves
Take a photo beside a ruler if the shape is odd
For Nissan Z center caps and Skyline GT R badges, size is not always tied to the car model. Wheel brand, trim, year, and aftermarket caps all change the measurement. Nissan’s parts page lists a current Z center cap for 2024 to 2026 cars, which helps if the wheel is factory. If your car sits on RAYS, Work, Enkei, BBS, or random wheels from a past owner, measure the cap in front of you, not the idea in your head.
Pick the emblem that fits the build
A Nissan cap can go clean, race inspired, old school, or full NISMO energy. The trick is picking what fits the rim, not the loudest thing you can find. A bronze wheel with a black and silver badge can look sharp. The same wheel with five colors on the cap can look like a vending machine had a panic attack.
For Z Cars, I like simple center marks with strong contrast. Modern Z styling already has clean lines, so the cap should support the shape. On a Heritage style build, bronze, black, silver, and deep purple tones make sense. On a track style setup, a cleaner NISMO look feels more at home.
For Skyline and GT R rims, the badge should feel more serious. R32, R33, and R34 style builds often look best with a crisp center mark, red detail, or a simple black base. Nissan’s own heritage page says the R32 Skyline GT R returned in 1989 after a 16 year absence, which is why the badge carries more weight than a normal cap sticker. People do not stare at an R32 because they are bored.
Good Nissan rim emblem styles include:
Black base with silver Nissan detail
Gloss black with red GT R accent
NISMO inspired white, black, and red
Brushed silver look for OEM style wheels
Carbon look base for tuner builds
Deep purple accent for a Heritage style Z
Clean prep beats strong glue
Prep is boring, which is why people skip it. And that is also why their emblems peel. Surface prep is the cheap step that makes the badge last. I would rather spend five extra minutes cleaning than spend ten minutes pretending lifted edges are normal.
Avery Dennison says exterior graphics should not be washed within the first 48 hours after application, and its cleaning guidance warns that pressure and distance matter because harsh washing can lift decal edges. 3M lists 90 degrees Fahrenheit as the maximum application temperature for its wrap film, which supports the same garage rule, do not install when the cap is cooking. The surface needs to be calm, dry, and clean. Adhesive likes boring conditions.
Use this prep flow:
Wash the cap with mild soap and water
Dry it fully with a clean towel
Remove old glue with a safe adhesive remover if needed
Wipe the badge area with isopropyl alcohol
Let the surface dry fully
Do not touch the cleaned area with your fingers
Test the emblem position before peeling the backing
Do not use tire shine near the cap before install. Tire shine makes rubber look juicy and makes stickers sad. Wax, silicone spray, brake dust, and road grime all stand between the glue and the cap. Kick them out first.
Install it slow, not brave
Once the cap is clean, slow down. A round emblem gives you one clean chance to look centered, and if you rush it, the wheel will remind you every time you walk past the car. I have rushed this before. Then I saw that crooked cap in my sleep like a tiny round ghost.
Start by holding the emblem over the cap before peeling anything. Look at the outer edge and the logo direction. On a Nissan badge, make sure the logo sits level when the wheel is parked. If you want all four wheels aligned the same way, park the car with the valve stems in a matching position first.
Use this install flow:
Put the wheel or cap at a comfortable height
Dry fit the emblem over the flat area
Check the logo direction twice
Peel the backing without touching the glue
Hold the emblem by the edge
Place one side lightly, then lower the rest slowly
Press from the center outward
Hold firm pressure for 30 seconds
Run your thumb around the edge with steady pressure
Do not press one edge hard first. That can trap air under the other side. Do not slide the emblem around after contact either. Pressure adhesive is not a chess piece.
For larger badges, use the gentle rolling method. Set the lower edge in place, then roll the emblem upward with steady thumb pressure. It sounds fancy, but it is just the same way you would lay down a phone screen protector without making a bubble zoo. Simple wins.
Skyline and Z Car details that matter
Skyline wheels are not all the same. Factory wheels, period correct upgrades, RAYS wheels, BBS wheels, and modern swaps can all use different cap shapes. That is why the badge size follows the cap, not the chassis code. Your R32 story is cool, but your center cap does not care.
Older caps bring extra trouble. They can look flat from two steps away and still hide chips, cracks, or old glue near the badge area. If the surface feels rough, smooth it before install. A dome on rough paint can lift around the edge.
Watch for these Skyline cap problems:
Old clear coat peeling around the emblem area
Missing original badge with glue left behind
Slightly concave center cap shape
Aftermarket caps with a raised center bump
Repainted caps with soft paint that is not fully cured
Brake dust baked into the edge of the recess
Modern Z wheels create a different problem. The shapes are cleaner, so there is less room to hide a mistake. A slightly small emblem can look neat when centered. A slightly big one sits over a curve and starts the peel clock.
For modern Z center caps, check these before ordering:
Is the cap factory or aftermarket
Is the badge area flat or slightly curved
Is there a lip around the badge spot
Does the wheel finish need a subtle or bold emblem
Do all four caps measure the same
If you want the badge to match a caliper or accent color, read the guide on custom colors for Brembo and rim emblems. Red detail on a NISMO style build can work. Purple and bronze on a Heritage style Z can work. Red, blue, green, chrome, and carbon all at once looks like the car lost a bet.
Aftercare keeps it stuck
The install is not done when your thumb leaves the cap. The adhesive still needs time to settle. This is where people get impatient and drive straight to a wash bay because the wheels look nice now. Then they blast the edge with water and wonder why the corner starts lifting.
Give the badge time. Keep the car dry if you can. Avoid hard washing for at least 48 hours, and do not point a pressure washer at the emblem edge. After that, wash normally, but be smart around the cap.
Aftercare rules I trust:
Wait before washing
Use mild car soap
Keep pressure washer nozzles away from the edge
Do not scrub the dome with rough brushes
Avoid harsh wheel acid on the emblem
Wipe brake dust before it turns into crust
Check the edge after the first few drives
A good 3D gel emblem should look like it belongs on the wheel, not like a sticker trying to survive a war. The How It’s Made page shows how print, cut, dome, cure, and final check work. That process matters because wheel centers live near heat, water, brake dust, and pressure washers. More force does not mean more clean.
My clean Nissan install checklist
This is the checklist I use when I want the cap to look right the first time. It works for Skyline GT R badges, Nissan Z center caps, NISMO style caps, and most aftermarket Nissan rim emblems. It is not magic. It is just not skipping the boring parts.
Run through this before you peel:
Confirm the cap is flat enough
Confirm the size in millimeters
Clean the cap with soap and water
Remove old glue fully
Wipe with isopropyl alcohol
Let the cap dry
Line up the logo direction
Touch only the emblem edge
Press from center outward
Hold pressure for 30 seconds
Avoid washing for 48 hours
Keep pressure water away from the edge
If you are choosing between a flat decal and a dome, read domed stickers vs vinyl decals for wheel caps before you buy. Flat decals are thin and can look fine on simple surfaces. Domed gel emblems add depth, gloss, and a more finished feel, which is why they make sense on Nissan builds where the wheel center is part of the look.
For a sportier build, Nismo 3D domed wheel emblems can make the cap feel sharper without changing the whole wheel. Just keep the size right and the surface clean. The badge should look like it was always meant to be there. That is the goal.
Quick Q and A
Q: Can I install 3D gel emblems on original Nissan center caps?
Yes, if the surface is flat, clean, and the emblem is the right size. Measure the visible badge area in millimeters before ordering. Do not guess from the car model alone.
Q: Will 3D gel emblems fit Skyline GT R aftermarket wheels?
Yes, but the wheel cap decides the size, not the Skyline model. Measure the actual cap, especially if the wheels are RAYS, BBS, Work, Enkei, or another aftermarket brand.
Q: Should Nissan Z center caps match the brake calipers?
They can, but they do not have to match exactly. A small red, bronze, silver, or purple detail can tie the wheel together without making it too loud.
Q: How long should I wait before washing the wheels?
Wait at least 48 hours after install. After that, wash gently and keep high pressure water away from the emblem edge.
Q: Can I install a dome over an old faded Nissan badge?
Yes, if the old badge is flat, smooth, and firmly attached. If the old badge is peeling, cracked, greasy, or raised unevenly, remove it first and clean the cap.
Instruction files checked: